How to install MySQL ODBC Driver
MyODBC is an interface that allows programming languages to support the ODBC interface to communicate with a MySQL database. This guide helps you to install MyODBC and make the first steps with it.
To install ODBC driver please follow the steps below.
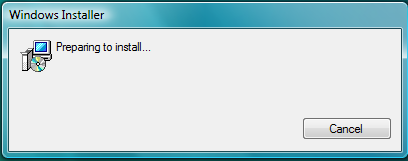
First download the ODBC driver for the MySQL server from the official page of the MySQL webpage. Then click on the installer file (Figure 1).
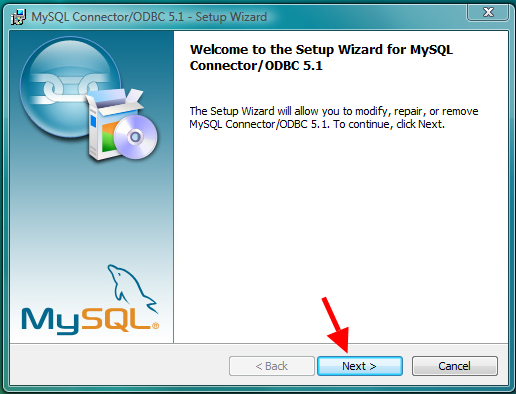
On the next page by clicking on the Next button, the installation can be started (Figure 2).
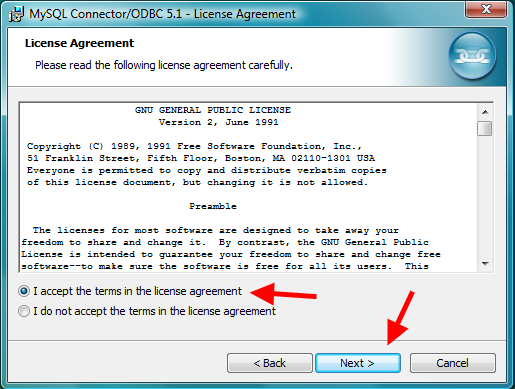
After, you need to accept the license agreement (Figure 3).
On the next page choose the setup type that best suits your needs (Figure 4).
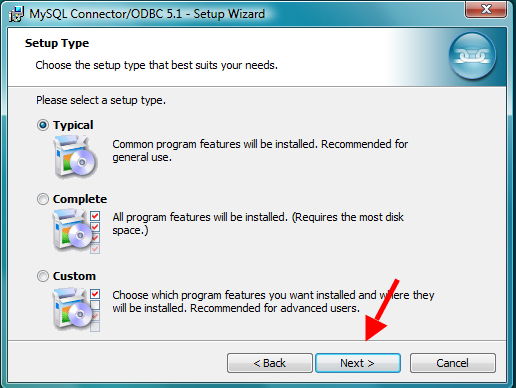
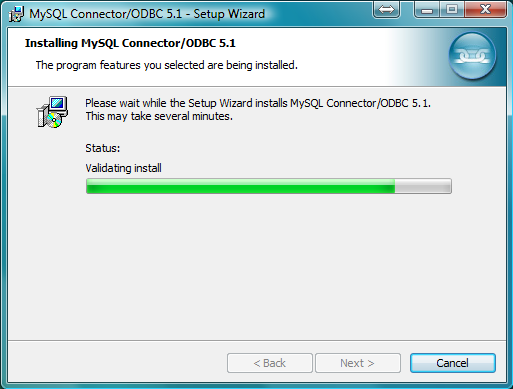
After choosing the setup type and clicking on the next button, you need to wait for the end of the installation (Figure 5).
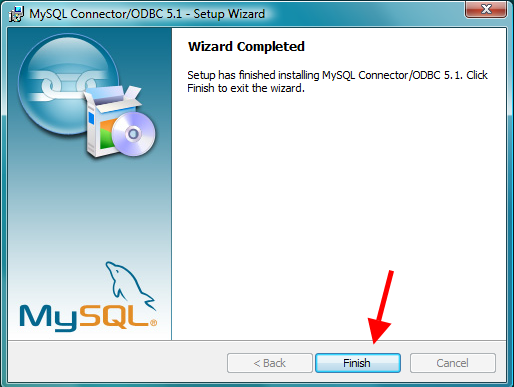
If the installation is finished, end the installation by clicking on the Finish button (Figure 6).
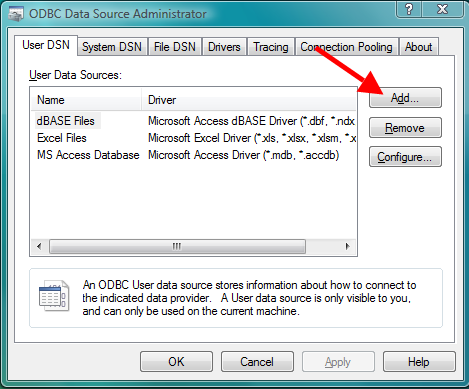
After the installation, open the ODBC Data Source Administrator software, and add a new User Data Source by clicking on the Add button (Figure 7).
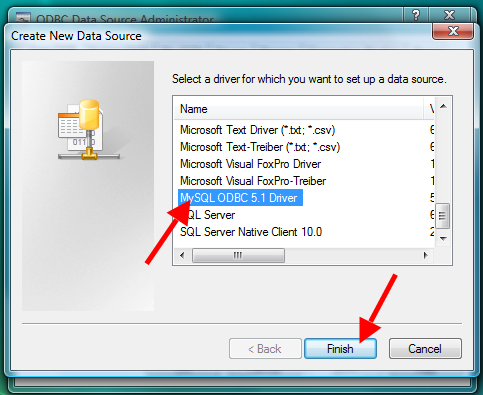
On the next page, select the MySQL ODBC driver (Figure 8).
Then, give the Data Source Name, the IP address of your MySQL server, the username and the password and the database name for the MySQL server (Figure 9).
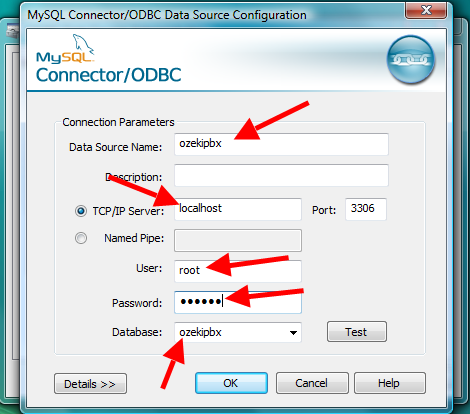
Clicking on the Test button, check whether the given parameters are correct or not (Figure 10).
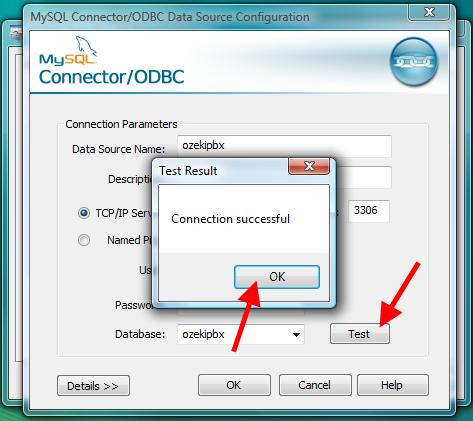
If the test was successful, click on the Ok button. If the name of the given user data source is in the list, your MySQL server is ready to wait the connection of an SQL API (Figure 11).
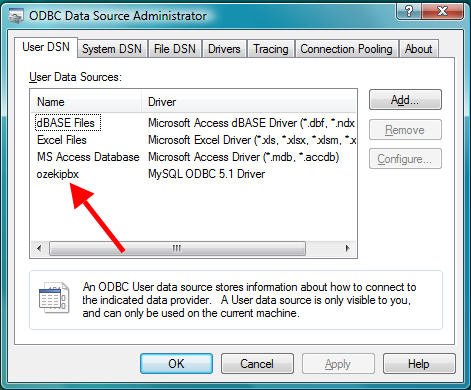
Finally, you are free to use your MySQL and the latest installed MyODBC. As a result, now, you have the chance to customize your PBX.
If you have any questions or need assistance, please contact us at info@ozekiphone.com.
More information

 Sign in