How to install an API extension in Ozeki Phone System
For using your own VoIP applications developed by OPS SDK, you need to install a new API Extension. It can be used to accept a client connecting through the Ozeki Phone System API. The following step-by-step guide demonstrates what you need to do in order to setup and configure your API Extension in less than 5 minutes.
What is API Extension
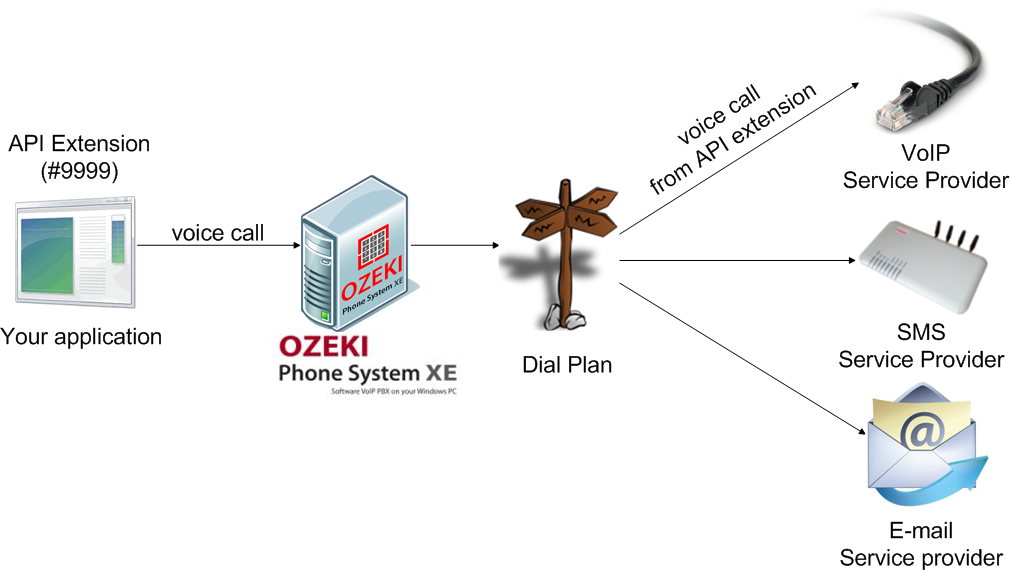
API Extension is a standard extension that provides a phone number for your client application connecting through Ozeki Phone System. The phone number of the API Extension is used in the dial plan to forward calls coming to or initiated by the client. Thereby it can be used to build and use diverse VoIP and SMS applications, such as auto dialer applications, call assistants or IVR systems, etc.
How to install a new API extension
Installation consists of three main simple steps. The whole process only takes a few minutes.
|
Step 1: Install a new API Extension Step 2: Define a phone number for this extension Step 3: Add a new dial plan rule Step 4: Configure your app and make a test call |
Prerequisites
First you need to download and install Ozeki Phone System (take a look at the quick start guide for getting started quickly). After the installation, login by using your username and password.
For using your application with Ozeki Phone System, one or more installed outside lines (VoIP phone line, analog phone line, E-mail service or SMS service) are essentially needed. The type of the required outside line depends on your application. If the needed outside line does not exist, check out the following step-by-step guides in order to install it quickly and easily:
Step 1 - How to add a new API Extension
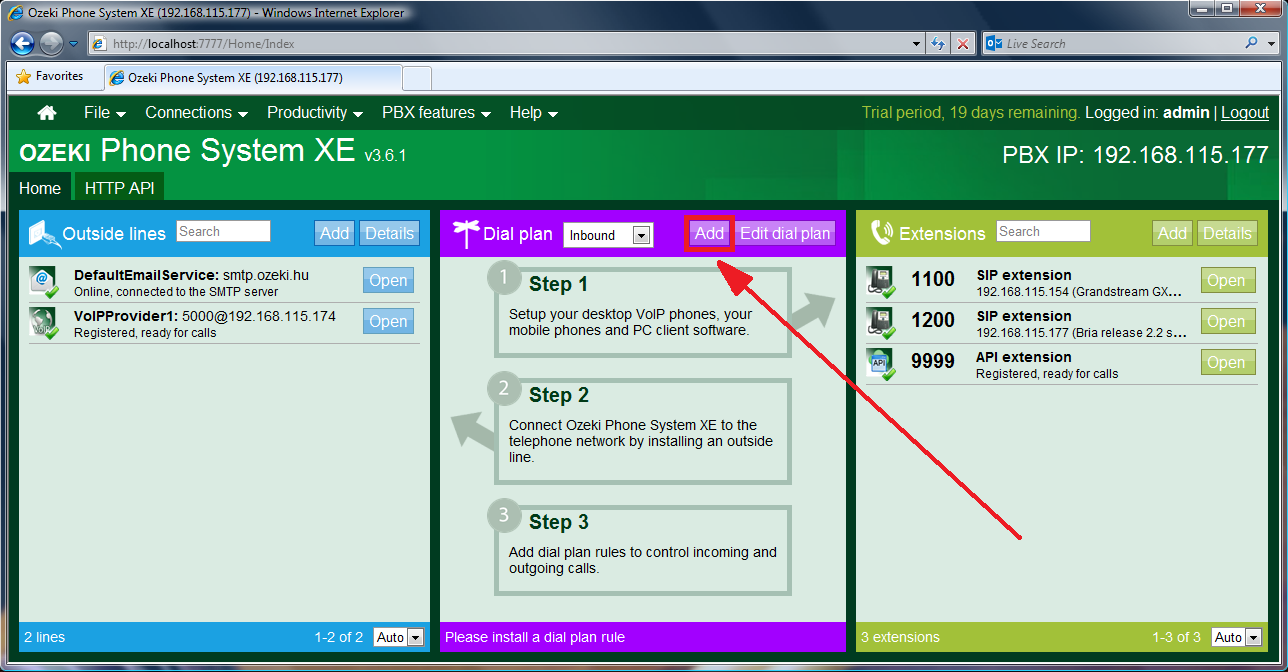
After logging in, you need to add a new API Extension in Ozeki Phone System. Go to the third panel (called 'Extensions') then click on the 'Add' button on the top right-hand corner of this section (Figure 1).
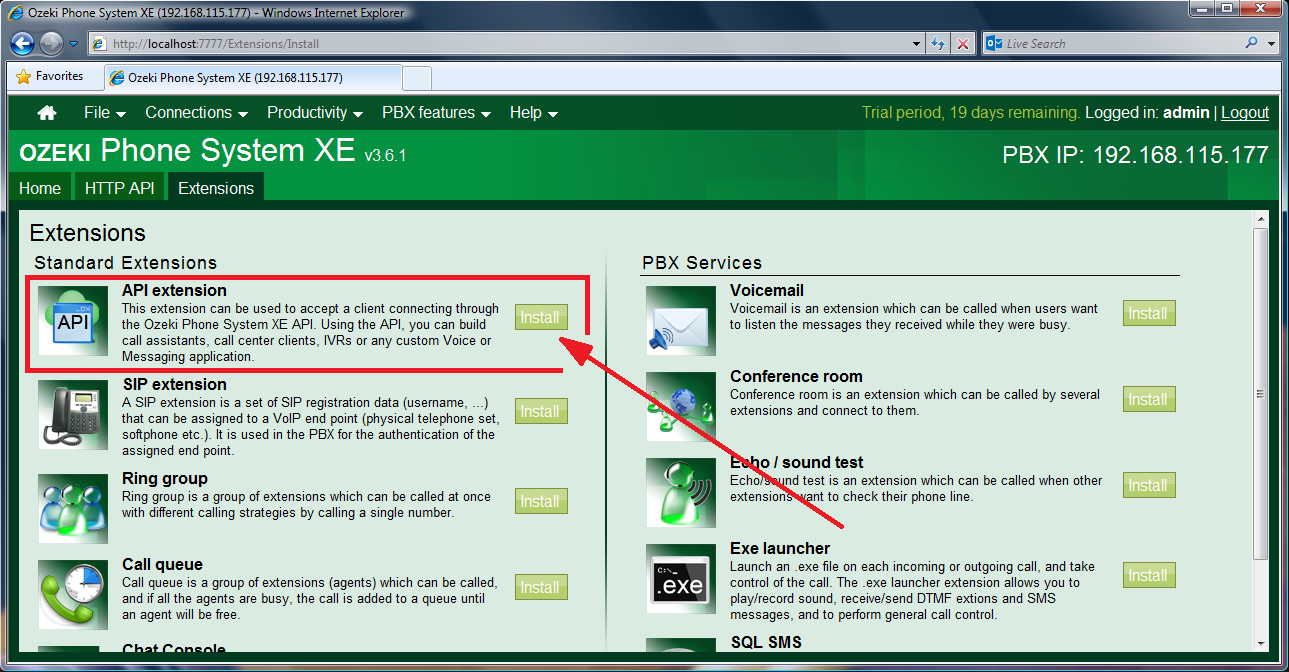
The 'Extensions' panel will appear. Here you need to look for the 'API extension' in the 'Standard Extensions' column then click on the 'Install' button next to it (Figure 2).
Step 2 - How to specify a phone number for your API Extension
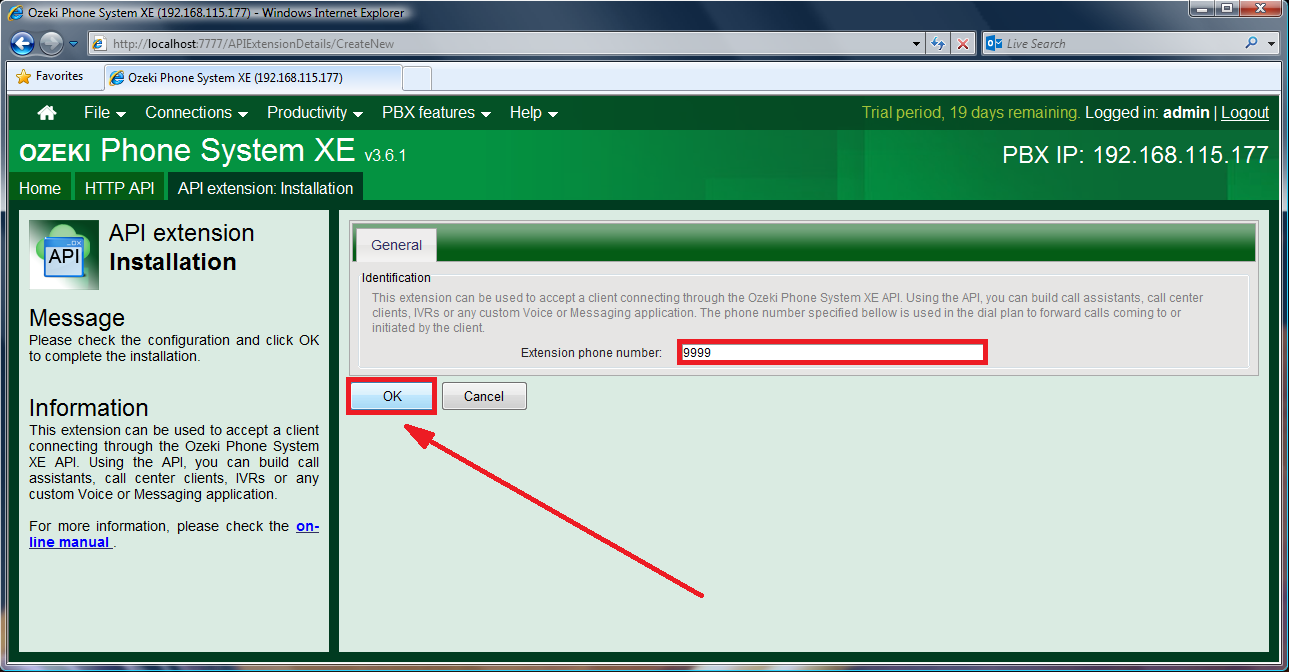
Now the configuration panel of the API extension can be seen. You need to enter a telephone number that will be assigned to the API extension. (This phone number will be used in the dial plan forward calls coming to or made by your client application.) After entering a number, click on the 'OK' button (Figure 3). The extension will be registered automatically.
Step 3 - How to define a new dial plan rule
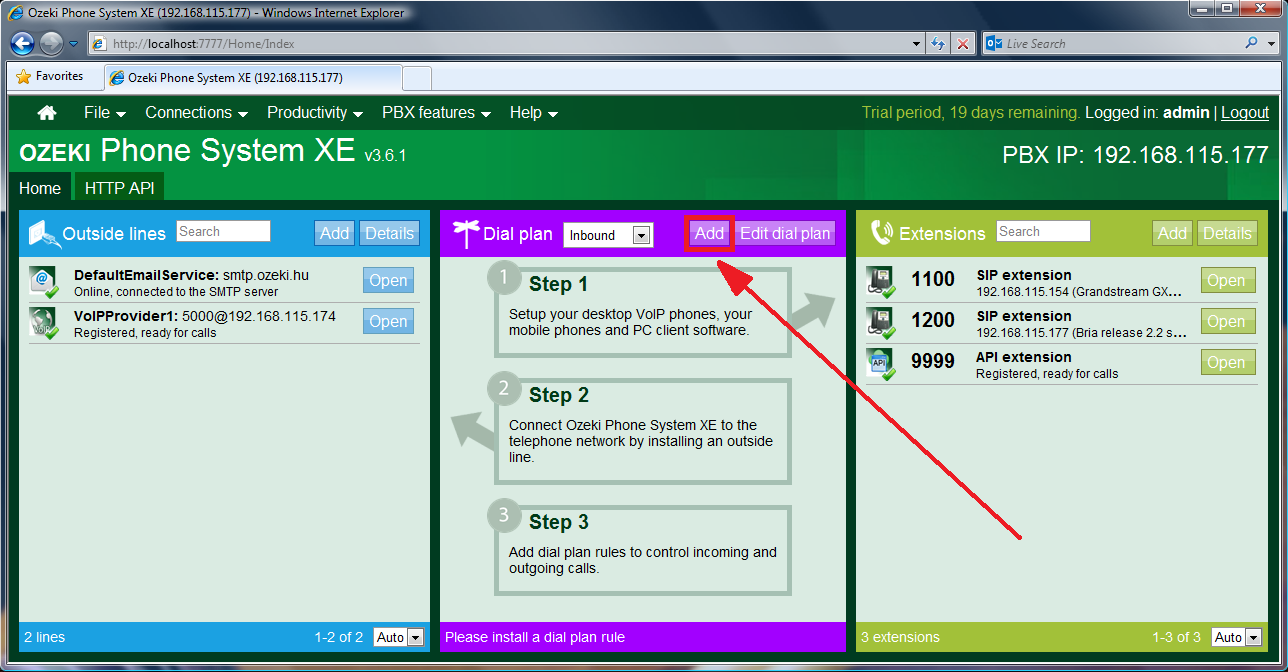
Return to the home screen and click on the 'Add' button in the middle, called 'Dial plan' section (Figure 4).
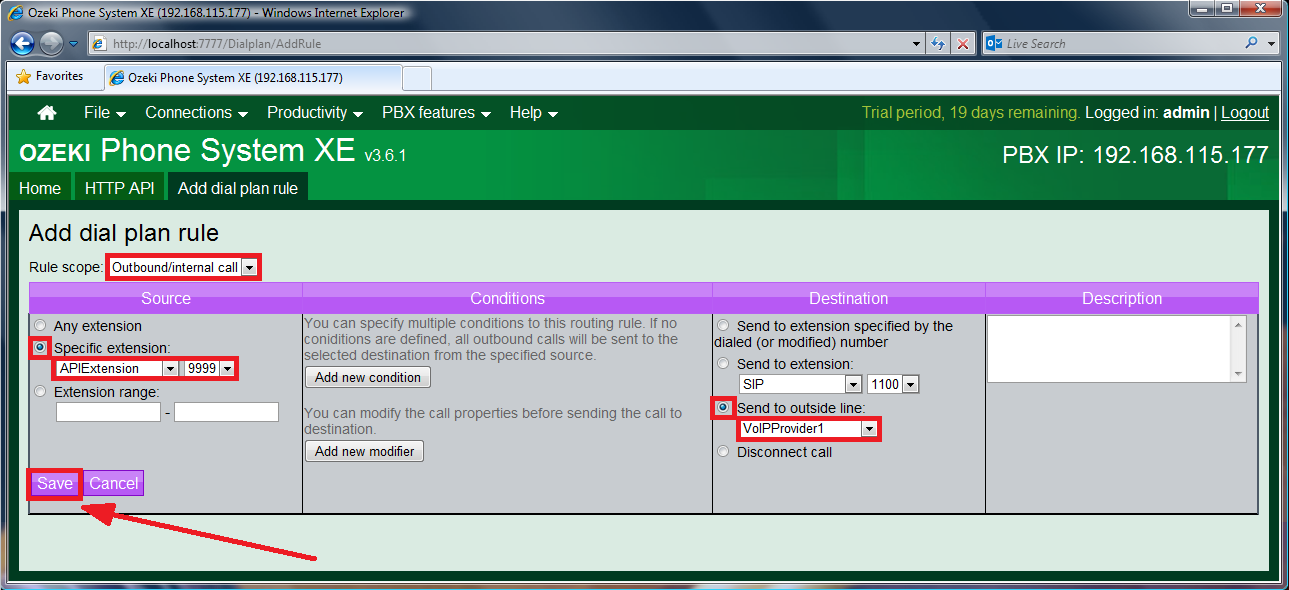
First select the 'Outbound/internal call' menu item from the 'Rule scope' drop-down menu. In the Source column select the 'Specific extension' option then choose the appropriate API Extension from the drop-down menu. In the 'Destination' column select the 'Send to outside line' option then choose a VoIP, SMS or E-mail service provider. Finally, click on the 'Save' button (Figure 5).
Step 4 - How to make a test call
As an example, we are going to demonstrate a test call by using an autodialer application, which can be used to call numerous external phone numbers automatically. (It is called Ozeki Broadcast By Phone that can be downloaded and modified free of charge if you download its installer and/or source code.)
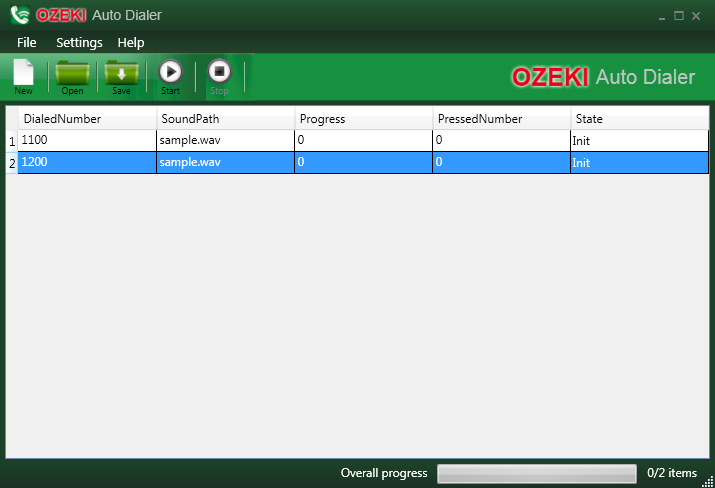
Figure 6 shows that the application is ready to call the No.1100 and No.1200 phone numbers. However for dialing, you need to specify the API extension details within your application.
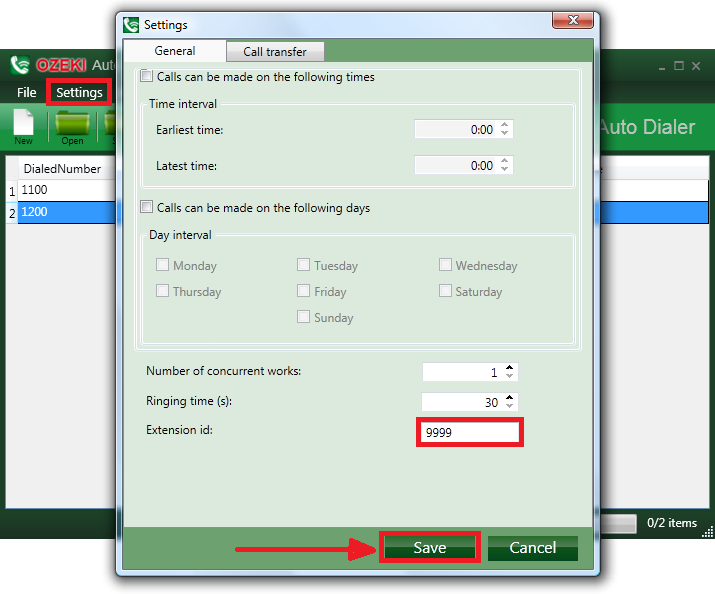
In case of Ozeki Broadcast By Phone you need to click on the 'Settings' menu item then enter the telephone number of the API extension into the 'Extension id' edit box. You have defined this phone number previously in Ozeki Phone System (Figure 3). Finally, click on the 'Save' button (Figure 7).
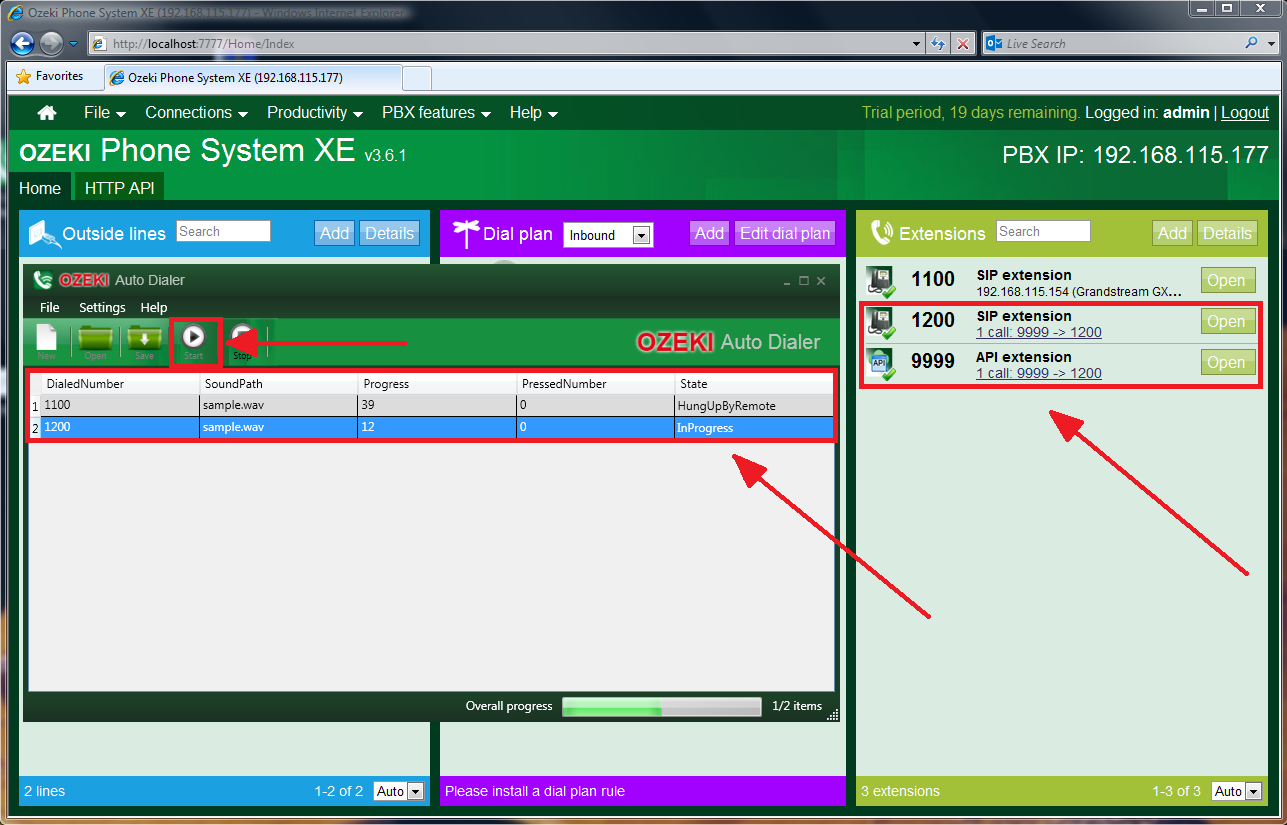
Your application has been connected to Ozeki Phone System successfully, so it is ready to use. For making a call by using Ozeki Broadcast By Phone, you only need to click on the 'Start' button. The application will dial the listed phone number automatically. You can track the call status in the autodialer software and in the Ozeki Phone System as well. You can see that the calls have been made using the newly created No.9999 API Extension (Figure 8).
Keep in mind
OPS SDK allows you to develop different kinds of telecommunication applications (such as autodialers, appointment reminders, SMS sender applications, etc.) that make your communication systems more effective. For using them with your Ozeki Phone System, an API Extension is required. If you follow the instructions above, you can connect your VoIP, SMS or E-mail application easily to your telecommunication system.
If you have any questions or need assistance, please contact us at info@ozekiphone.com

 Sign in