How to setup a callback request in the Ozeki Phone System
What if a customer would not like to spend money calling the company? He could provide his phone number and the company can call him back. The way it works is that you put an inputbox onto your company’s website. The customer types his/her phone number and clicks ’Submit’. Then a phone will ring inside your company. When a member of the support staff picks it up, the call will be transfered to the customer. So when the support staff member picks up the phone he/she will hear its ringing on the other side. When the customer picks up the phone, they can start the conversation.
This can be accomplished by using the HTTP API of the Ozeki Phone System. Before doing a callback with the HTTP API follow these instructions:
The telephone which will answer the callback request should already be added to
the system as an extension. If it's not, follow these steps if you want to connect an
analog phone or a desktop
VoIP phone. You need to
register an API Extension too, because when the customer clicks ’Submit’ to request a
callback an API extension will call the employee.
The Following guide is split into four steps for the sake of
better transparency:
|
Step 1: Add an API Extension |
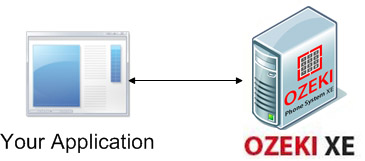
|
Step 1. Add API Extension
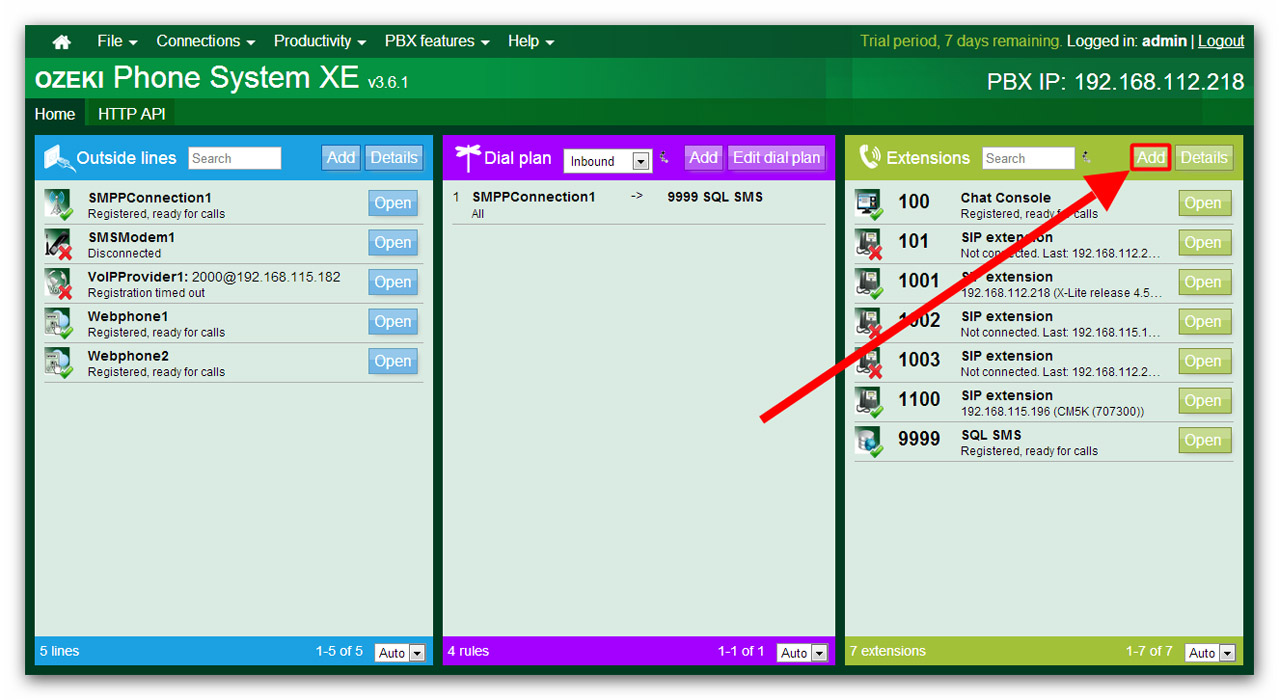
On the right side of the Ozeki Phone System GUI you will see a green bordered box called Extensions. Click ’Add’ (Figure 1).
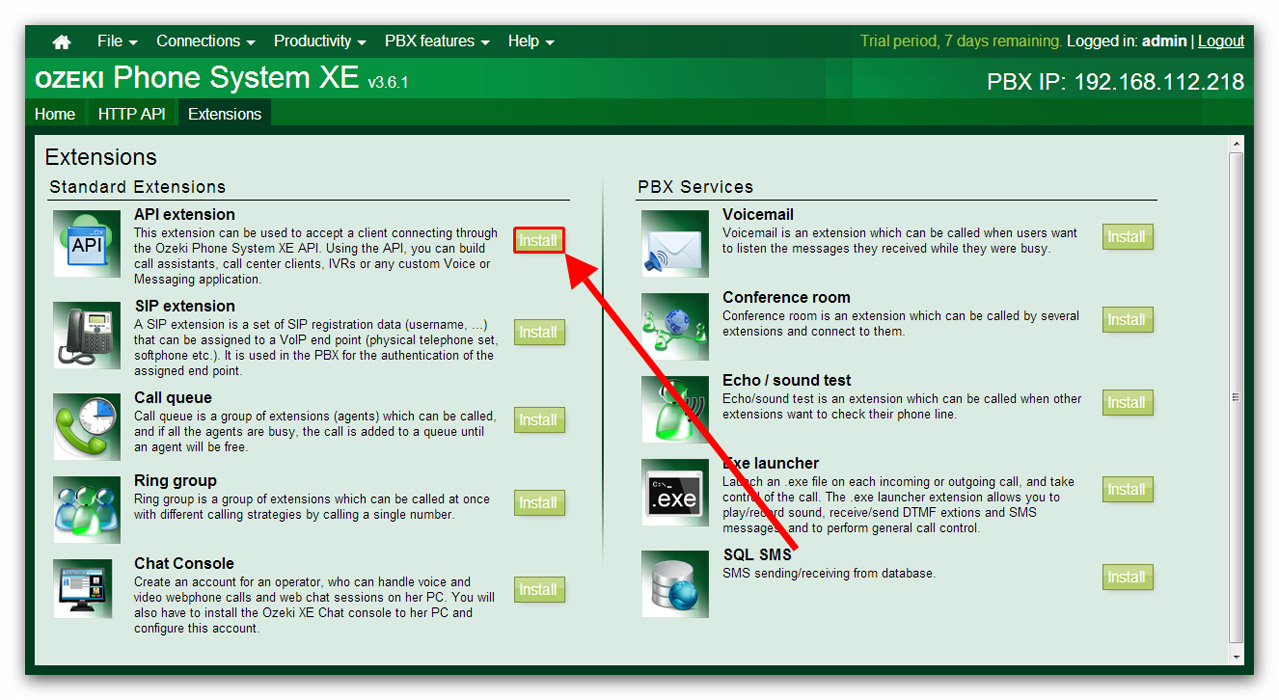
On the left half of the screen you will see an ’API extension’ label. Click the ’Install’ button next to it (Figure 2).
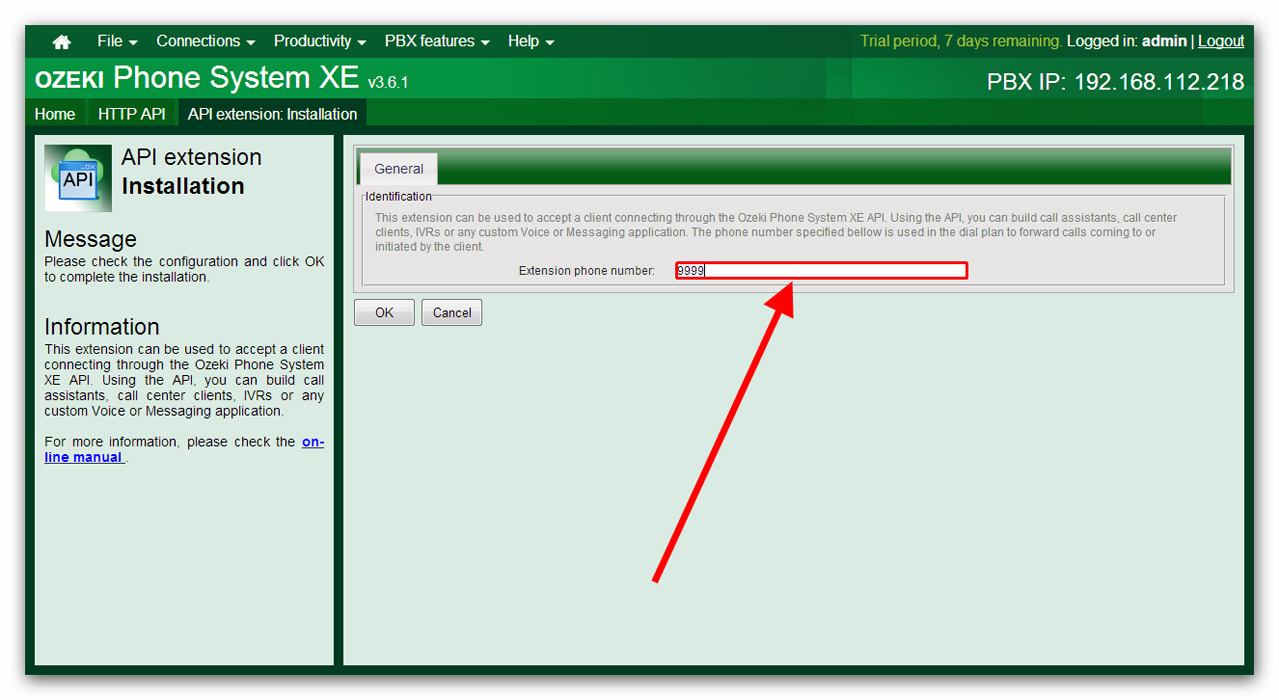
Type in the extension phone number and click ’OK’. The API extension has been installed successfully. (Figure 3).
Step 2. The Call command
Now the API extension is created and it is assumed that you have already connected an analog phone, or a VoIP phone to the PBX. If you need help, visit our Extension setup guide. Now, study how a callback request will work using the HTTP API:
- The customer types his/her phone number into the inputbox and clicks ’Submit’. You need to save the phone number on a server.
- A Call command is sent to the Ozeki Phone System.
The Call command is a HTTP request.
You need to input 4 mandatory parameters when giving out the command. These are the following:
- Command='Call'
- Dialled=(This is the phone number of the extension which will be connected to the customer.)
- ApiExtension=(This is the phone number of the API extension that calls the employee.)
- Url=(This is a URL. This is where the response OzML is downloaded from. The response OzML is a HTTP response to a CallConnected notification.)
Watch the workflow of the call command to understand it better (Figure 4).
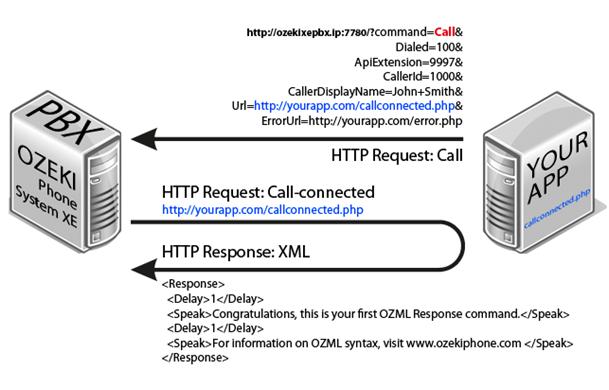
You can get additional information about the call command here
Step 3. Implementing a Callback Request
If you want to implement a callback request, you have to be familiar with the HTML language, and with a server-side scripting language such as PHP or ASP.
First of all, you are going to create a simple HTML file, which will contain only two things: a data field, and a submit button. On Figure 5 you can see the HTML code of the index.html which will create the website used in the guide.
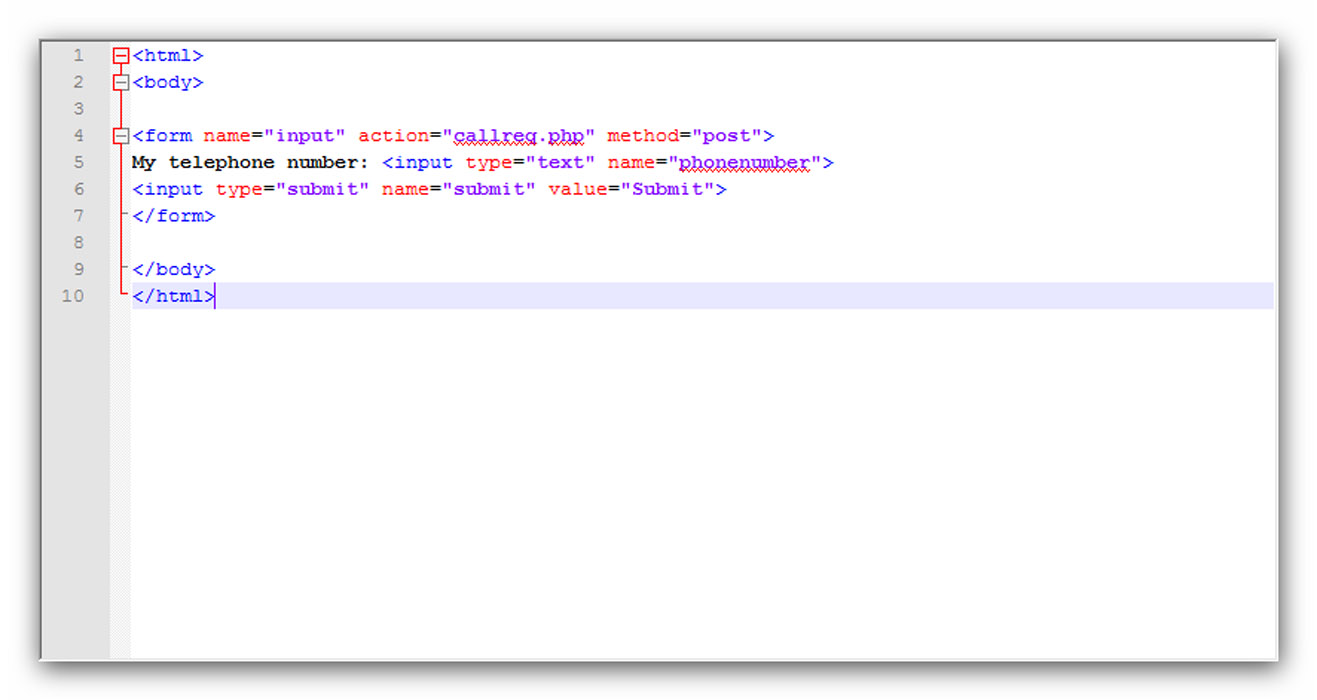
1 2 3 4 5 6 7 8 9 10 |
<html><body><form name="input" action="callreg.php" method="post">My telephone number: <input type="text" name="phonenumber"><input type="submit" name="submit" value="Submit"></form></body></html> |
On Figure 6, you can see the HTML file is opened in a web browser.
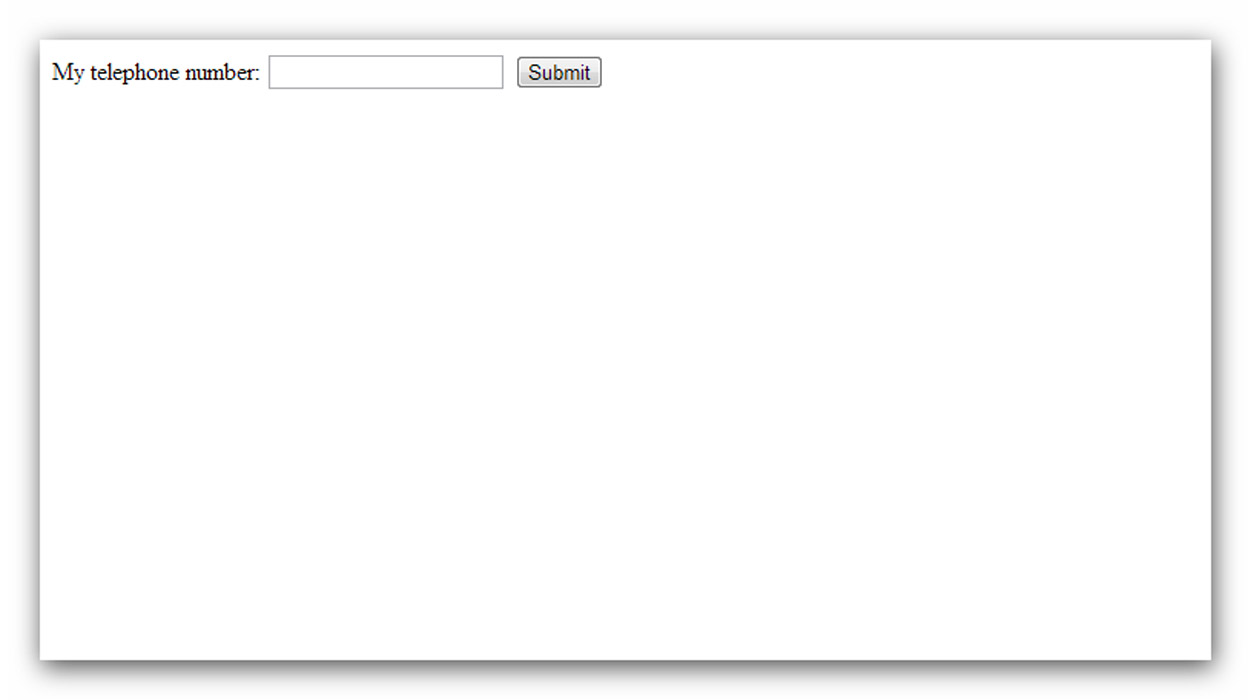
This is the page where customers, who ask for callback, enter their phone number, and press Submit. After that, the phone number is sent from the HTML site to another file which is (in this guide) the callreq.php file, written in PHP language. You have to have a server which supports PHP. If you do, after uploading this php file, it will be translated on your server, and it will become your php Application. Here is the code of the .php file:
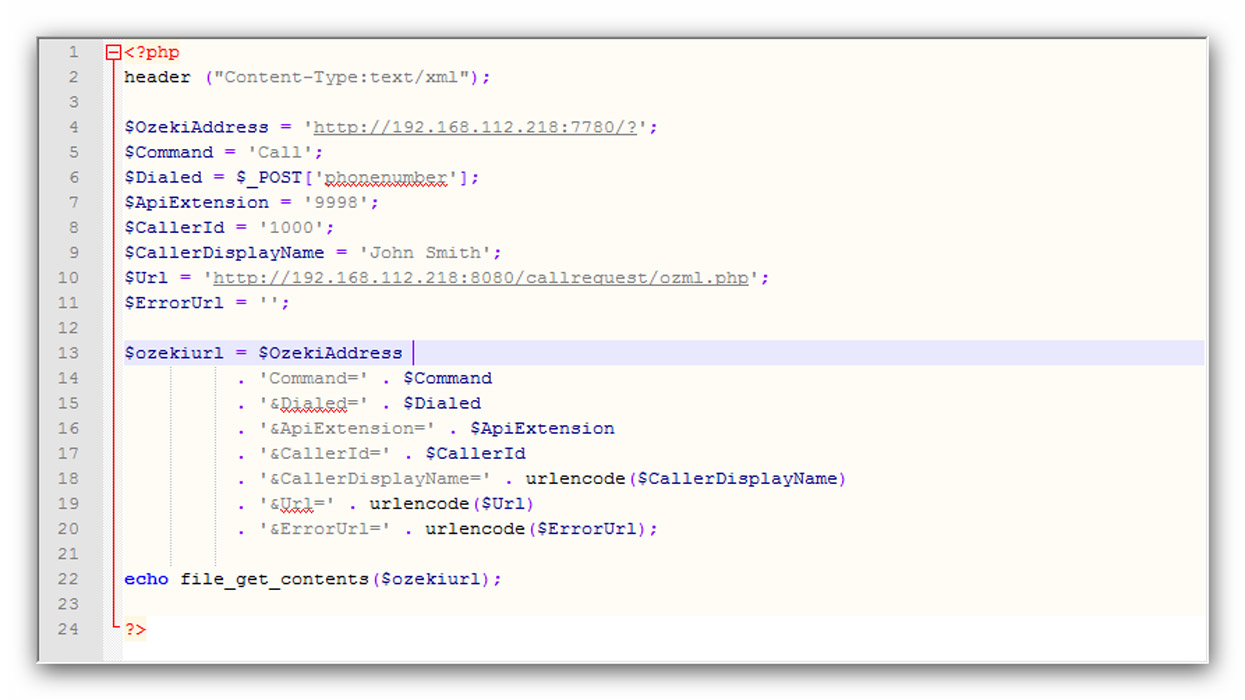
1 2 3 4 5 6 7 8 9 10 11 12 13 14 15 16 17 18 19 20 21 22 23 24 |
<?phpheader ("Content-Type:text/xml");$Command = 'Call';$Dialed = $_POST('phonenumber');$ApiExtension = '9998';$CallerId = '1000';$CallerDisplayName = 'John Smith';$ErrorUrl = '';$ozekiurl = $OzekiAddress . 'Command=' . $Command . '$Dialed=' . $Dialed . '$ApiExtension=' . $ApiExtension . '$CallerId=' . $CallerId . '$CallerDisplayName=' . urlncode($CallerDisplayName) . '$Url=' . urlencode($Url) . '$ErrorUrl=' . urlencode($ErrorUrl); echo file_get_contents($ozekiurl);?> |
The role of this PHP file is a little bit more complicated. This file gets the phone number from the HTML page and forms the Call command. The entered mandatory data are the following:
- $OzekiAddress: This contains the IP address of the Ozeki Phone System and the port of the API extension which is 7780 by default.
- $Command: This is where you define the type of the command. Since you want to make a call command, the value of this field is 'Call'
- $Dialed: This variable contains the phone number of the Customer. The value of this variable is received from the data field of the HTML page
- $ApiExtension: The number of the API extensions within the Ozeki Phone System.
- $CallerId: This is the number that the customer will see, when he gets a call.
- $CallerDisplayName: This is the name that the customer will see, when he gets a call.
- $URL: This is an URL which contains a file with XML data. This will be explained futher below.
After the command is formed in the proper way, and all the mandatory data is given, the Application delivers the info to the Ozeki Phone System.
First, the customers number will be dialled from the Ozeki Phone System. If the customer answers the call, the Ozeki Phone System will send a notification back to your Application about the connected call. This is called the callconnected notification.
This Application will answer the notification, and this is where the $URL part of the Call command gets important. A Response will be sent back to the Ozeki Phone System. The response is an XML data (contained in a .php file in this guide) that contains the phone number of the employees at the company who will answer the call of the customer. Ozeki Phone System XE gets this response data from the $URL which has been previously provided for it in the Call command.
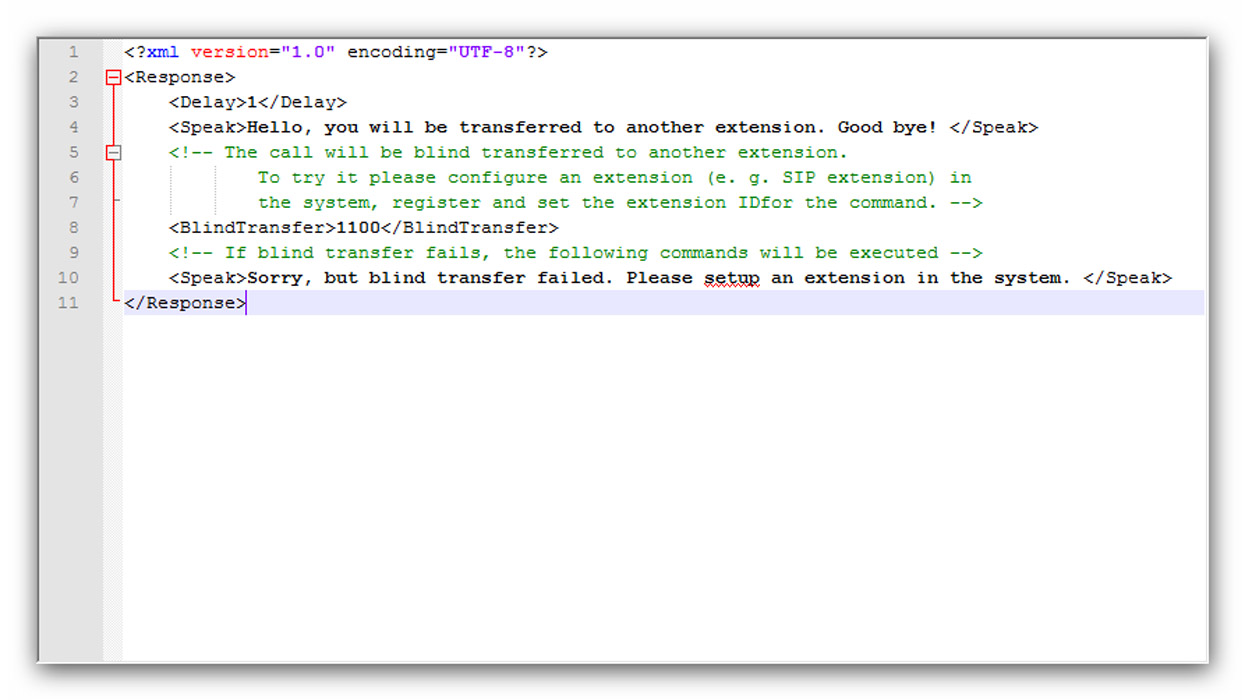
Here is the ozml.php file containing the xml data used in this guide for the Response:
1 2 3 4 5 6 7 8 9 10 11 |
<xml version="1.0" encoding="UTF-8"?><Response> <Delay>1</Delay> <Speak>Hello, you will be transferred to another extension. Good bye! </Speak> <!-- The call will be blind transferred to another extension. To try it please configure an extension (e. g. SIP extension) in the system , register and set the extension ID for the command. --> <BlindTransfer>1100</BlindTransfer> <!-- If blind transfer fails, the following commands will be executed --> <Speak>Sorry, but blind transfer failed. Please setup an extension in the system. </Speak></Response> |
This xml data consists of the following tags:
- Reponse: This is the main tag of the whole xml data
- Delay: This data provides information about the amount of time, the call will be delayed.
- Speak: The data contained between these tags will be told to the employees by a robotic voice.
- BlindTransfer: Here, you have to add the phone number of the employees, this is what makes the callback request possible.
After the Ozeki Phone System gets the response, it will dial the employees on the number 1100 at the company through the HTTP API Extension. When an employee answers the call, the Callback Request is served, and the customer got called back as he wanted.
Step 4. Make a Ring group
This last part is about making a Ring group. It is important, because the xml data of the Response will only contain one phone number, so without a Ring group, only one employee could answer the callback request. Here you can find a detailed guide to help you with this.
Conclusion
The guide above showed you how to setup an API Extension in the Ozeki Phone
System XE, and how to implement a callback request using HTML, and PHP languages.
If you follow this guide step-by-step, and read it paying attention, you will be able
to make your own web application and make it communicate with the Ozeki Phone System,
resulting in a served callback request.
If you have any questions or need assistance, please contact us at info@ozekiphone.com
More information
- JavaScript API interceptor
- How to setup a callback request in the Ozeki Phone System PBX
- Part1: JavaScript example on sending SMS, making VoIP calls

 Sign in