How to setup call routing for Messages
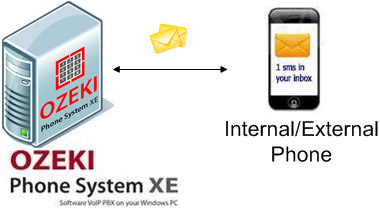
It can easily happen that one of the members of the communication does not own a microphone, or does not have a sound device. This problem can be solved by sending messages to each other, rather than making a voice call. Similar to voice calls, messages also have to be routed. Ozeki Phone System provides dial plans for routing messages as well.
The following step-by-step guide will show you how to make a dial plan for messages, and an example will be used to illustrate them; a dial plan will be created for sending messages between two SIP extensions.
|
Step 1: Setup two SIP Extensions Step 2: Make a dial plan for messages Step 3: Send test messages |
Step 1: Setting up extensions
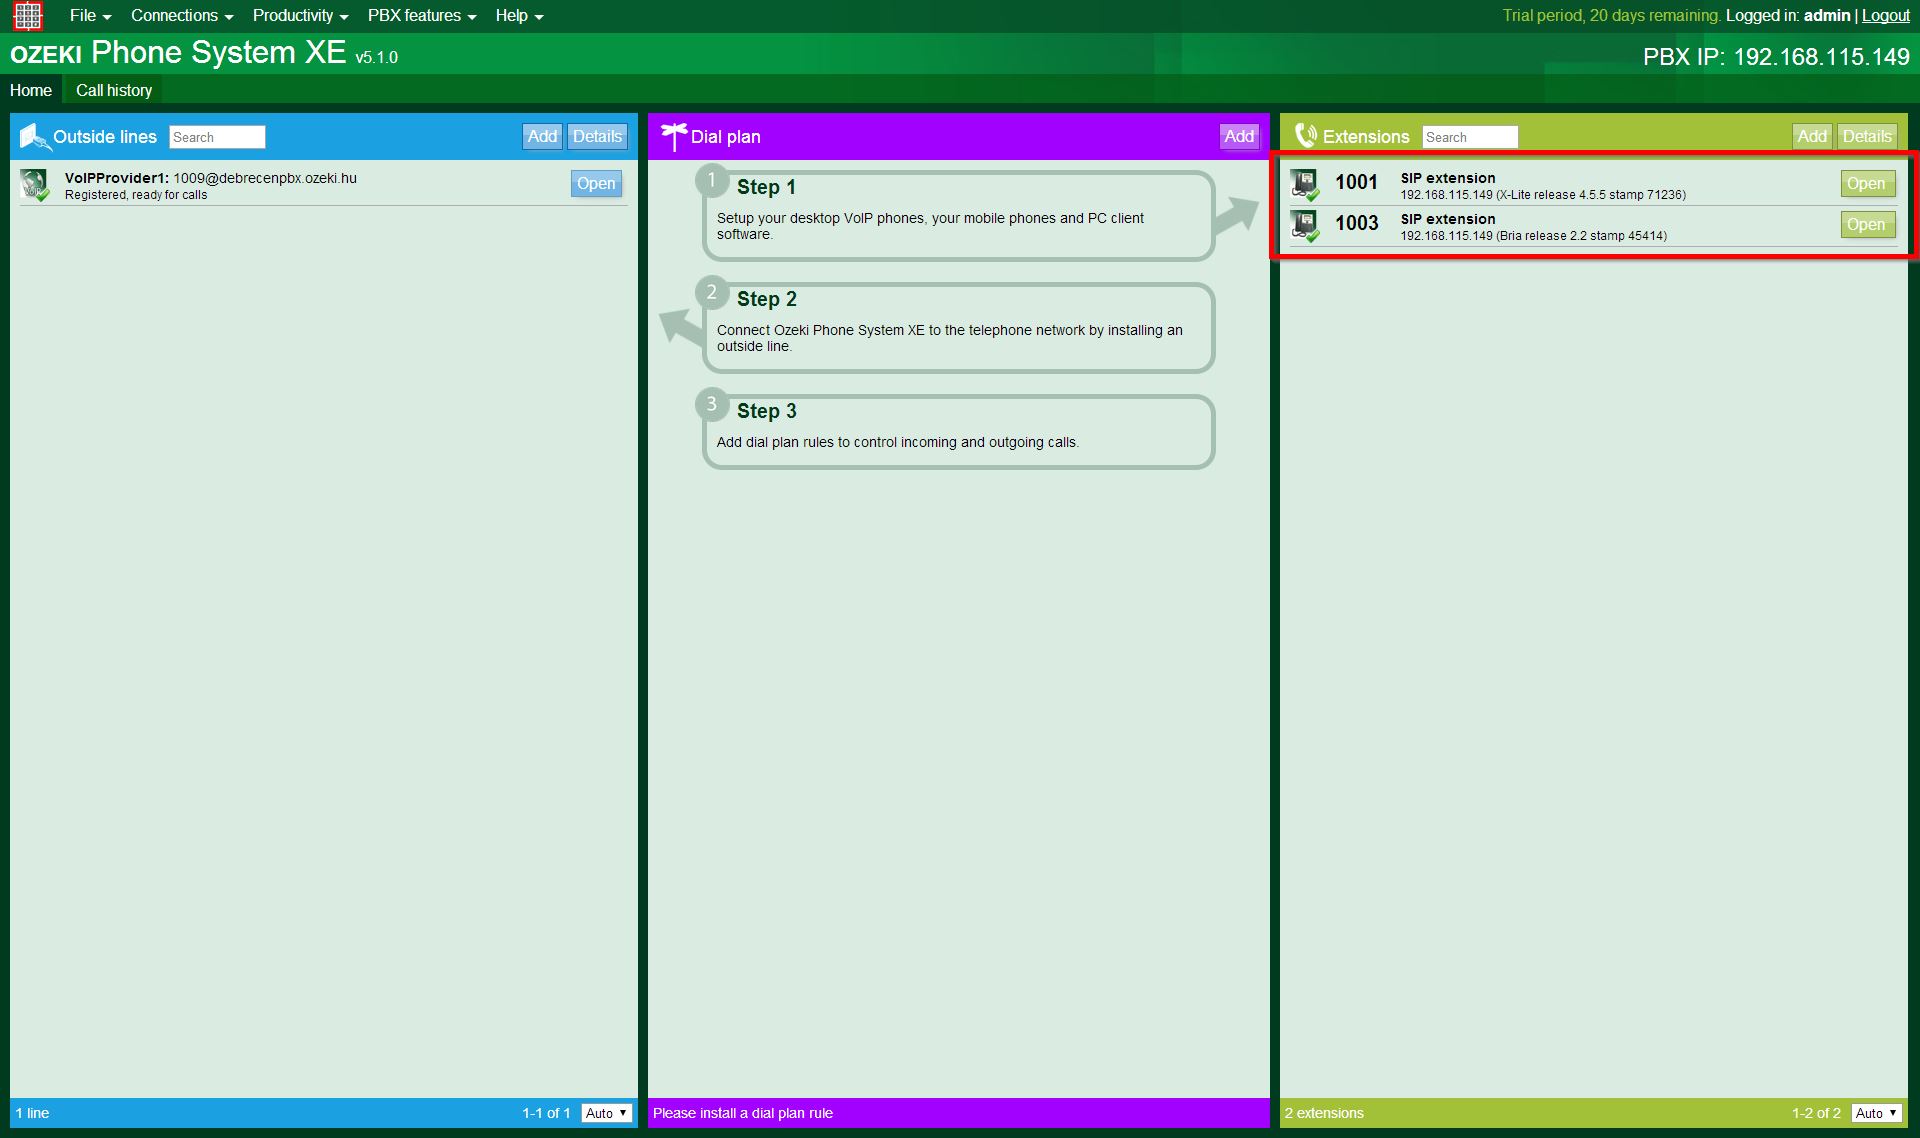
You can handle messages from all sources and destinations (for example: Email providers and SMS Modems). This guide will introduce the steps by using local extensions, so it is assumed that you have already added extensions to Ozeki Phone System.
If you need help, please visit the Extension setup guide.
Step 2: Making a dial plan
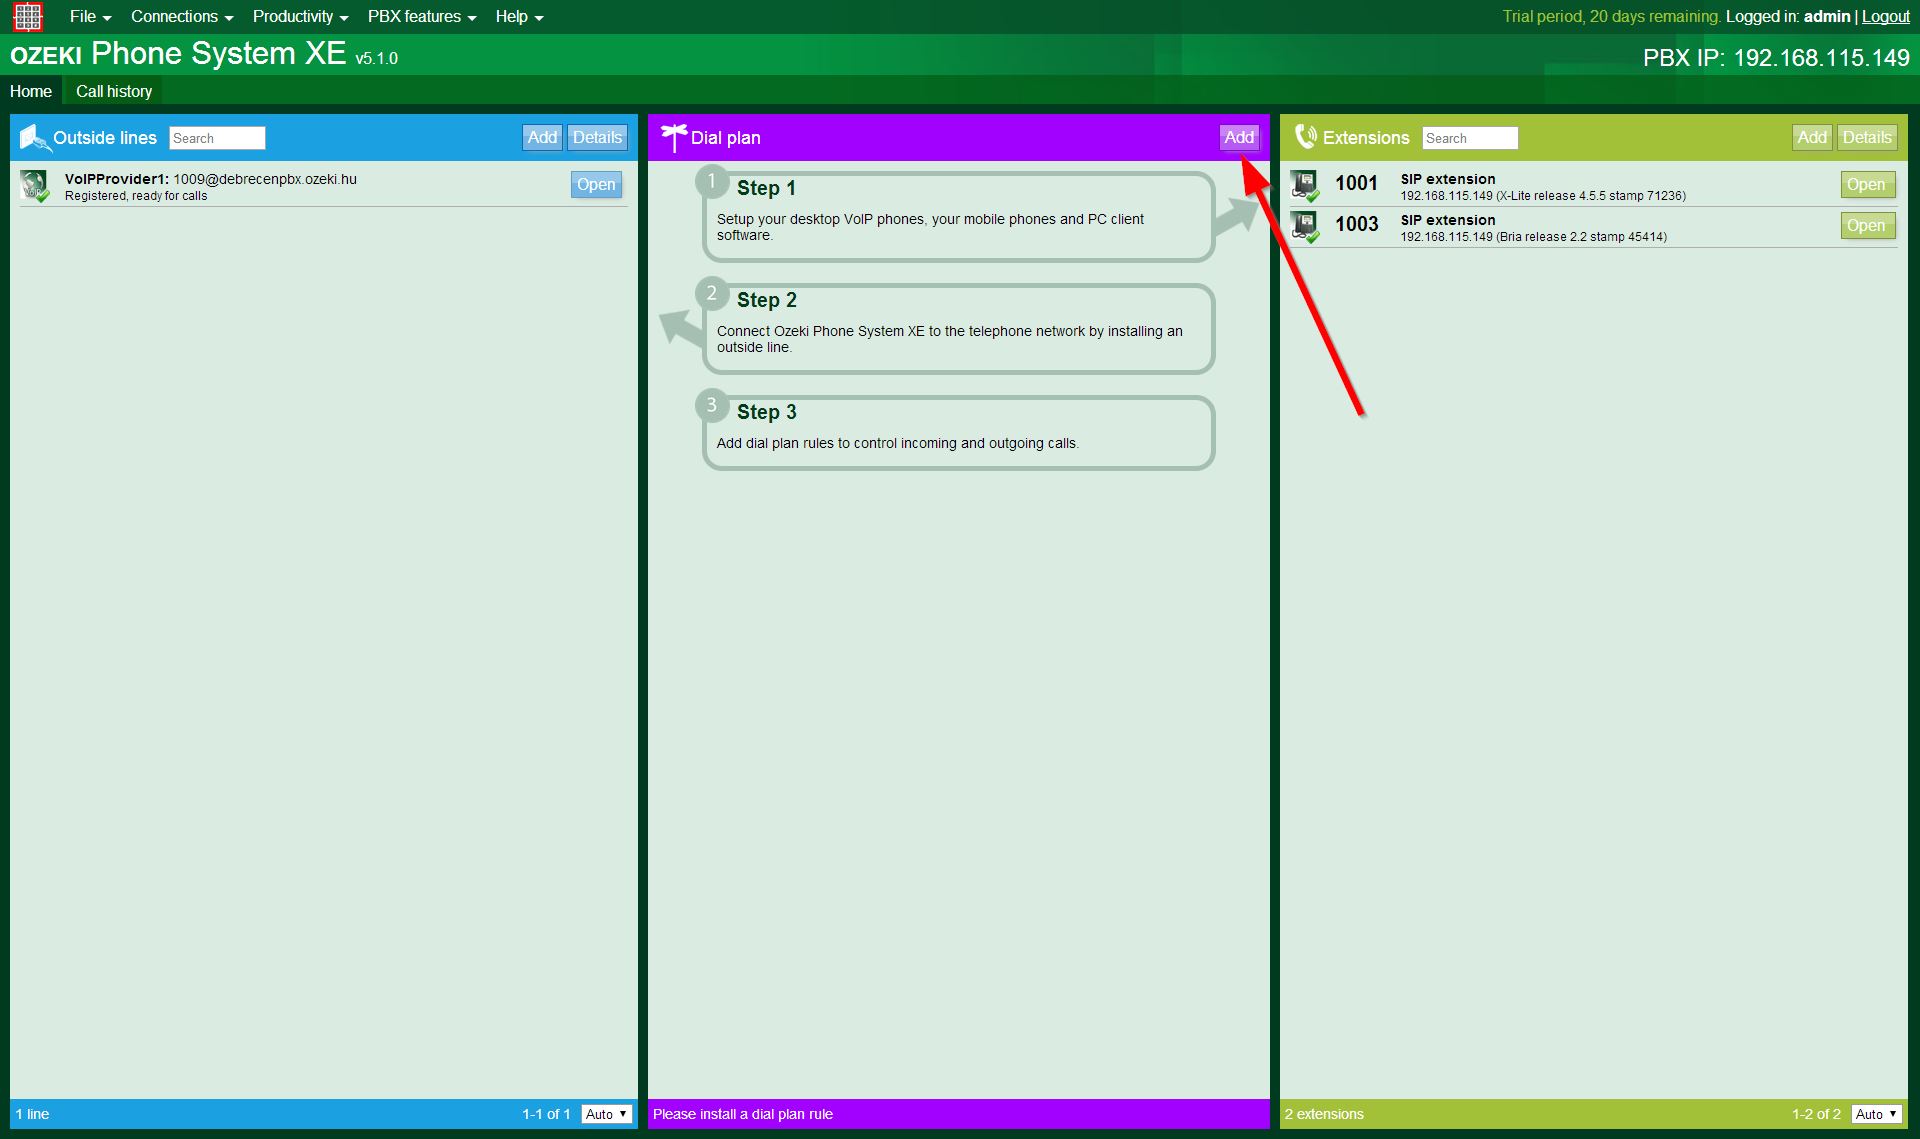
To make a dial plan, go to the main page of Ozeki Phone System, and click on the Add button at the Dial plan section (Figure 3).
About the Messages Dial plans:
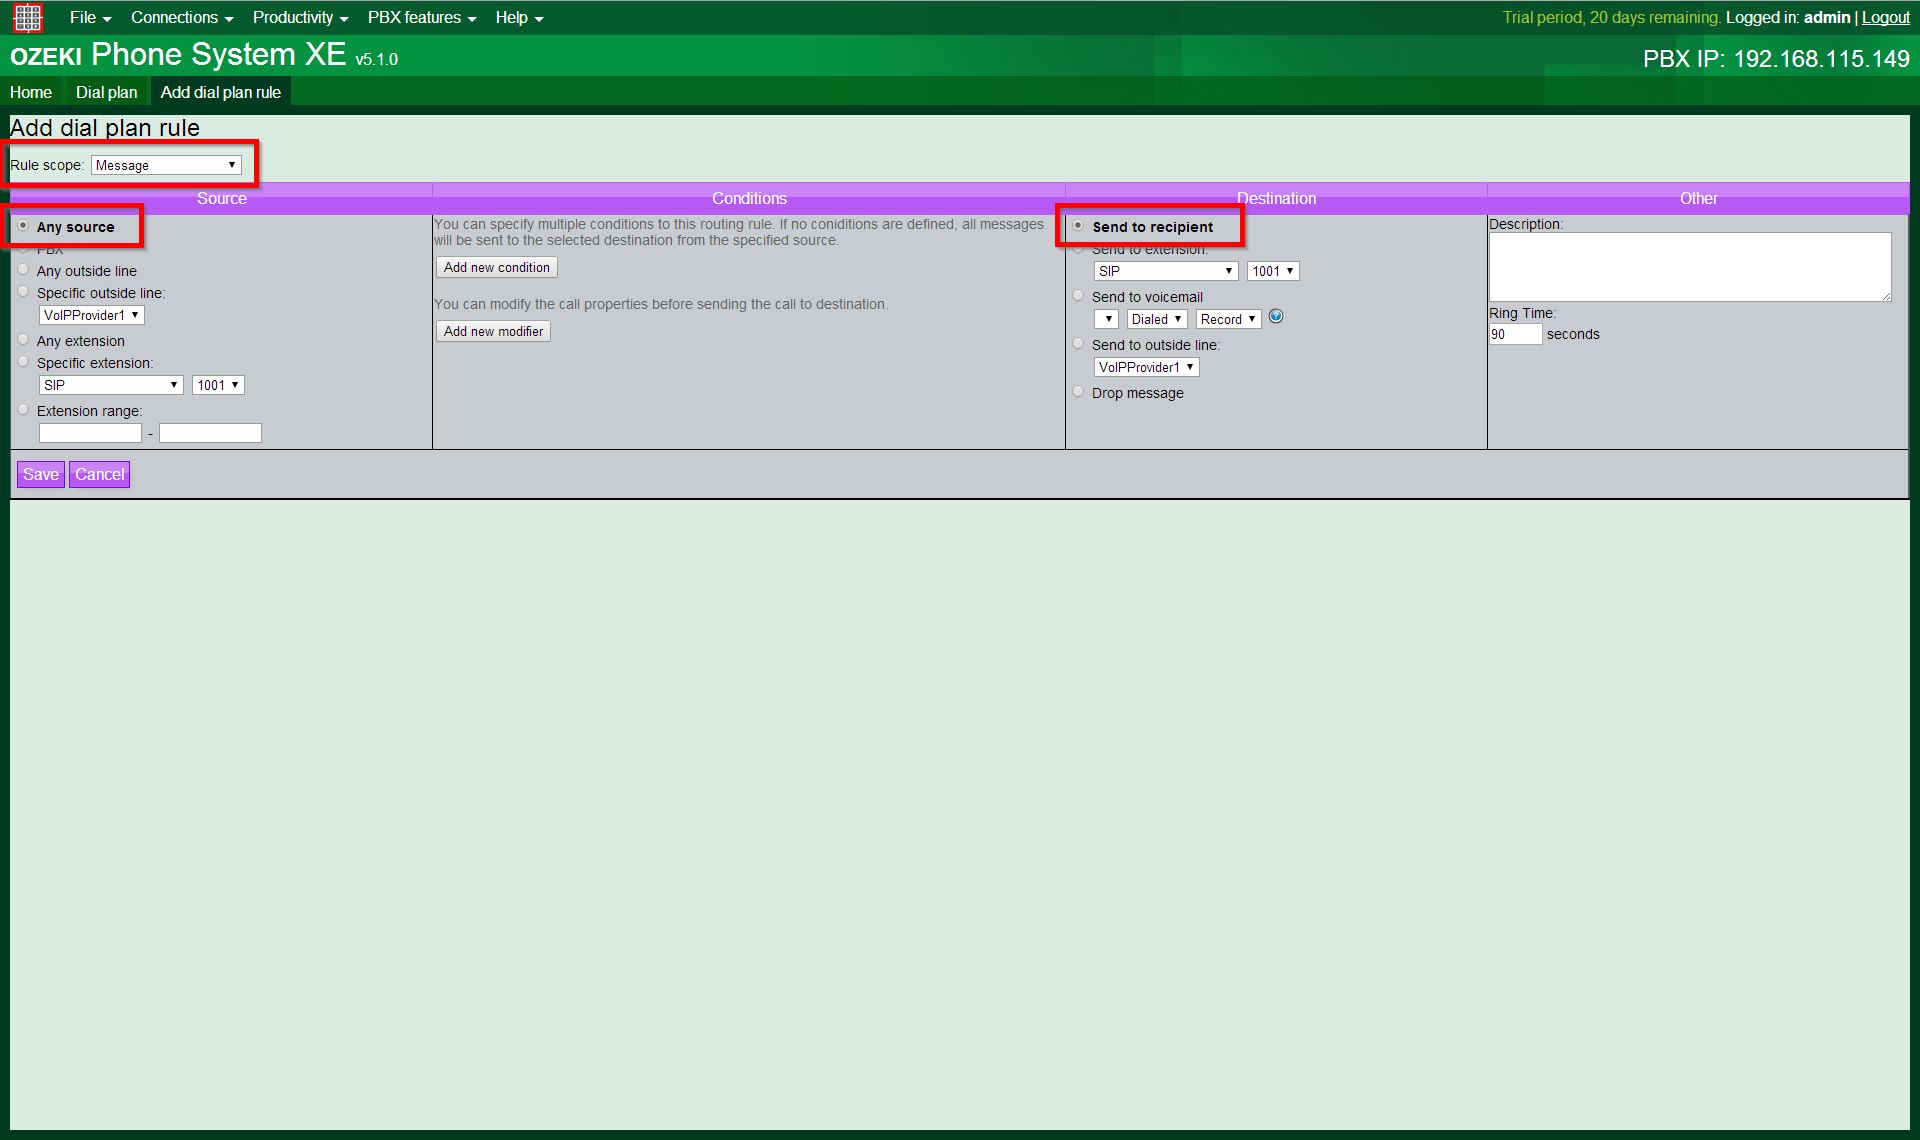
You can see four columns (as Figure 4 shows below):
- 1. Source: the source of the call. You can select one of the options with a radio button:
- Any sources: the PBX will check every sources about suiting the set conditions or not.
- PBX: checks only the messages which are coming from the PBX itself (system messages, notifications such as: new Ozeki Phone System version is available, there was a security incident, or there is a new message waiting in the voicemail etc.)
- 2. Conditions: here, you can set the routing rules (which are selecting the calls to be sent) and the call properties
(which are manipulating the selected attributes).
You can add more entries to the call conditions and properties, and the operating of these modifiers will happen in the order of the adding. There is AND connection between the entries, so the call will be sent to the destination only if it suits all of them.
About the attributes, usable within this scope:- Recipient: the destination's address.
- Sender: the address of the source.
-
Type: the type of the message, which can be:
- Message: instant messages (for example: most of the softphones are sending text messages as instant messages).
- SMS: regular SMS (Short Message Service) (usually comes from mobil phones)
- Email: electronic mail.
Routing rule conditions:
The call will be sent from the source to the destination, if all of the set conditions suits the selected attributes. You can define conditions for the Recipient, the Sender and the message's Type attributes with the followings:Call properties:
If there is a call which has passed all the set conditions, it can still contain the extra characters for the purpose to indicate something to the dial plans. Since you will not need those anymore, before the PBX sends the call to the destination, it can make preprocessings on the Recipient and the sender attributes:
-
3. Destination: if a call passes the checks, that will be sent to a destination, which is being selected by a radio button:
- Send to recipient: sends the message to the the callee, specified by the dialed (or modified) number.
- Send to extension: sends the message to the selected (by the type and phone number) extension.
- Send to outside line: you need to select an Outside line in order to send the message to an outside line.
- Drop Message: does not send the message anywhere, drops it.
As the guide's next step, select:
- Messages in the Rule scope menu,
- All messages at the Source section,
- Send to Recipient at the Destination section,
- do not modify anything at the Conditions and Other columns.
Basically, this dial plan sends a message from any device to another within the Ozeki Phone System XE. The Dial plan doesn't change the original path of the message, it is going to be sent to the number defined by the sender (Figure 4).
You can check the examples chapter for more information about setting up conditions.
Step 3: Sending test messages
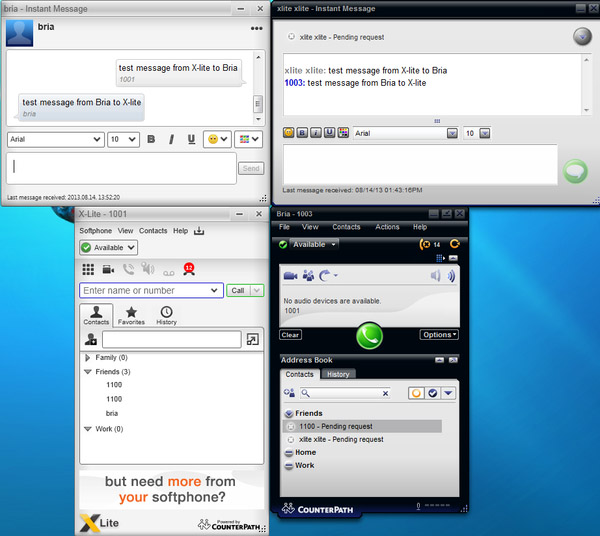
At this step, two SIP extensions will be used within the Ozeki Phone System. One is an X-Lite Softphone SIP extension with the phone number "1001", the other is a Softphone Bria SIP extension with the phone number "1003".
On Figure 5, you are about to see a sent message from the number "1001" X-Lite Softphone, to the number "1003" Softphone Bria. The X-Lite Softphone is at the left side with its chat interface, and the Softphone Bria is placed at the right side.
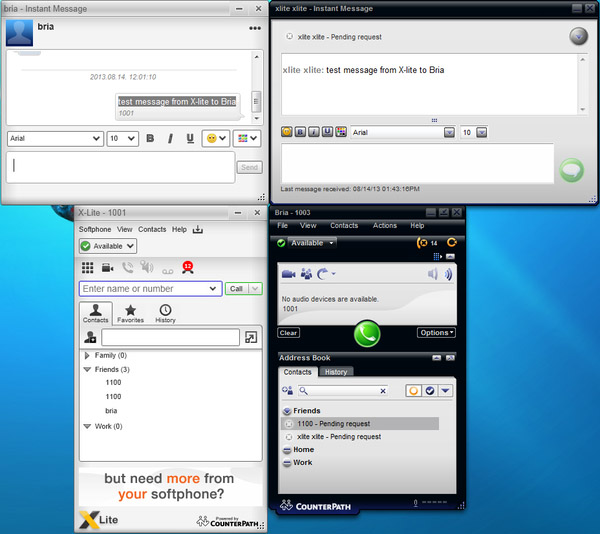
On Figure 6 you are going to see the exact opposite. Now, the message is sent from the number "1003" Softphone Bria, to the number "1001" X-Lite Softphone.
Dial plan setup examples
To manipulate the messages' destinations, it's really easy to set up routing rules with the help of Dial plans. You can even manage messages from inside and outside extensions, and forward them to anywhere.
-
Message Type: if you would like to receive all of the incoming instant messages to the PBX with one
single local extension, you just have to set the Type condition to "Message", and the
destination extension to the prefered one.
-
Recipient: if your extension can't handle e-mails or SMS messages, but you would like to receive them
through that device, you can set the Recipient attribute
to be Equal to the extension's phone number, and the destination as an Email provider or
SMS Modem.
This way, the emails and SMS messages which would come to your extension, will be redirected to the selected Email providers and SMS modems.
- Sender: if you have more SMS modems, you can set the messages' destinations for each of the senders, by setting the Sender attribute to the extension's number, and defining the destinations at the Destination column.
-
SMS to Email: your PBX is accepting messages, but you would like to send the SMS messages to
an Email provider, as an Email letter.
To do this, at the Conditions column, you need to set the Type attribute to be Equal to "SMS", and you also need to set the Email provider at the Destination column.
Conclusion
As you can see, implementing call routing for messages can be easily done by setting up message dial plans in Ozeki Phone System. If you follow this guide, you can connect SIP extensions to the Ozeki Phone System, and send messages to each other from them, by making a simple dial plan.
If you have any questions or need assistance, please contact us at info@ozekiphone.com
Dig deeper!
People who read this also read...
- Call recording basics
- How to add mobile extensions to Ozeki Phone System
- How to create VoIP, ISDN or PSTN phone line connection
- How to connect SMS services to Ozeki Phone System
- Everything about Webphone Technology - Live chat, voice calls, video calls, click to call
More information
- How to setup call routing for Inbound calls in Ozeki Phone System PBX
- How to setup call routing for Outbound calls in Ozeki Phone System PBX
- How to setup call routing for Missed calls in Ozeki Phone System PBX
- How to setup call routing for Messages in Ozeki Phone System PBX
- How to create time profiles and assign them to dial plan rules

 Sign in