
 Sign in
 How to setup Ozeki Phone System with FreePBX
This guide shows how you can connect Ozeki Phone System to your FreePBX. This solution gives you a brief explanation about how you can configure Ozeki Phone System as Voip Provider connect with FreeBPX .
Ozeki Phone System uses Voice over IP to establish phone calls. Using VoIP technology is less expensive than traditional phone services. With Ozeki Phone System you can view your registered phone line and your active phone calls. You can establish calls using Ozeki Phone System. You can also select the codec to be used during the phone call.
This configuration guide demonstrates how you can connect Ozeki Phone System to your FreePBX.System architecture
If you follow the configuration guide, you will have a telephone system that works as follows: First, create an extension in your FreePBX. Ozeki Phone System will connect using this created extension. Once Ozeki Phone System is connected, you can start your calls. The destination phone could be a VoIP phone, a land line phone or a mobile phone. You can see this process in Figure 1.

- Ozeki Phone System registers to FreePBX.
- The call will be forwarded to FreePBX using the created extension.
- The destination phone will be ringing.
- You can start talking using the Ozeki Phone System.
Configuration steps
Before you start to configure this solution it is assumed that you have already installed your FreePBX and downloaded Ozeki Phone System installer from the download page.
Step 1.) Install FreePBX
Connect your 3rd party PBX with Ozeki Phone System. The computer where you install PBX will be a virtual machine or a computer. Start with a simple installation to co-operate with Ozeki Phone System. Follow the installation guide at FreePBX wizard. After the automatic install reboot you should add the location and your local IP address which you want to use for 3rd party PBX.


Step 2.) Create a SIP account
In this example I have installed FreePBX on a computer and its IP address is 192.168.91.99. You can reach and configure FreePBX through its web interface. In order to configure FreePBX navigate to the IP address of your installation using your web browser and click on the PBX Administrator icon (Figure 4).

Login with as administrator with password you set during the installation (Figure 5).

Once you logged in, click on Extensions (Figure 6).

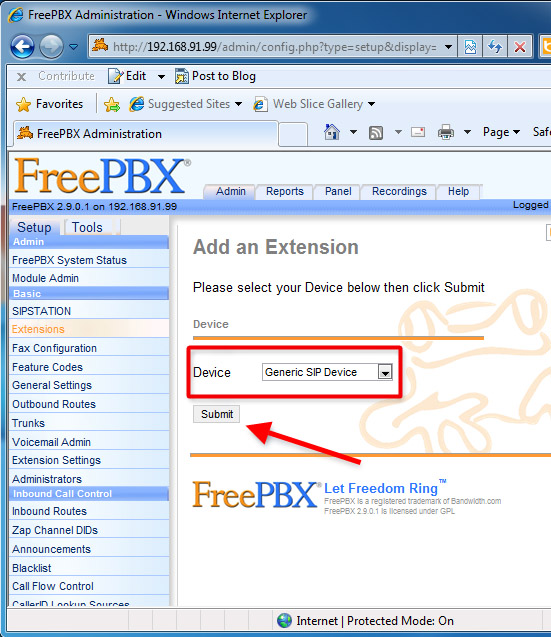
Now you can add an extension to your configuration. To do this, select Generic SIP Device from the Device list and click on Submit (Figure 7)
Fill the User Extension, Display Name and the SIP Alias field, and scroll down the configuration form (Figure 8).

Provide the SIP password at the secret field. In this example it will be abc123 (Figure 9).

Once it is done, click on Submit (Figure 10).

To apply the new extension, click on Apply Configuration Changes at the top of the page (Figure 11).

The changes will be applied by reloading the config file of the PBX. Click on Continue with reload.

Once it is reloaded, the configuration of FreePBX is done and you can configure Ozeki Phone System.
Step 3.) Configure Ozeki VoIP provider to use the created SIP account
If you have any questions or need assistance, please contact us at info@ozekiphone.com
Dig deeper!
People who read this also read...
More information
- Ozeki and Cisco Unified Communications Manager 8 connection
- How to setup Ozeki Phone System with Cisco Call Manager Express
- How to setup Ozeki Phone System with Asterisk
- How to setup Ozeki Phone System with 3CX Phone System
- How to setup Ozeki Phone System with AsteriskNow
- How to setup Ozeki Phone System with Kamailio
- How to setup Ozeki Phone System with FreeSwitch
- How to setup Ozeki Phone System with OpenSIPS
- How to setup Ozeki Phone System with Trixbox
- How to setup Ozeki Phone System with OpenSER
- How to setup Ozeki Phone System with PBXnSIP
- How to setup Ozeki VoIP SIP SDK with PBXpress
- How to setup Ozeki Phone System with SipX ECS
- How to setup Ozeki Phone System with Elastix
- How to setup Ozeki Phone System with FreePBX
- How to setup Ozeki Phone System with SwyxWare
- How to setup Ozeki Phone System with Avaya IP Office