How to setup Ozeki Phone System with Kamailio
Ozeki Phone System offers an efficient way to contact your customers or start a marketing call campaign. On this page you can learn how to do the first steps to achieve your goals. As a start, you need to connect Ozeki Phone System to your PBX. You can learn how to connect Ozeki Phone System to your Kamailio PBX with the help of this guide.
Voice over Internet Protocol (VoIP) is a generally used term for transmission technologies that deliver voice communications over the Internet or other packet-switched networks. It is also referred to as IP telephony, Internet telephony, voice over broadband (VoBB), broadband telephony and broadband phone.
Ozeki Phone System utilizes the advantages of VoIP technology and places phone calls using VoIP technology.
On the following steps you can learn about how to get started if you use Kamailio PBX.
System overview
If you follow the configuration steps below, you will have a system which works as follows: First, you need to install Kamailio PBX on your Linux server. Once you installed Kamailio, you can use the default configuration of it to connect Ozeki Phone System. Ozeki Phone System will register to the PBX, and will make phone calls using this registration. The destination phone could be a VoIP phone, a land line phone or a mobile phone. Figure 1 demonstrates this process.

The final system will work as follows:
- Install Kamailio PBX into your linux distribution. You can use the default configuration of Kamailio PBX.
- Ozeki Phone System will register to Kamailio PBX.
- You can start calling your contacts using the registered account.
- Kamailio PBX will call your contacts via Ozeki Phone System.
Configuration steps
Before you start to configure this solution, it is assumed that you have already installed your linux distribution and downloaded Ozeki Phone System from the download page.
Step 1.) Install Kamailio PBX
Connect your 3rd party PBX with Ozeki Phone System. The computer where you install PBX will be a virtual machine or a computer. Start with a simple installation to co-operate with Ozeki Phone System. Follow the installation guide at Kamilio wizard. There are some packages that need to install for kamilio installation.
Use the following command to install the packeges. After the install command type the packeges names(git client,gcc compiler,flex,bison,libmysqlclient-dev,make)
sudo apt -get install
Before you start configure SIP account install 3rd party PBX,which needs the following packages.
When the inicializing finished and installed packages, create a directory where the sources will be stored. Then download the sources from GIT:
git clone --depth 1 --no-single-branch git://git.sip-router.org/sip-router kamailio
Type simple cd command to jump to kamilio directory and press "git git checkout -b 4.0 origin/4.0" into the command line. After it, install the whole kamilio package in one directory:
make PREFIX="/usr/local/kamailio-4.0" include_modules="db_mysql" cfg
Next installation step to compile the Kamilio. Use "make install" for compiling
To be able to use the binaries from command line, open "/root/.bash_profile" and at the ebd add:
PATH=$PATH:/usr/local/sbin
export PATH
Create the database which need for Kamilio:
nano -w /usr/local/etc/kamailio/kamctlrc
DBENGINE=MYSQL
/usr/local/sbin/kamdbctl create
To fit your requirements for the VoIP platform, edit the configuration file /usr/local/etc/kamailio/kamailio.cfg Follow the instruction in the comments to enable usage of MySQL.
You should modify init.d file. Browse the directory with cd command and use the following commands:
/usr/local/src/kamailio-4.0/kamailio/pkg/kamailio/deb/debian/kamailio.init
chmod 755 /etc/init.d/kamailio
After that edit the following $DAEMON and $CFGFILE values:
DAEMON=/usr/local/sbin/kamailio
CFGFILE=/usr/local/etc/kamailio/kamailio.cfg
/usr/local/src/kamailio-4.0/kamailio/pkg/kamailio/debian/kamailio.default
mkdir -p /var/run/kamailio
Finally you should start the service which you have install. If you want to add a user just use the "adduser" command. To start/stop the server:
/etc/init.d/kamailio start
/etc/init.d/kamailio stop
Finally you will and your new account for logging:
kamctl add username password email
If you finished installation you can start with SIP account configuration.
Step 2.) Create a SIP account
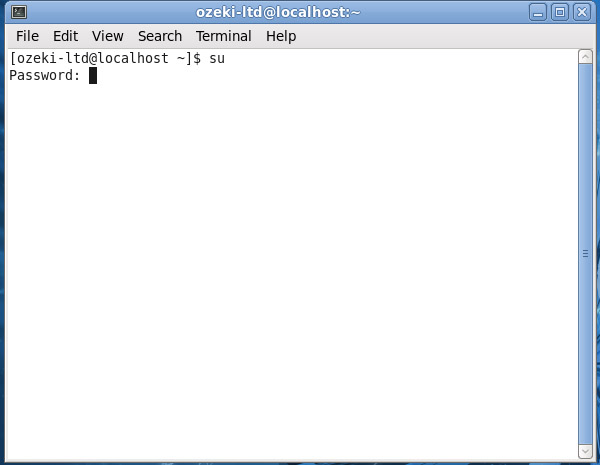
First, login to your linux distribution, start a terminal and type su to login as administrator (Figure 2).
su

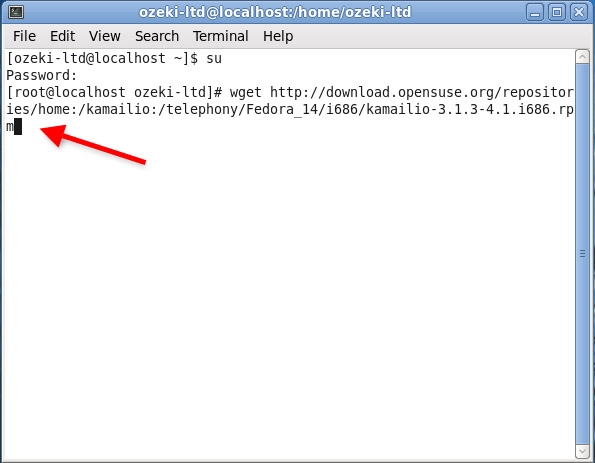
Next, download the Kamailio installation package. Since I use a Fedora distribution in this example, I will need the .rpm package. Download the package with wget in the following way (Figure 3):
wget http://download.opensuse.org/repositories/home:/kamailio:/
telephony/Fedora_14/i686/kamailio-3.1.3-4.1.i686.rpm

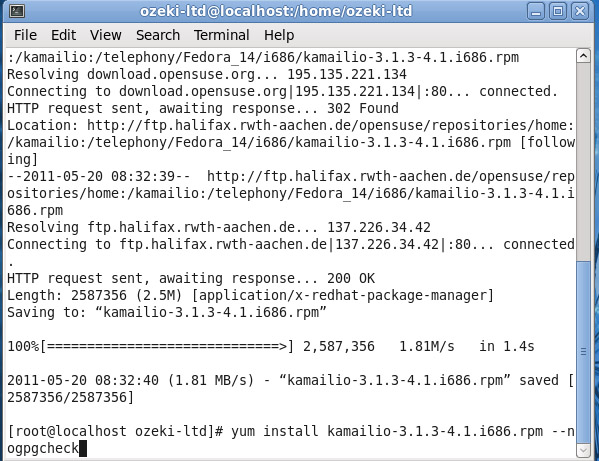
When the package is downloaded, you need to install it. Please note that you will have to skip the gpg check for this package (Figure 4).
yum install kamailio-3.1.3-4.1.i686.rpm --nogpgcheck

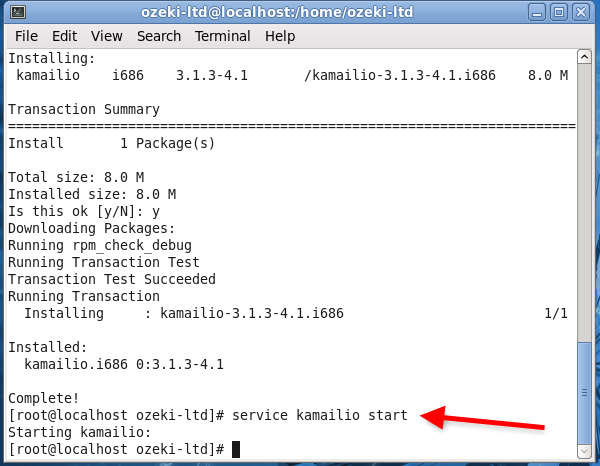
Once Kamailio is installed, you can start using it with its default settings. By default, you don't need to define any extension in Kamailio, and you can register to it with any username or password. All you need to do is to start the Kamailio service in your distribution (Figure 5).

service kamailio start
Now the configuration of Kamailio is done and you can start to configure Ozeki Phone System.
Step 3.) Configure Ozeki VoIP provider to use the created SIP account
If you have any questions or need assistance, please contact us at info@ozekiphone.com
Dig deeper!
People who read this also read...
- FreeSwitch Development
- OpenSIPS Development
- Trixbox Development
- Download Ozeki Phone System
- Connect Other PBXs
More information
- Ozeki and Cisco Unified Communications Manager 8 connection
- How to setup Ozeki Phone System with Cisco Call Manager Express
- How to setup Ozeki Phone System with Asterisk
- How to setup Ozeki Phone System with 3CX Phone System
- How to setup Ozeki Phone System with AsteriskNow
- How to setup Ozeki Phone System with Kamailio
- How to setup Ozeki Phone System with FreeSwitch
- How to setup Ozeki Phone System with OpenSIPS
- How to setup Ozeki Phone System with Trixbox
- How to setup Ozeki Phone System with OpenSER
- How to setup Ozeki Phone System with PBXnSIP
- How to setup Ozeki VoIP SIP SDK with PBXpress
- How to setup Ozeki Phone System with SipX ECS
- How to setup Ozeki Phone System with Elastix
- How to setup Ozeki Phone System with FreePBX
- How to setup Ozeki Phone System with SwyxWare
- How to setup Ozeki Phone System with Avaya IP Office

 Sign in