How to change the chat client version
The following article will walk you through the process of changing your Ozeki Chat client version directly on the myozeki.com website. Whether you are looking to leverage the latest features or ensure optimal security, or wanting to go back to an earlier version, this guide has you covered. It will not take 2 whole minutes to finish it, which goes to show how easy it is to handle even serious-sounding tasks in Ozeki Chat. Let's get started!
What does "version" mean in the tech world?
In this context, a version is like a fingerprint for a specific stage of a software's life. It's a unique number or code (like version 1.2.3) that tracks changes and updates. Bigger numbers signify newer versions (for example 2.7 is more recent than 2.6), and the later number changes in the sequence, the smaller the update (e.g. going from 1.0.0 to 1.0.1 is a relatively small update compared to going to 1.1.0 or 2.0.0).
Changing the Chat client version on myozeki.com (video tutorial)
The video will guide you through checking your current version, selecting a new one, and verifying the update – all in a swift 47 seconds! But do not be alarmed by its shortness, it will show all the necessary steps in great detail, allowing you to unlock the power of this simple but effective know-how.
Changing the Chat client version on myozeki.com (cheat sheet)
- Check current Chat version number
- Go to Install services
- Select Chat
- Change version
- Check Chat version number
Changing the Chat client version on myozeki.com (detailed instructions)
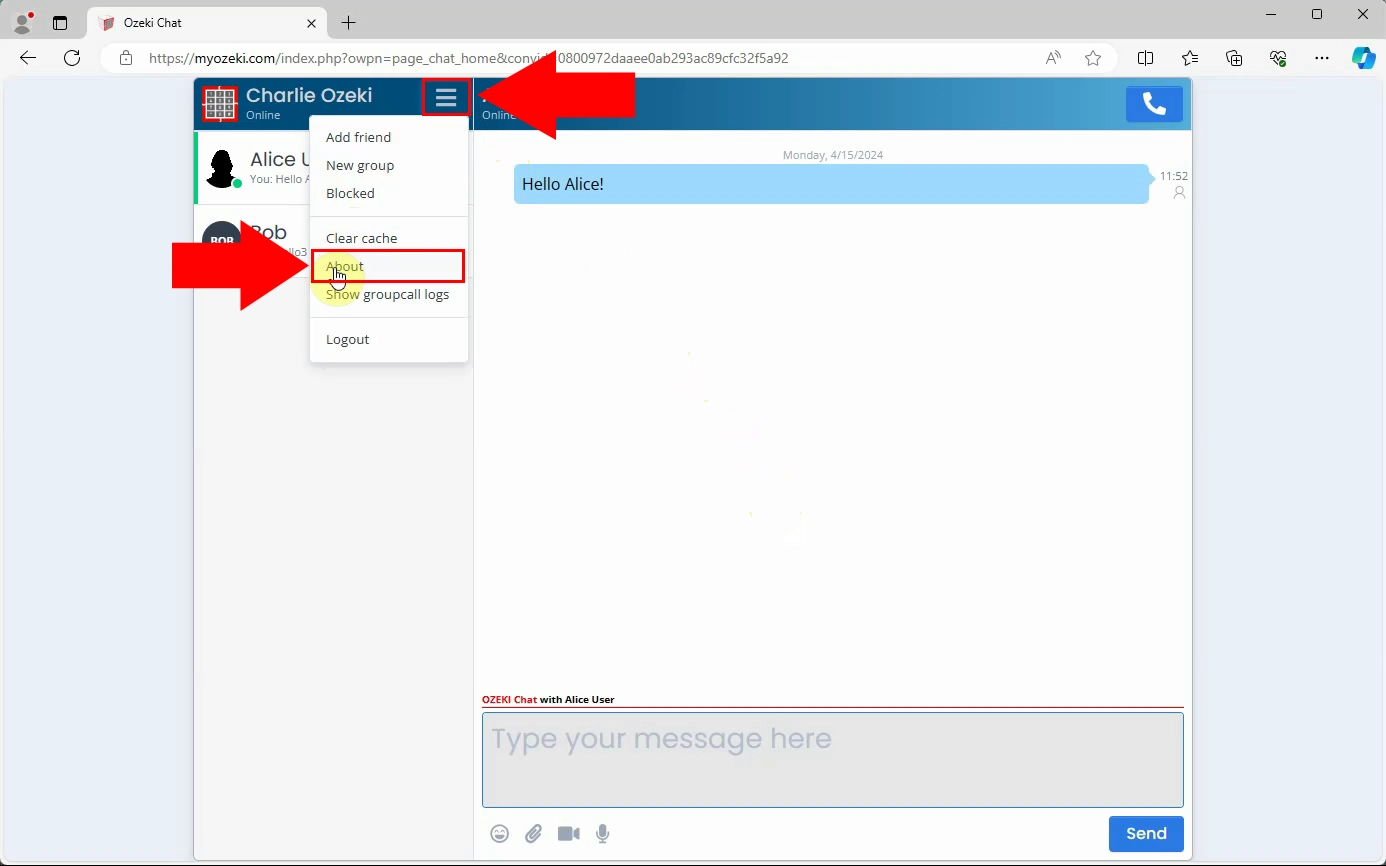
First, inside Ozeki Chat, click the hamburger icon in the top right corner of the left panel, and select About from the dropdown list, as seen in Figure 1.
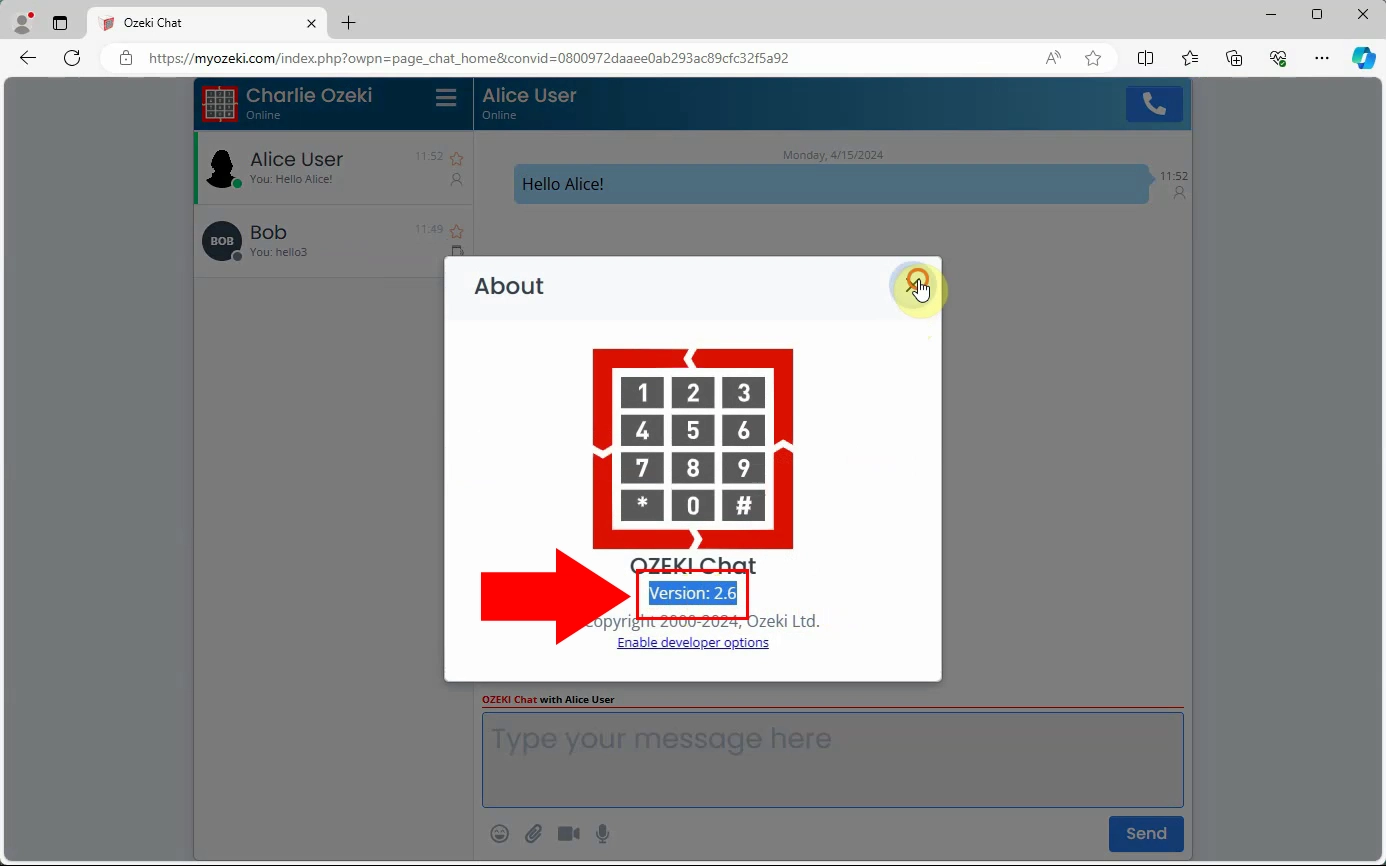
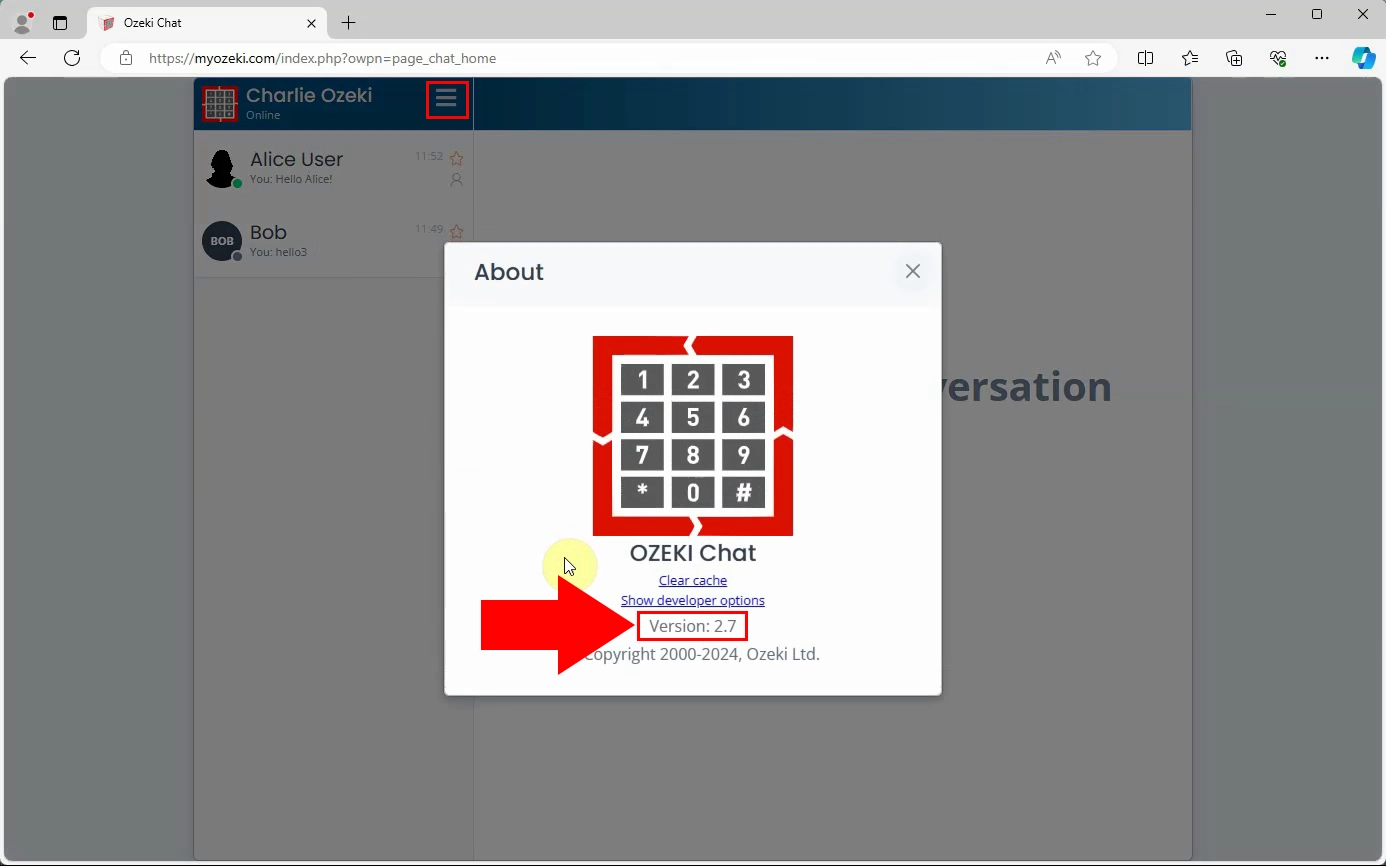
This will bring up a pop-up window, where you can find your currently installed Chat version number, highlighted in Figure 2.
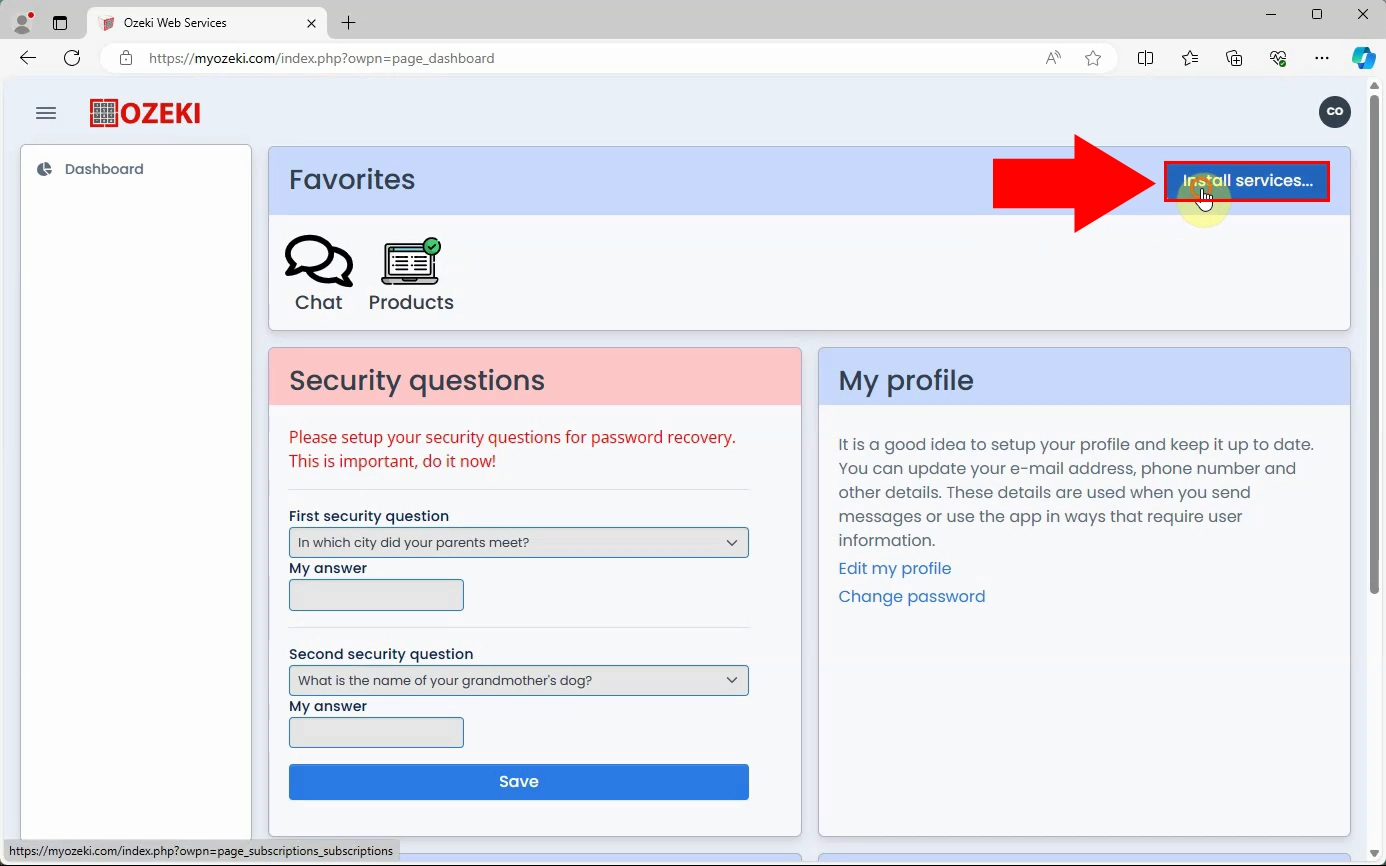
Head to the myozeki.com homepage, and click on Install services..., as shown in Figure 3.
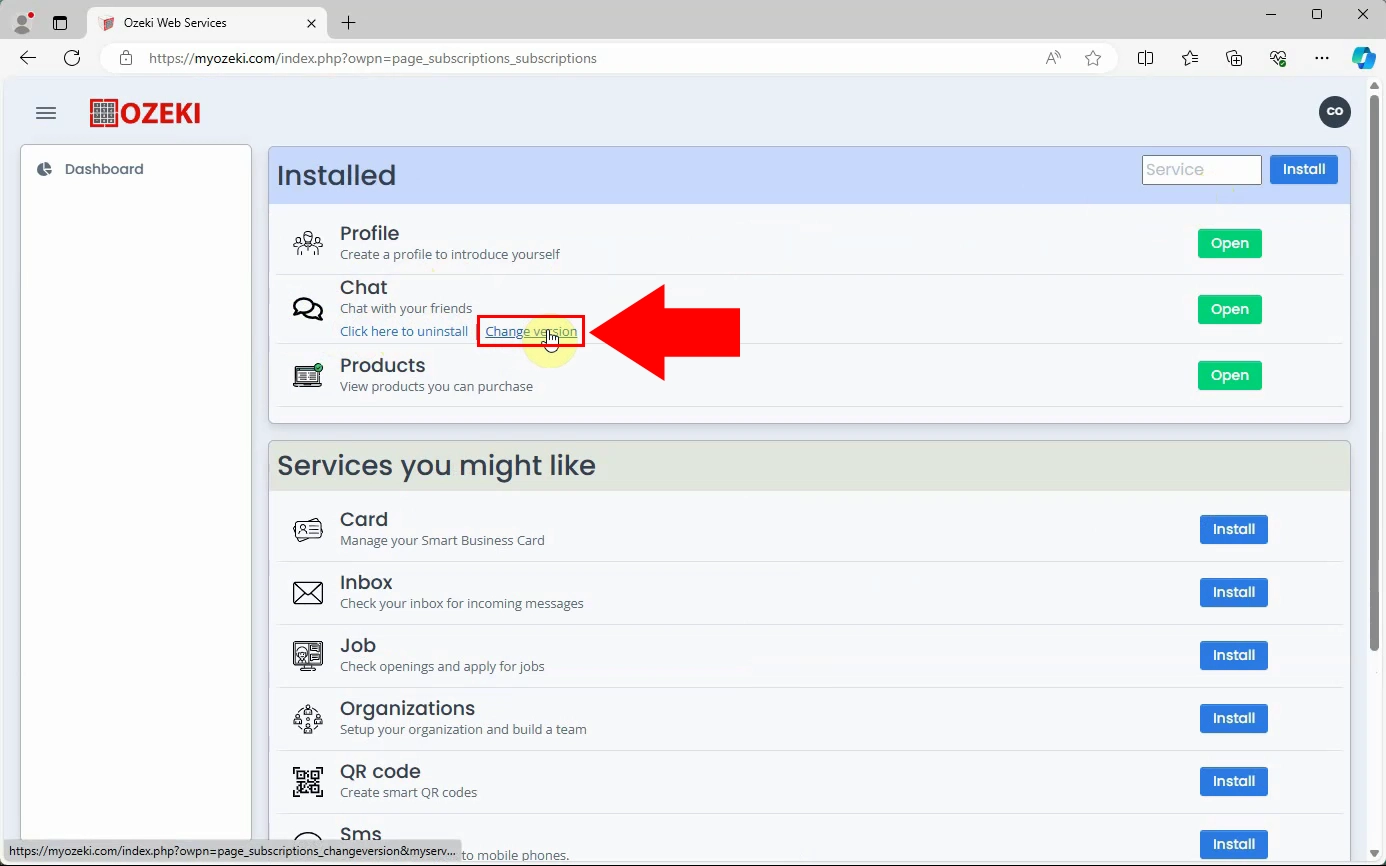
Look for Chat, and click on Change version beneath it (Figure 4).
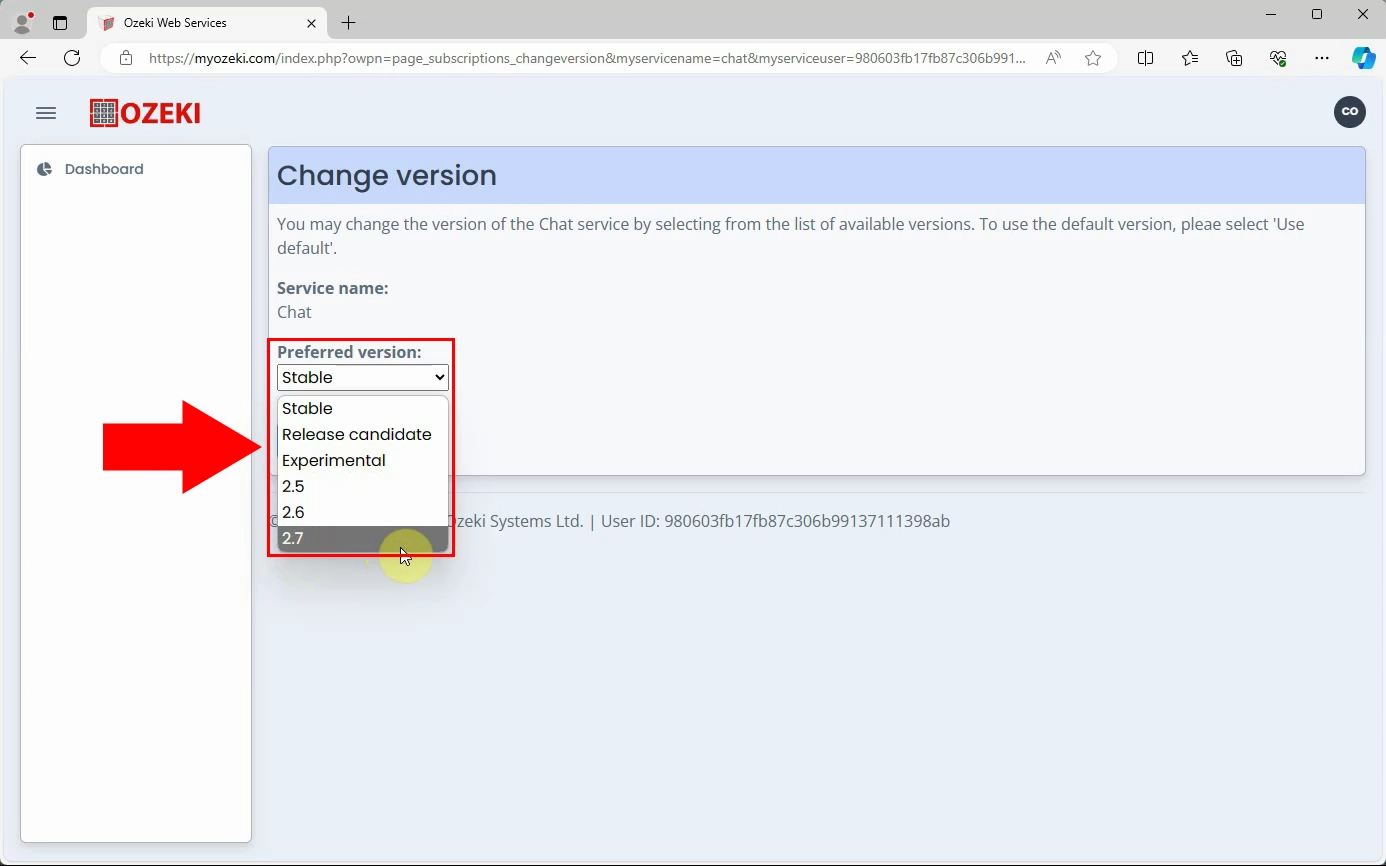
Click on the dropdown menu as illustrated in Figure 5, and select your desired version.
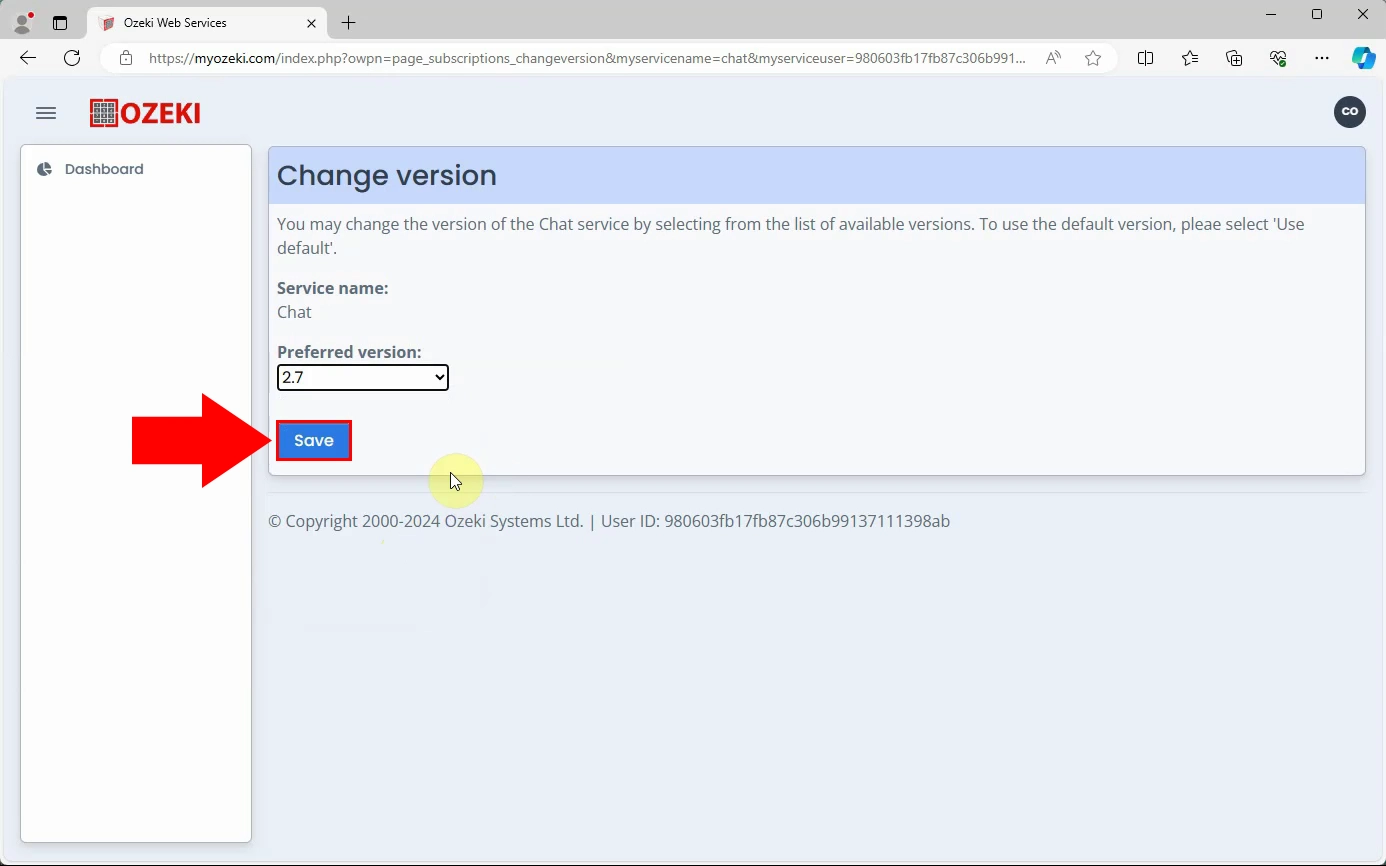
After that, click Save, as you can see in Figure 6.
If you have done everything correctly, going back to the About section of Chat will show the new version number now, similarly to Figure 7.
Why should I use this feature?
Changing the version allows you to either downgrade to an earlier version of Chat if you are having technical difficulties with the current one, or try an experimental version if you are curious about the new features and don't mind if it is not completely polished yet.
Do I have to manually update Chat every time?
No, if you leave the version dropdown list on Stable (this is the default option), it will always automatically update to the latest stable release. However, if you leave it on a specific version, it will not update until you change it.
More information
- How to change the chat client version in Ozeki chat
- How to create chat user account
- How to delete a chat user account
- How to suspend a chat user account
- How to reset a chat user password

