How to connect a Softphone to the
Ozeki Phone System
Softphones are a special kind of computer software, functioning as a virtual phone, allowing people to communicate with others over the Internet using their PC or laptop. In this guide you are going to connect a softphone (X-Lite Softphone) to the Ozeki Phone System. Below you can find the step-by-step explanation of the the whole process.

How to connect them?
By using SIP protocol you can use your softphone as a full-featured extension like a desktop VoIP phone. You only need to create a new SIP account and complete the proper configuration. Just follow 3 simple steps:
Step 1: Create a SIP account in Ozeki Phone SystemStep 2: Set up X-Lite Softphone
Step 3: Setup dial plans
Step 4: Make a test call
Step 1: Create a SIP account in Ozeki XE
In order to connect your softphone to Ozeki Phone System, first you need to create a SIP Extension. You can find detailed guide about how to create a SIP Extension here.
In the next step, you are going to connect a Softphone to the Ozeki Phone System. (In this guide X-Lite Softphone software is used, but the steps are similar to other software).
Step 2: Set up X-Lite Softphone
First, you need to download CounterPath X-Lite softphone. After you have installed and started it on your PC, its user interface will appear automatically.
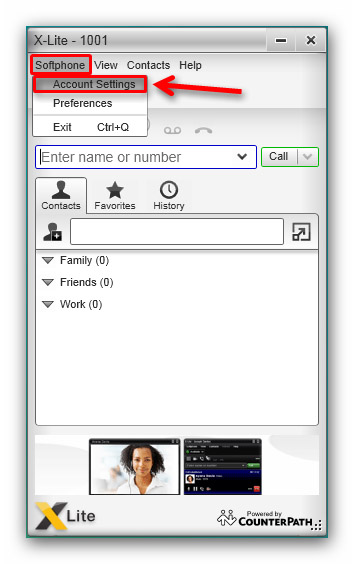
For configuring your Softphone, you need to setup a SIP account by navigating to the SIP account settings. You can achieve this by selecting Softphone at the upper menu bar, then selecting Account Settings within it. (Figure 2):
There, select the Account tab, and fill the following data fields: Account Name, User ID, Domain, Password, Display name, Authorization name and Proxy Address.
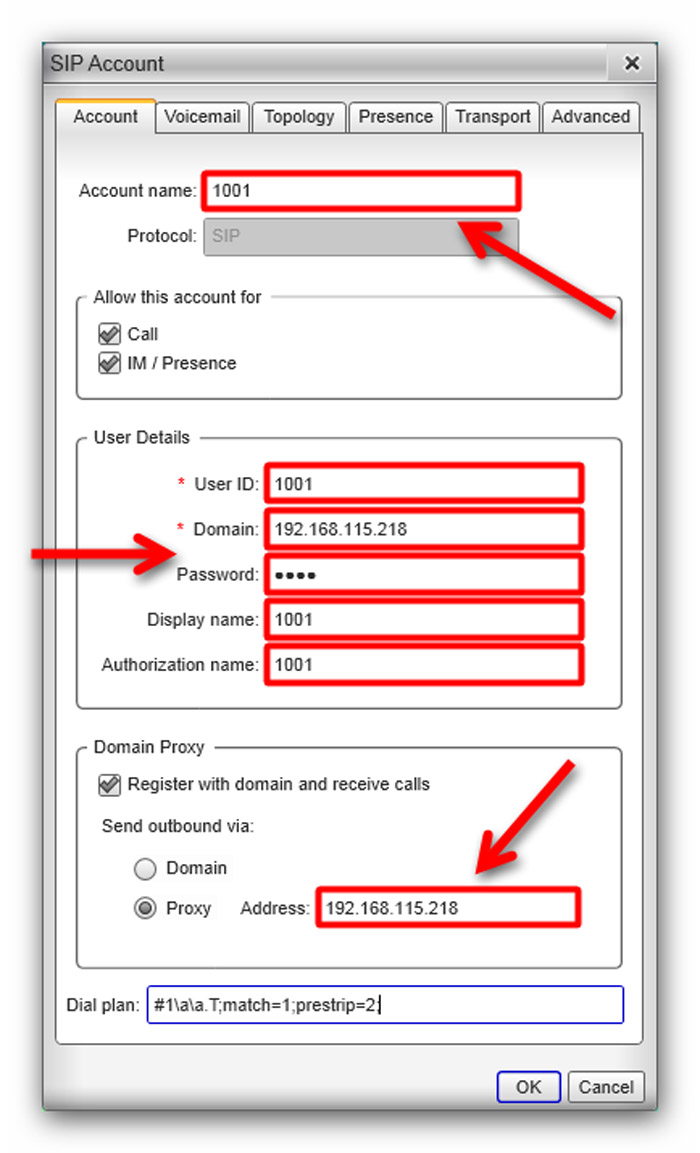
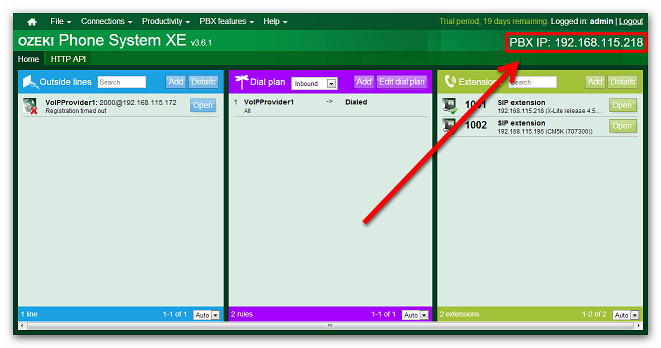
The User ID field in X-Lite Softphone and the Authentication name field in the Ozeki XE SIP Extension have to contain the same data. Moreover, the Domain field has to contain the IP address of the Ozeki Phone System XE (Figure 4), which can be seen at the top right corner of the Ozeki XE GUI.
After specifying the SIP details, click on the 'OK' button at the bottom of the SIP account configuration panel in X-Lite softphone.
Step 3: Setup dial plans
Step 4: Make a test call
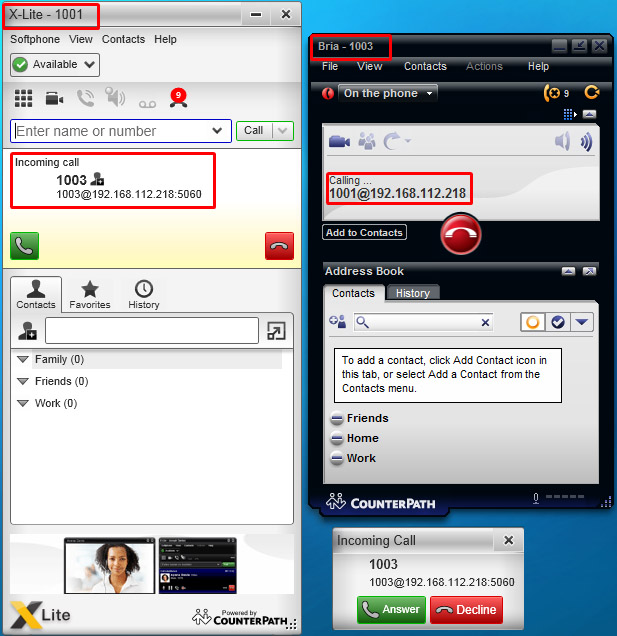
In the final step, we are going to dial the phone number of the X-Lite Softphone by using another SIP extension.(Bria) (In this example the No. 1003 extension dialled the new No. 1001 X-Lite Softphone extension.)
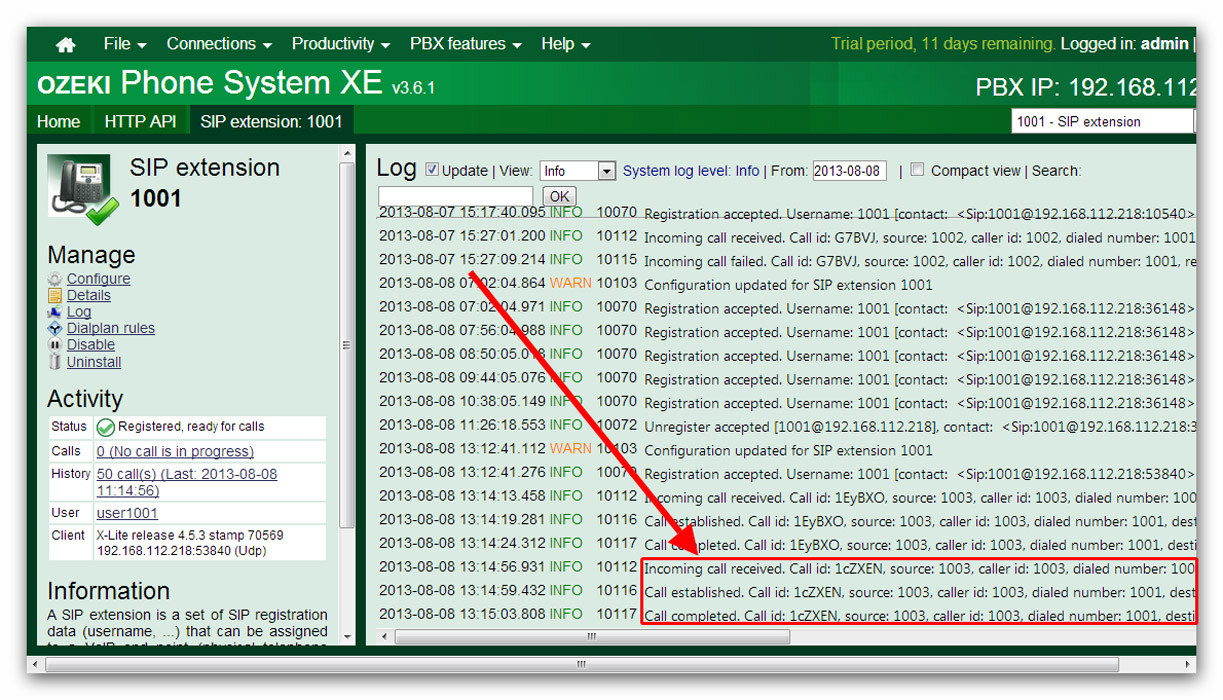
The whole call process can be tracked in the Log panel of your extension:
Conclusion
The guide above presented that Softphones can be used as an analog phones and can be easily connected to the Ozeki Phone System. If you carefully followed that guide, you will be able to install a new SIP extension in the Ozeki Phone System and connect your Softphone to it.
If you have any questions or need assistance, please contact us at info@ozekiphone.com
Dig deeper!
- Learn how to setup a mobile extension on Android
- Learn how to setup a mobile extension on iPhone
- Learn how to setup a mobile extension on Windows Phone
People who read this also read...
