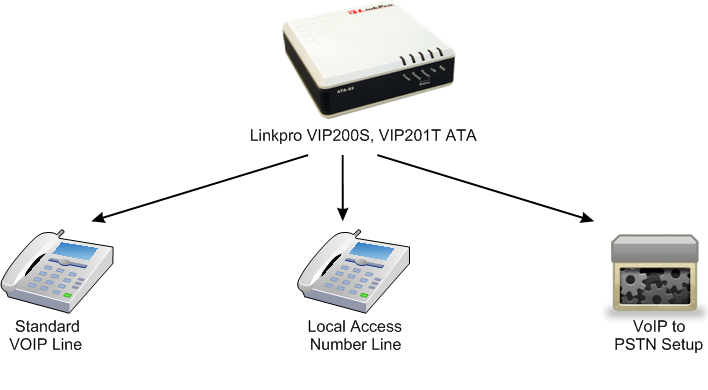
How to setup a LinkPRO VIP200S, VIP 201T ATA
Communication via the Internet is unavoidable in worldwide multinational companies. However, you need certain devices for digital communication. This article introduces two basic devices you will need, although you can get anything similar of another brand. This page is useful for you to read if you would like to know how to setup these kinds of devices.
Ozeki Phone System needs a device to digitalise analog signals for data transmission via the Internet, and to convert digital data back to analog signals for the PSTN, or Public Switched Telephone Network, which is in existence since the beginning of the last century, and it includes landline and mobile telephone networks.

Two devices can do this conversion: IP Phones, like LinkPRO VIP200S and Analog Telephone Adapters. First, let us see how we can setup LinkPRO VIP200S.
-
Identify your phone's IP address, which is the unique address given to each computer in the network as destination addresses by the Internet Protocol.
- On your phone: Press Setup → Select Network or press 9 → scroll down to see you IP address.
- In the IVR Configuration Menu (Interactive Voice Response the interactive menu that you can use with the keys of your telephone or with automatic voice recognition): pick up the handset → press Setup → type in 110 # → you can hear the IP address.
-
Type the IP address into an Internet browser.
-
Click “Admin Login” → “Advanced” (top of the page) → Click on “Ext1” tab.
-
Set “Line Enable” field to “yes”
-
The IP address of Ozeki Phone System needs to be given in the Proxy field of “Proxy and Registration” section.
-
In the “Subscriber Information” section give the name you would like to appear on your phone in the “Display Name” field → Enter the extension number into the “User ID” field → The extension's Authentication Password should be given in the “Password” field → Set “Use Auth ID” field to “yes” and enter the Authentication ID into “Auth ID” field.
-
Type “ [x*].” (no quotation marks) into the “Dial Plan” field of the “Dial Plan” section.
-
Under “SIP” tab (Session Initiation Protocol starts, ends and maintains connection during multimedia sessions): Set “RTP packet size” to “0.020”
-
At the bottom of the page, click on “Submit All Changes”
-
Your phone will reboot and ready to be used after that.
If you would like to use Ozeki Phone System, you need to install LinkPRO VIP 201T ATA, unless you have a router, or your modem has router function. If your computer is connected to the modem with a USB cable, then unplug it on both ends, since you will not need it, but you will need an ethernet cable (it looks like a phone cable) to connect your modem and adapter with it.
Steps of Installation:
-
Turn off or unplug your computer, adapter and modem.
-
Disconnect your computer from the Internet, and use the very same cable to plug into the PC port of your ATA (Analog Telephone Adapter does the analog-digital conversion, here it is LinkPRO VIP 201T ATA).
-
With an ethernet cable, connect the WAN port of your ATA and your modem (from where you unplugged the cable in Step 2).
-
Connect your phone to the Phone 1 port on the ATA with a phone cable.
-
Turn on the modem and the PC (Personal Computer), and wait for a few minutes, so that they would have enough time to run properly.
-
Plug in your ATA, to turn it on. As long as the light is red, the adapter is not connected, so do not make a call, but after that you are ready to do that.
As you can see, regardless of its versatility, Ozeki Phone System is still easy to manage, due to the next generation technology it uses. This system can always guarantee you powerful and high quality communication that you and your company needs in this harsh competition of our days.
People who have read this article, also read the following:
If you have become interested, please watch our video:
How to setup a LinkPRO VIP200S, VIP 201T ATA (Video tutorial)
More information
- How to setup Ozeki PBX
- How to setup Call Recording
- How to setup Call Center
- How to setup a VoIP Gateway
- How to setup a PBX Cluster
- How to setup Ozeki PBX on VMWare
- How to setup Ozeki PBX on KVM
- How to setup Ozeki PBX on ESXi
- How to setup a VoIP service
- How to setup Direct Dial In (DID)
- How to setup a Mobile VoIP Extension
- How to setup an ISDN to VoIP Gateway
- How to setup VoIP at Home
- VoIP installation on DSL
- How to setup VoIP on Broadband
- How to setup a Linksys 3102 ATA
- How to setup a LinkPRO VIP200S, VIP 201T ATA
- How to setup Asterisk VoIP Server and Ozeki PBX
- How to setup Fring VoIP calls with Ozeki PBX

 Sign in