How to configure GoIP 1 GSM to VoIP gateway with Ozeki Phone System
In this article, you will learn how to configure a GoIP 1 GSM to VoIP gateway and integrate it seamlessly with the Ozeki Phone System. The guide covers setting up the GoIP device for SIP trunking, enabling GSM call routing, and adjusting both basic and advanced VoIP settings to ensure smooth communication between mobile networks and your VoIP PBX. Additionally, you'll see how to connect an AI-powered phone line in the Ozeki AI Chat Server, allowing intelligent call handling with speech recognition and AI responses. By following these steps, you can turn your GoIP gateway into a smart, AI-enhanced telephony solution.
What is GoIP 1 GSM?
GoIP 1 GSM is a GSM to VoIP gateway device that allows you to connect a mobile GSM network to a VoIP (Voice over IP) system. It enables voice communication by converting GSM calls into SIP-based VoIP calls, making it ideal for businesses looking to integrate mobile networks with their PBX systems or IP telephony solutions. The GoIP 1 is commonly used for call routing, cost-saving on mobile calls, and creating flexible telecommunication setups (Figure 1).
What is Ozeki Phone System?
Ozeki Phone System is a versatile VoIP PBX software that allows businesses to manage phone calls over IP networks. It supports SIP-based communication, enabling connections with VoIP devices, gateways, and traditional phone lines. The system offers advanced features like call routing, IVR, voicemail, and AI integration for intelligent call handling. It's designed to improve communication efficiency by combining classic telephony with modern, AI-powered automation.
GoIP 1 GSM Confiugration (Quick Steps)
- Access the GoIP web interface and assign a static IP address.
- Set Config Mode to Trunk Gateway and enter PBX IP.
- Advanced VOIP settings, set Call OUT Auth Mode to None.
- Enable Call OUT and Call IN via GSM.
Add new AI Phone lin in Ozeki AI Chat server (Quick Steps)
- Install the AI Phone Agent in Ozeki AI Chat Server.
- Configure SIP settings to connect the AI phone line to your PBX.
- Assign Speech-to-Text and Text-to-Speech models for AI call handling.
- Activate the AI phone agent and verify PBX registration.
- Create a new route to manage incoming and outgoing AI-driven calls.
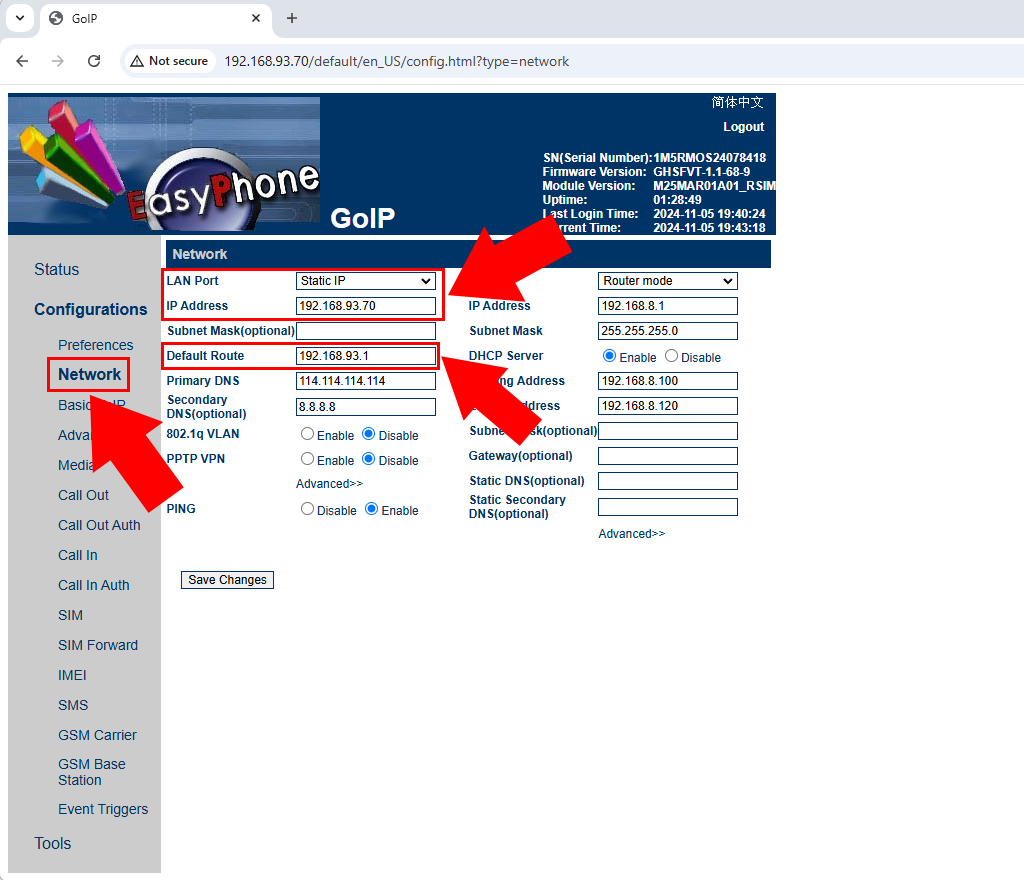
Step 1 - Set FIP IP address
Access the GoIP web interface and assign a static IP address and Default Route to the device under the network settings. This ensures stable communication between the GoIP gateway and your PBX system (Figure 2).
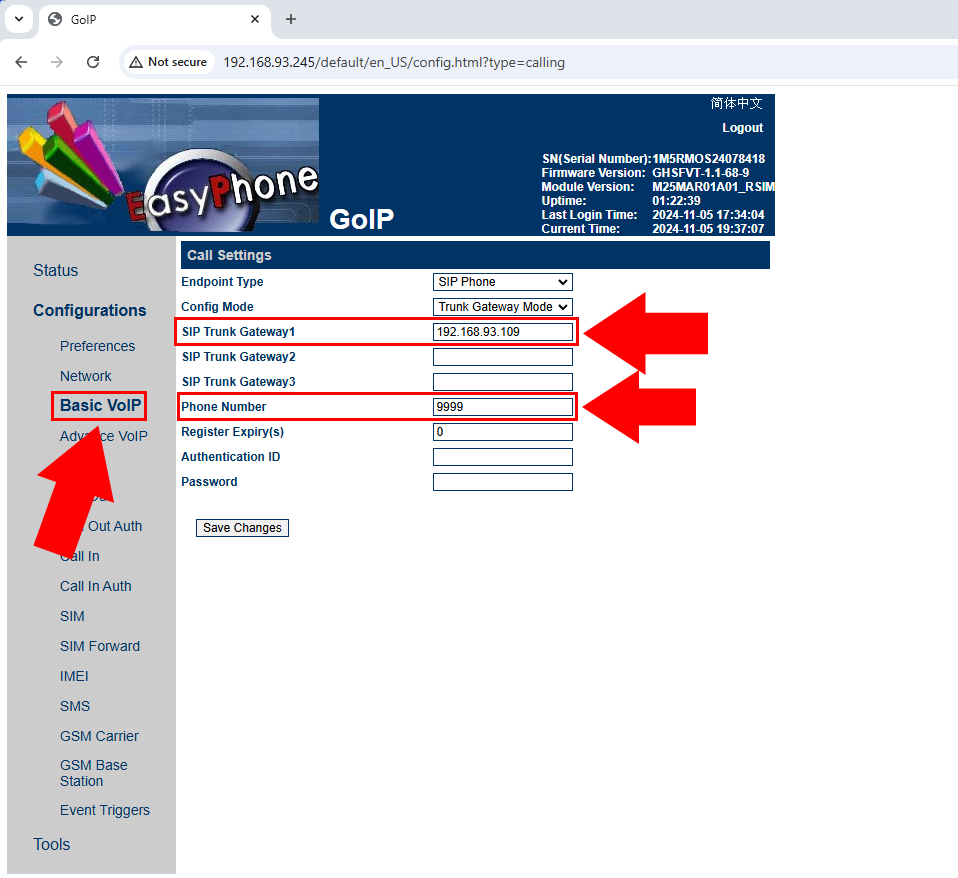
Step 2 - Basic VOIP settings
In the Basic VOIP settings, set the Config Mode to Trunk Gateway mode. Enter your PBX server's IP address in the SIP Trunk Gateway1 field, and define a phone number that the GoIP will use for VoIP registration and call routing (Figure 3).
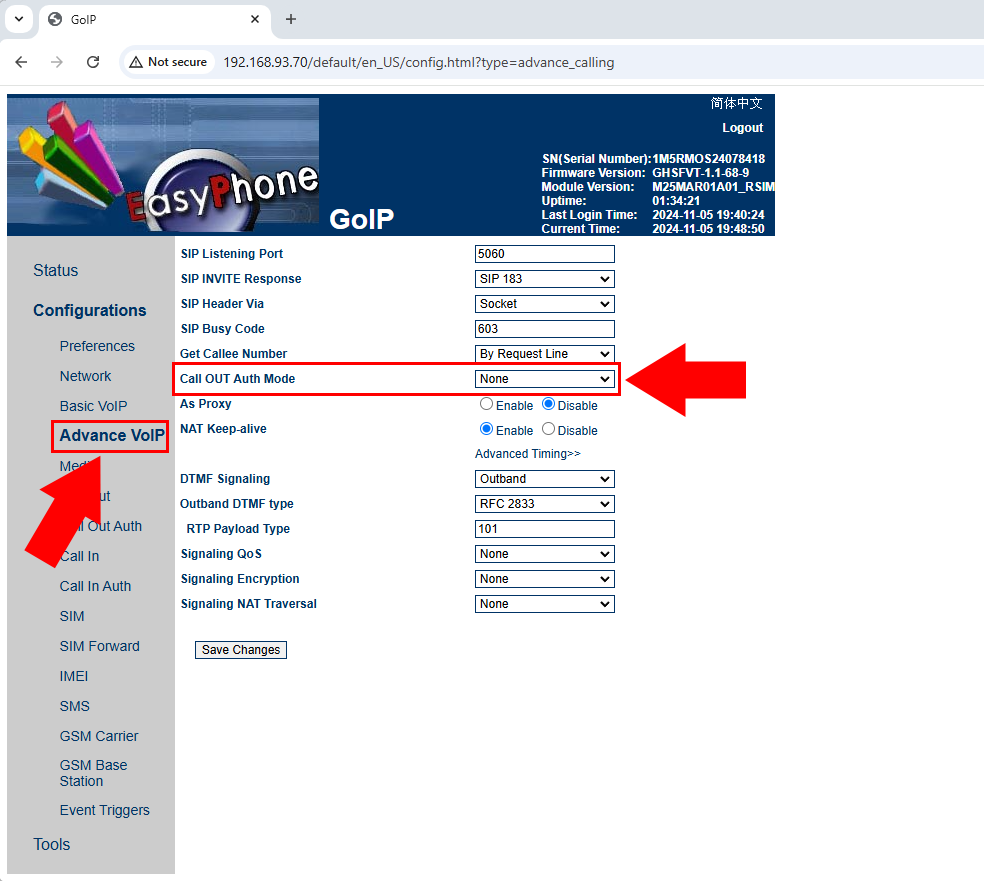
Step 3 - Advance VOIP settings
Navigate to the Advanced VOIP settings and set Call OUT Auth Mode to None. This disables outbound call authentication, which is suitable for trunk-based configurations where authentication isn’t required (Figure 4).
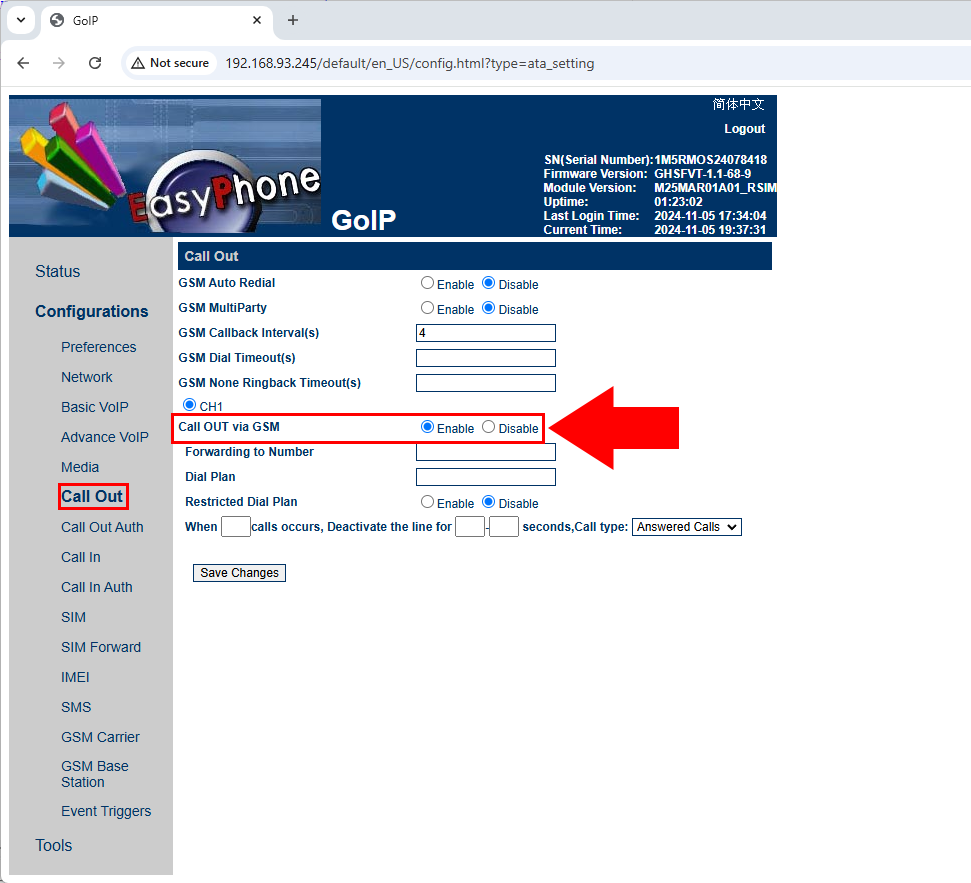
Step 4 - Call Out settings
Enable Call OUT via GSM to allow outgoing calls from your VoIP system to be routed through the connected GSM network. This setting activates the gateway function for outbound calls (Figure 5).
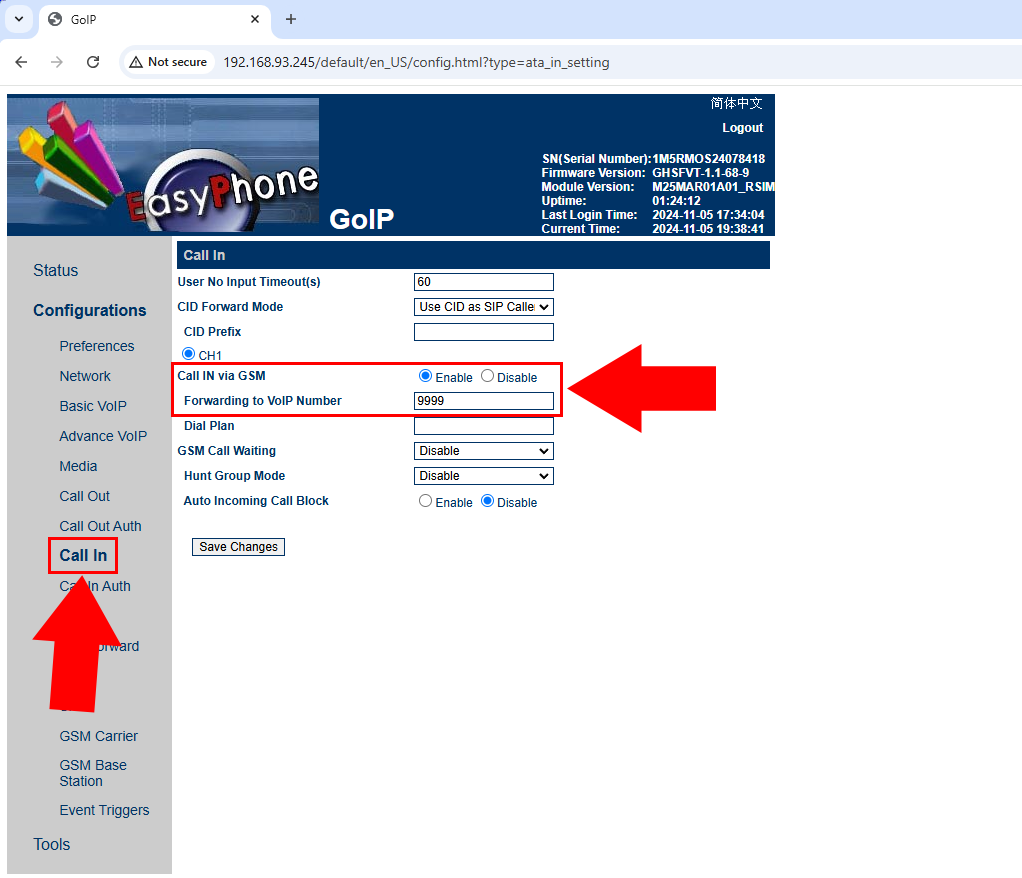
Step 5 - Call IN settings
Enable Call IN via GSM to accept incoming calls from the GSM network. Set the Forwarding to VoIP Number field to the phone number you configured earlier on the Basic VOIP page to ensure incoming GSM calls are properly forwarded to your PBX (Figure 6).
Add new AI Phone lin in Ozeki AI Chat server (Video tutorial)
In this video, you will learn how to integrate an AI-powered phone line within the Ozeki AI Chat Server to enhance your telephony system with intelligent call handling. The tutorial guides you through installing the AI Phone Agent, configuring SIP settings to connect with your PBX (including the GoIP gateway), and assigning Speech-to-Text and Text-to-Speech models for real-time AI conversations. You’ll also see how to register the AI phone line to the PBX, set up routing rules, and finalize the connection. By the end of the video, your AI phone line will be fully operational, capable of handling incoming and outgoing calls with advanced AI-driven responses.
Step 6 - Install AI phone agent
Start by installing the AI Phone Agent in Ozeki AI Chat Server. This component will handle VoIP communication and AI integration for phone calls (Figure 7).

Step 7 - Configure SIP settings
Enter your SIP account details, including display name, username, register name, password, domain, port, proxy parameters to connect the AI phone line to your PBX system (Figure 8).

Step 8 - Set AI speech models
Assign the Speech-to-Text, Text-to-Speech models to the AI phone agent. These models will enable real-time voice recognition, AI responses, and voice synthesis during calls (Figure 9).

Step 9 - AI phone registered to PBX
Once configured, verify that the AI phone line has successfully registered with your PBX. Turn the connection status indicator on (Figure 10).

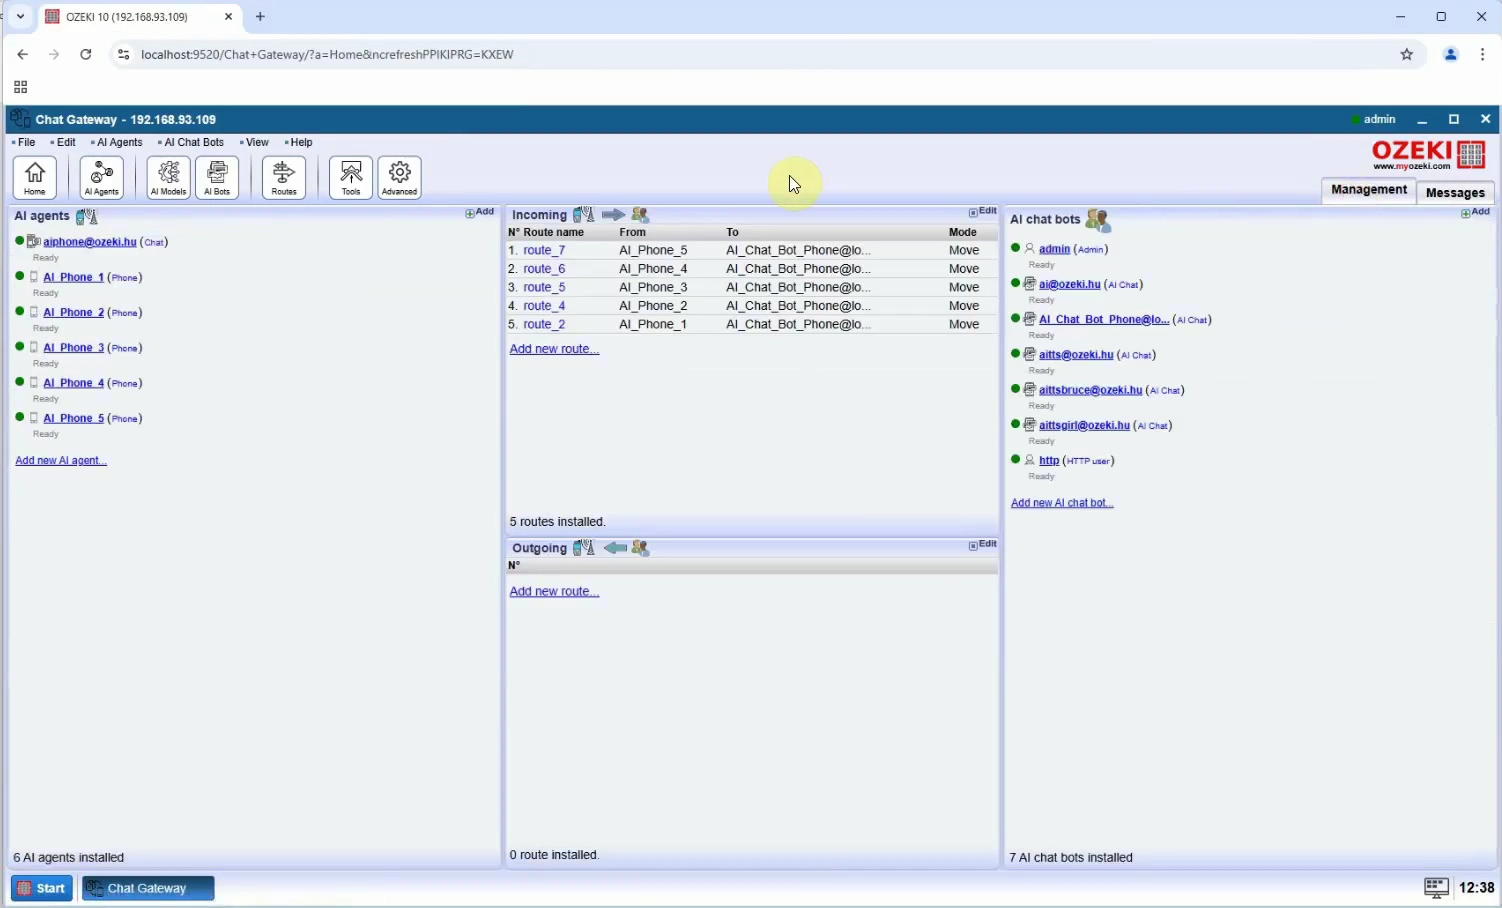
Step 10 - Create new route
To set up a new route, click the "Routes" button located at the top of the screen. Then, select "Create new Route" and configure the sender and receiver routes on the right side (Figure 11).

Step 11 - AI phone connection created
After completing the setup, your AI phone connection is fully operational. The AI system is now ready to handle and respond to phone calls intelligently (Figure 12).