How to upgrade your Ozeki Phone System
This guide demonstrates how you can upgrade the Ozeki Phone System software manually. Upgrading refers to the process of going from an earlier version of the PBX to the latest version. Manual upgrade can be used if the automatic upgrade is not available for any reason.
Step 1. Copy your original installation
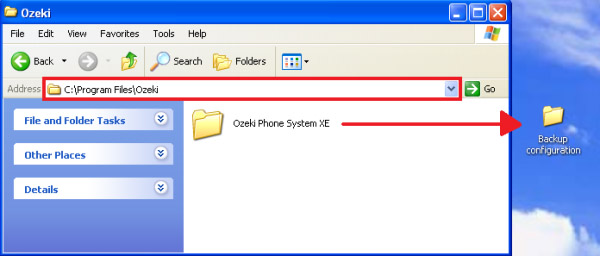
As the first step in the upgrade process, you need to copy your current installation of the Ozeki Phone System. In this way, you can make sure that all your configurations will be available after you have upgraded to the latest version. For this purpose, open the C:Program FilesOzeki directory, select the Ozeki Phone System subdirectory, then press Ctrl+C. Then press Ctrl+V in another directory in which you wish to backup your configuration (Figure 1).

Step 2. Uninstall your current installation
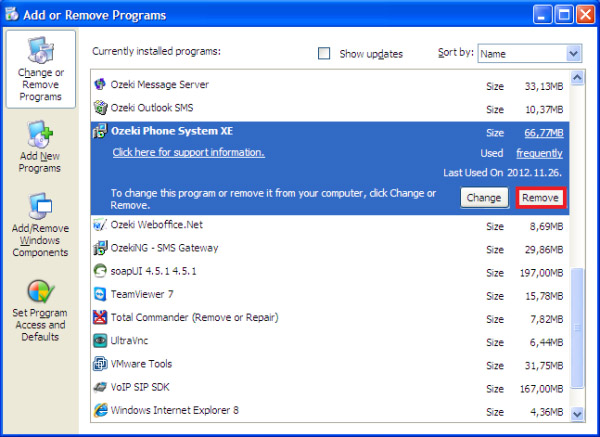
Now you need to uninstall the current installation of the Ozeki Phone System. For uninstallation, please go to the Windows Control panel. Click on Remove on the Ozeki Phone System entry in the Add/remove programs group (Figure 2).

Step 3. Delete the original Ozeki Phone System directory
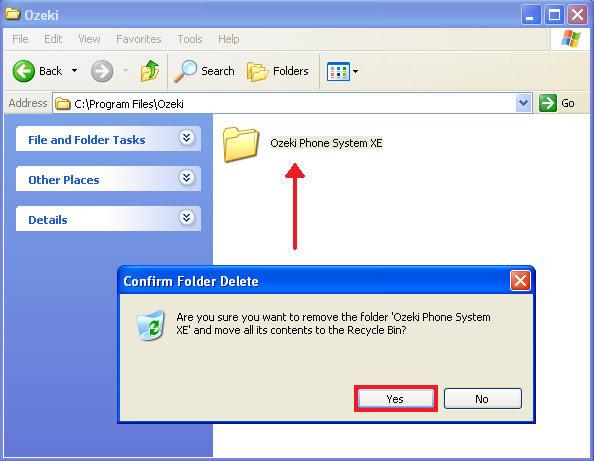
As the next step, you need to delete the original directory of Ozeki Phone System. This way, you can ensure a clean re-installation. Ozeki Phone System is originally installed in the C:Program FilesOzeki directory. The uninstaller leaves your configuration in place by default.

Step 4. Install the new version
Now you can start to re-install your system. Please make sure that you have downloaded the latest version of Ozeki Phone System from the download page. Once it is downloaded, the installation wizard is launched and you can follow the steps of the standard installation process. You can find help about the installation process on the Installation steps page.
Step 5. Copy the configuration files from the backup directory
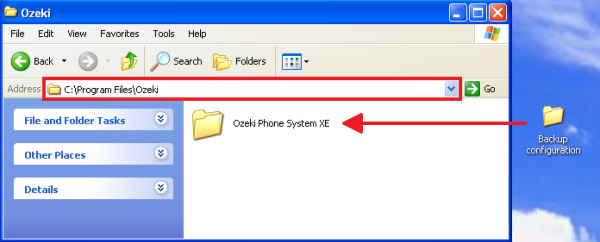
In order to use your earlier configurations, you need to copy the configuration files from the backup directory. Then simply paste them into the new installation directory of the Ozeki Phone System. Overwrite the files, if Windows prompts for it (Figure 4).

Step 6. Restart the service
Finally, it is recommended to restart the Ozeki Phone System service and/or your computer to make sure the updated configuration is loaded.
Helpful pages to get started with PBX:
- How to connect telephones to the Ozeki Phone System?
- Connect the Ozeki Phone System to a telephone network!
- Connect your smartphone to the Ozeki Phone System!
- How to setup SMS messaging with the Ozeki Phone System?
- How to setup VoIP provider connectivity?
For more information please contact us at info@ozekiphone.com
More information
