Install and configure Ozeki Phone System in a few steps
As the first step in setting up your corporate phone system, install the Ozeki Phone System VoIP PBX. This software will provide the professional technical background for your system. Once it is installed in a few minutes, you can start to configure and customise your system.
You can download Ozeki Phone System from the download page. You may check the system requirements on prerequisites page. After you downloaded the Ozeki Phone System, you can start the installation process by launching the installation wizard.
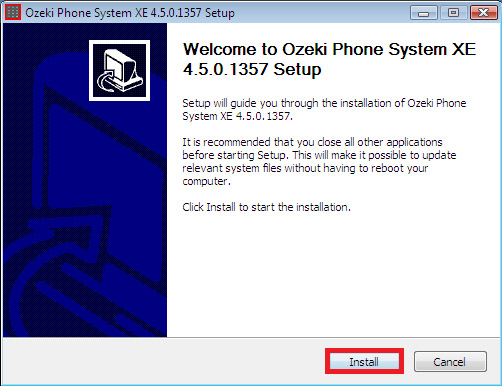
First steps – install the PBX to your computerLaunch the installation wizard. Click on the Install button in the welcome page of the wizard (Figure 1).
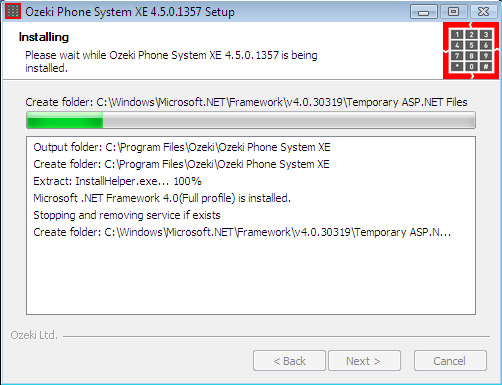
Watch as the installation takes place automatically (Figure 2).
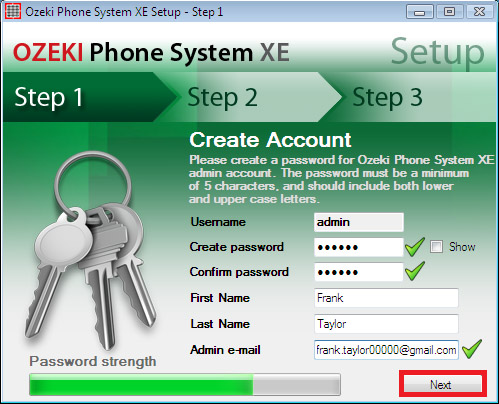
At the end of the installation process, as first step you will be asked for a username, full name, e-mail address and a password for the admin account. You will be able to use this password to log into Ozeki Phone System (Figure 3).
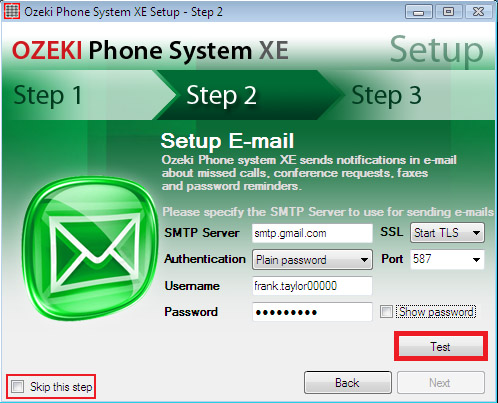
As second step you will be asked for the login details of the admin e-mail account. You can test the correctness of the e-mail account settings by clicking on the Test button after you have typed in the login details or you can skip this step, by ticking off the Skip this step option (Figure 4).
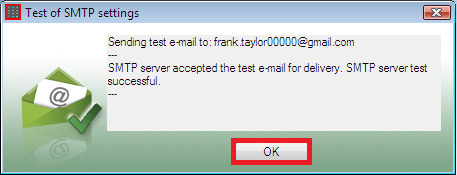
You will see the following window if the testing of the e-mail account settings was successful (Figure 5).
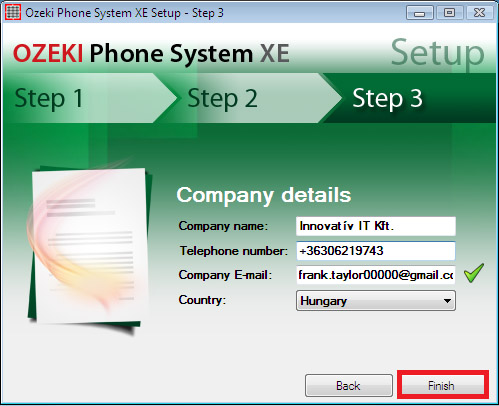
As third step you will be asked for the details of your company (Figure 6).
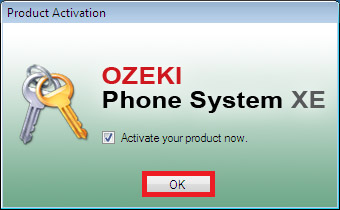
After you have clicked on Finish the product activation window will appear next (Figure 7).
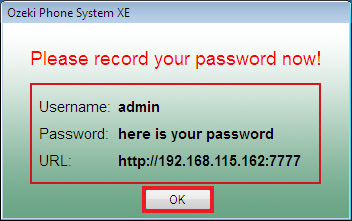
By clicking on OK a window will appear with the username, password and URL which belong to Ozeki Phone System (Figure 8).
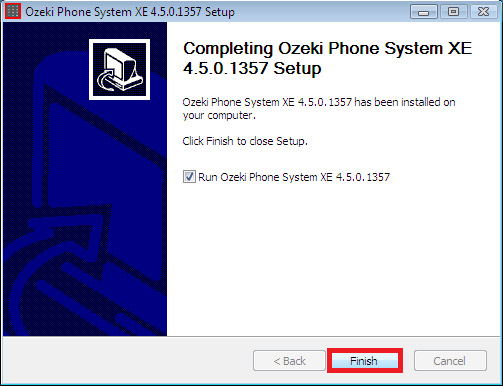
With this the Ozeki Phone System is successfully installed on your computer, you receive a notification about it in the next window. Now you can click on Finish (Figure 9).
As you have closed the installation wizard, you will find a shortcut on the desktop to the PBX (Figure 10).

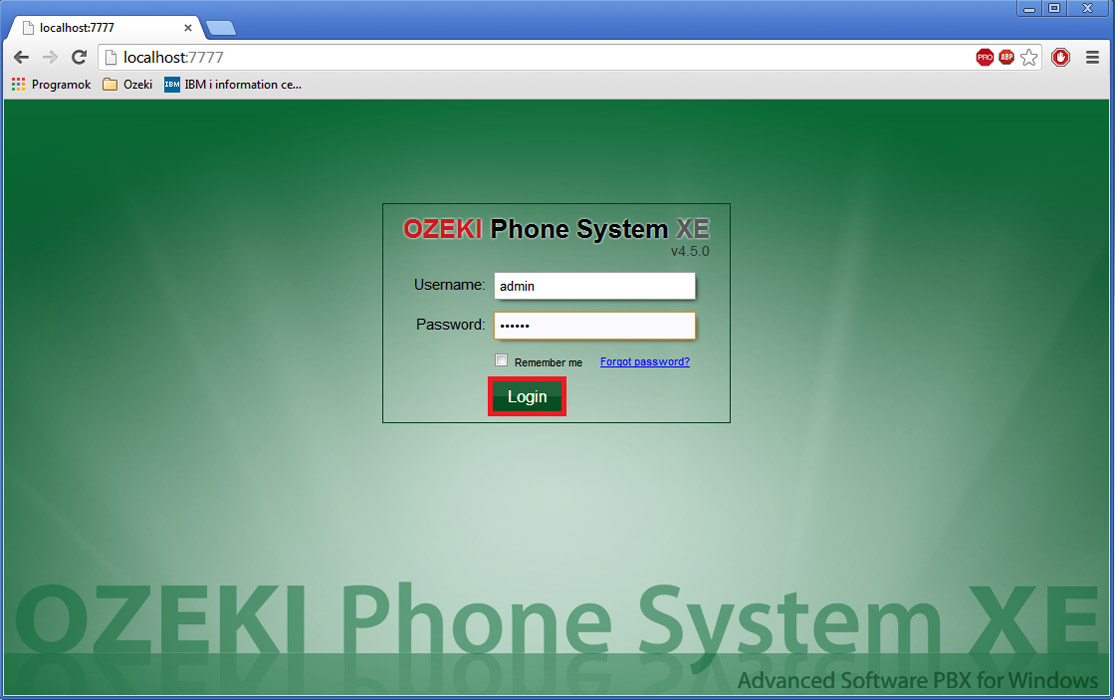
The login window is also launched automatically. Here you can login to the software (Figure 11).
This article demonstrates how to install Ozeki Phone System on your computer efficiently. Now you can start to configurate the PBX to your needs.
Helpful pages to get started with PBX:
- How to connect telephones to the Ozeki Phone System?
- Connect the Ozeki Phone System to a telephone network!
- Connect your smartphone to the Ozeki Phone System!
- How to setup SMS messaging with the Ozeki Phone System?
- How to setup VoIP provider connectivity?
If you have any questions or need assistance, please contact us at info@ozekiphone.com
More information
- How to install and configure Ozeki Phone System PBX
- How to backup and restore data in the Ozeki Phone System PBX
- How to upgrade your Ozeki Phone System software
- How to import configuration from 3CX
- How to import configuration from Asterisk PBX
- How to uninstall the PBX manually
