How to connect a VoIP Phone to an IP PBX
In this section you can get to know how can you connect a VoIP phone to your IP PBX (Internet Protocol Private Branch eXchange). Your VoIP phones can be easily connected to your Ozeki Phone System IP PBX. In order to make the connection, you need some devices and to get through a short and easy setup process. If you are one who wants to connect a VoIP phone to the revolutionary Ozeki Phone System IP PBX, this page is the perfect guide for you.
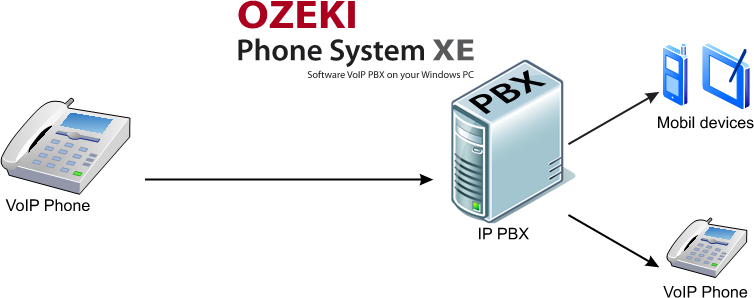
As you can see in Figure 1, any VoIP phone can be connected to your Ozeki Phone System IP PBX. Once the phone is connected, you can make calls via your Ozeki Phone System to any device, let it be a mobile device or another VoIP phone, or any other phone.

VoIP connection setup
To build up a VoIP connection you must have these physical equipment:
- Internet connection with the proper bandwidth
- VoIP service provider subscription
- ISDN or DSL modem (in most cases these are provided by the Internet service provider)
- an ATA adapter (Analog Telephone Adapter that connects the analog network to the VoIP network
- a switch or a router or any replacing device
- a phone
- your Ozeki Phone System IP PBX
Setting up the VoIP Connection
Follow these few steps to get your VoIP connection ready:
-
be sure that all your equipment are unplugged
-
plug the devices together with cables:
- plug in one end of an Ethernet cable to the FXO port of the DSL modem
- plug in the other end of the cable to the Internet port of the ATA adapter
- to connect a router or the switching device you use, connect it with the ATA with another Ethernet cable
- if you have traditional telephones, plug them into the ATA: take the phone jack and plug them into "Phone Port 1" etc. of the ATA
- plug the VoIP phones into the swtiching device
-
now plug in your devices to have electricity in order:
- first the ISDN / DSL modem
- than the ATA adapter
- the computer or router
- and the phones (the traditional and VoIP as well) in the end
-
Setup your Ozeki Phone System ip PBX (see below)
Having finished with the building up of physical connections,the next step is to install your IP PBX. With your Ozeki Phone System it is as easy as children's game.
To setup your Ozeki Phone System you have nothing else to do but to check the system requirements, download the Ozeki Phone System software and install it. Enter the webGUI, the graphical use interface. In the webGUI you can find the menu of your Ozeki Phone System: with the help of this menu, you can make any phoning devices to become an extension in your home network.
As soon as your devices became extensions in your Ozeki Phone System network, you can make configurations on them: adding to ring groups, configuring their place in the dial plan, setting up recording policies, and so on.
To get to know more about VoIP communication and how your Ozeki Phone System works, keep on reading with these pages:
- VoIP Routing explained
- Phone Calls on the Internet explained
- How to setup a VoIP service
- How to setup VoIP on Broadband
If you have become interested, please watch our video:
How to connect a VoIP Phone to an IP PBX (Video tutorial)
