How to create time profiles and assign them to dial plan rules
Time profiles can be used to setup such dial plans, that will allow incomming calls only at certain times e.g. working hours, otherwise those calls could be forwarded to a voicemail.
If your company has many incomming calls and you want to accept them only at certain times, then the time profile function of Ozeki Phone System is what you are looking for. Setting it up only takes a few minutes, so let's see the necessary steps for it.
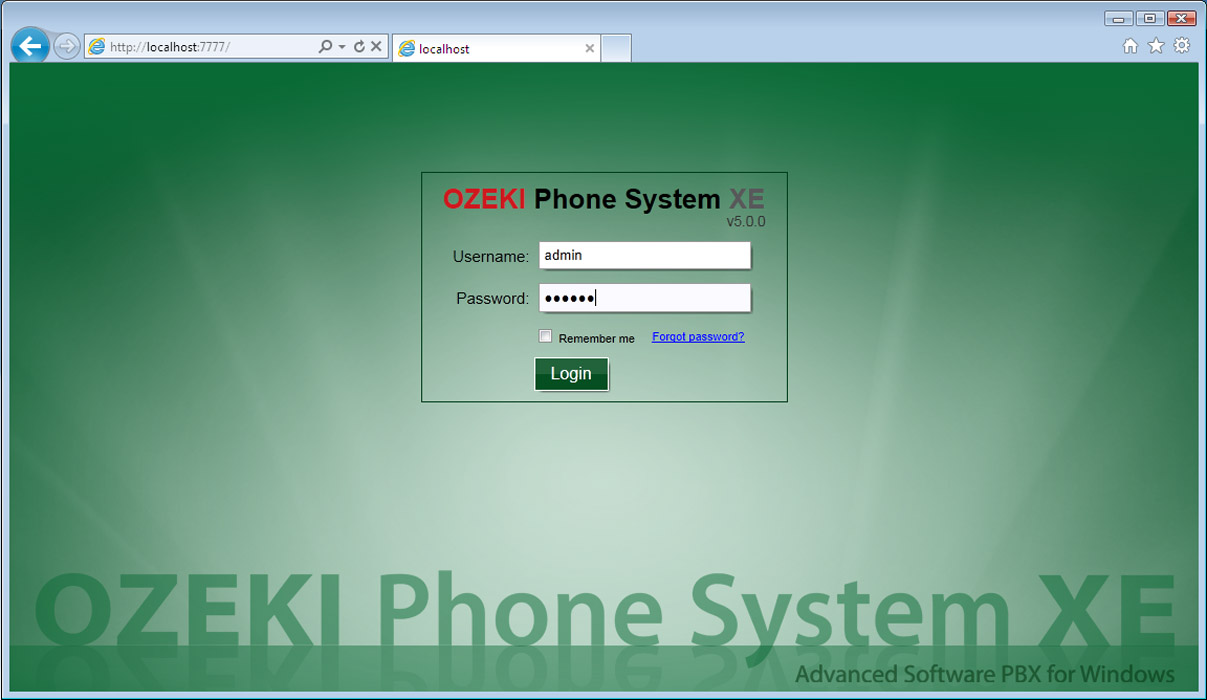
Step 1: Logging in to Ozeki Phone System
First of all, log in to Ozeki Phone System with your username and password.
Step 2: Adding a Time profile
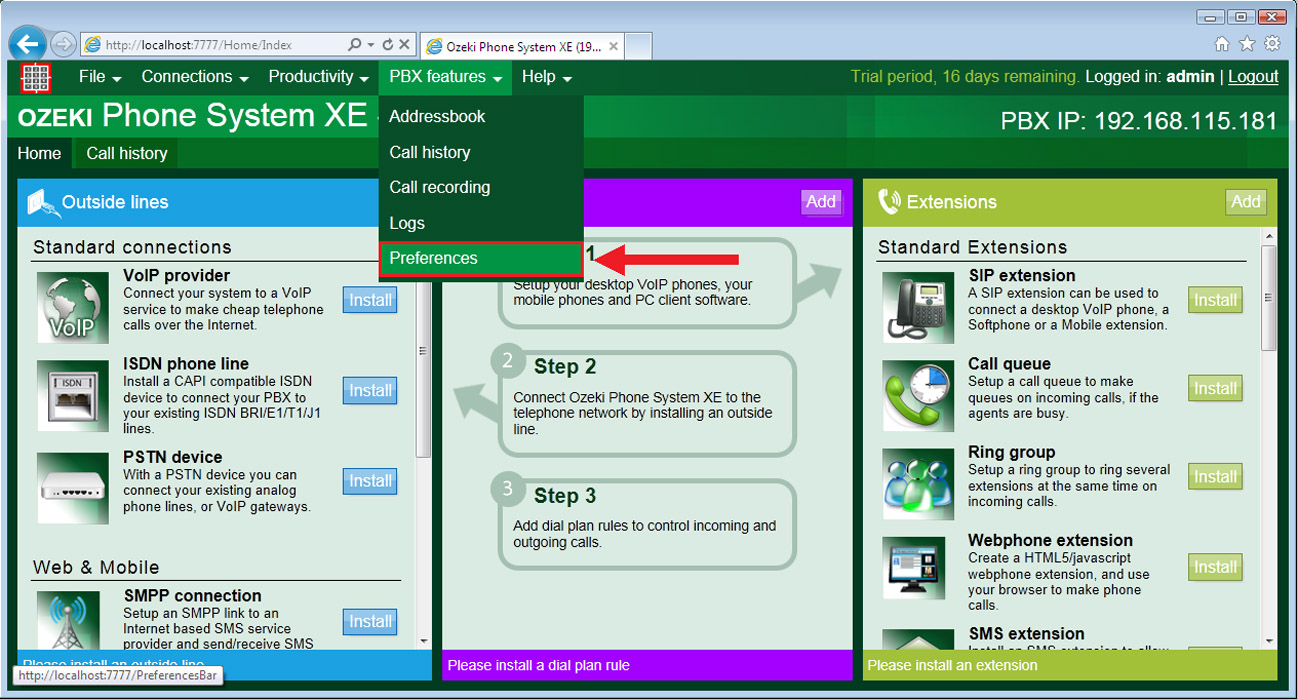
For this purpose navigate to the PBX features drop down list and select the Preferences as you can see on Figure 2.
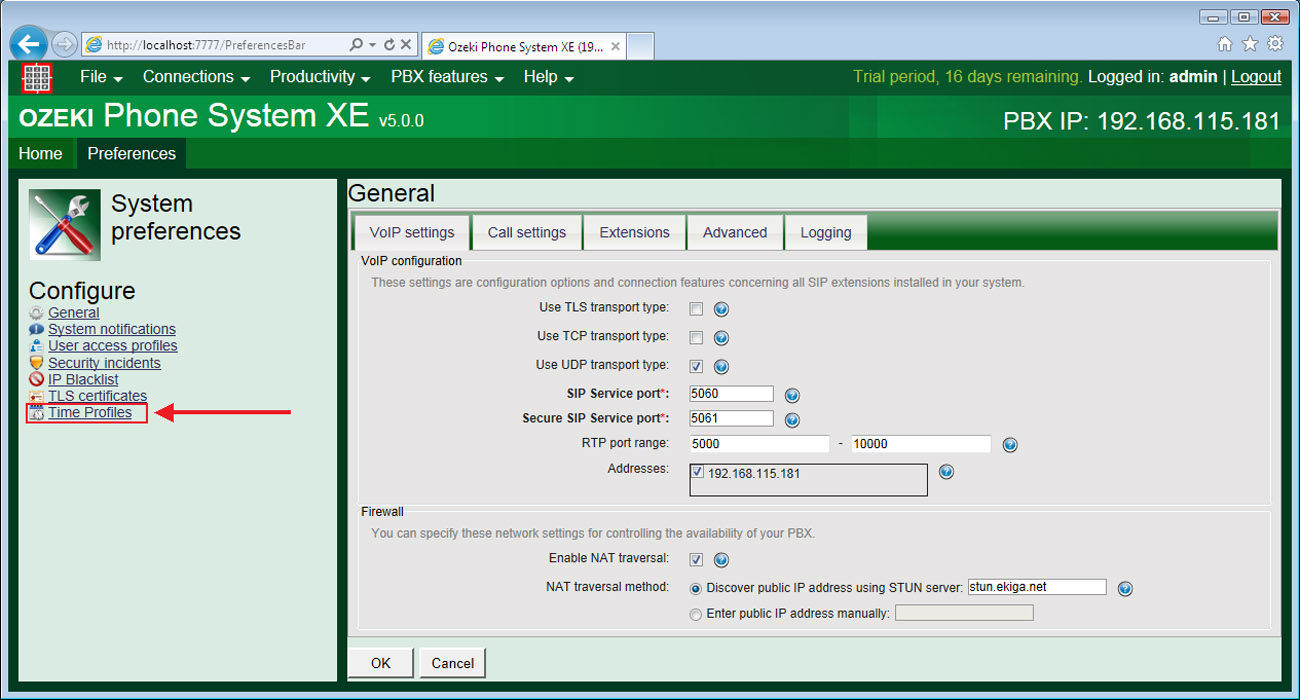
Click on Time Profiles at the bottom of the left side of the screen.
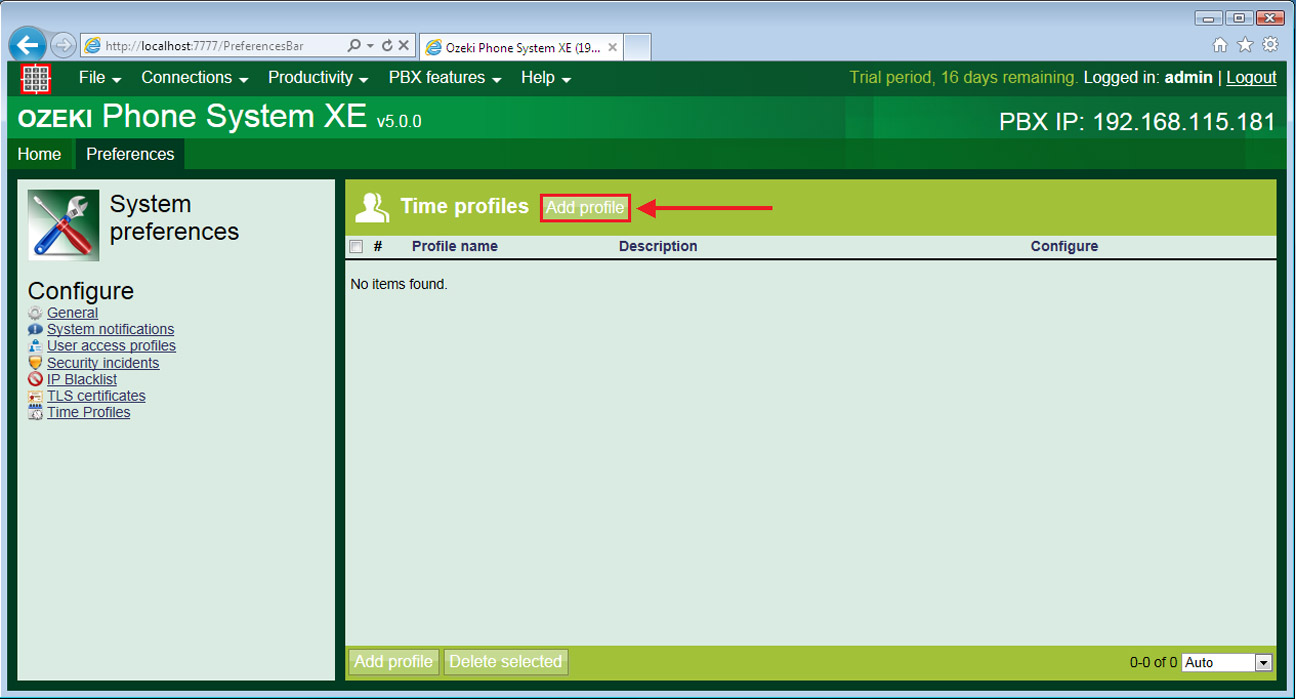
In the Time profiles window click on Add profile.
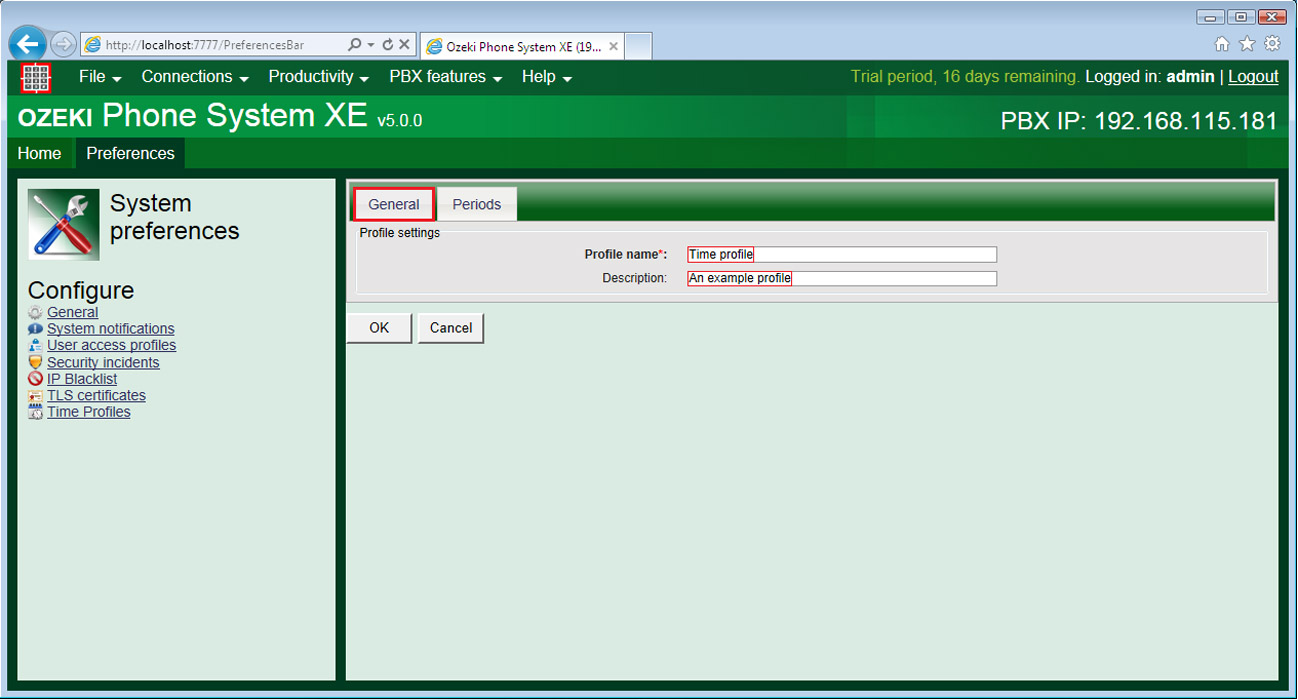
The time profile configuration window consists of two tabs, the first is the General tab, where you can set the name of the profile and add a description to it.
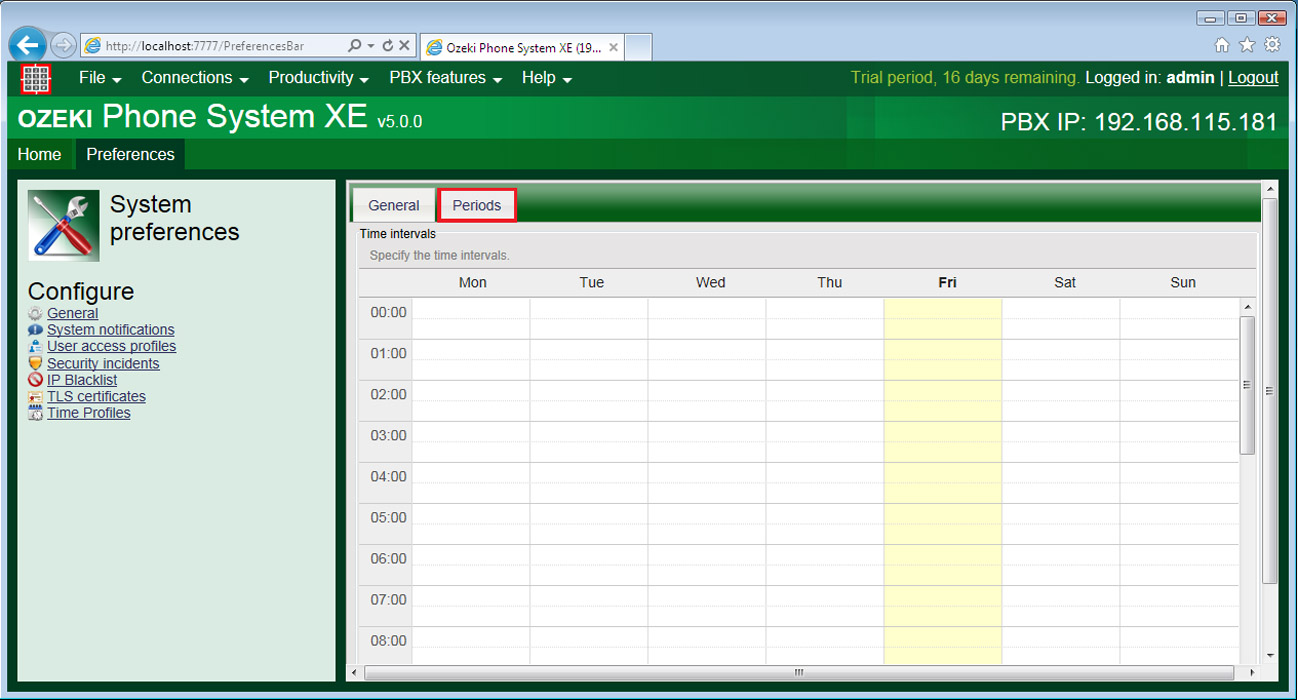
The second is the Periods tab, where you can specify the time intervals when you want to allow the incoming calls from outside lines (for example).
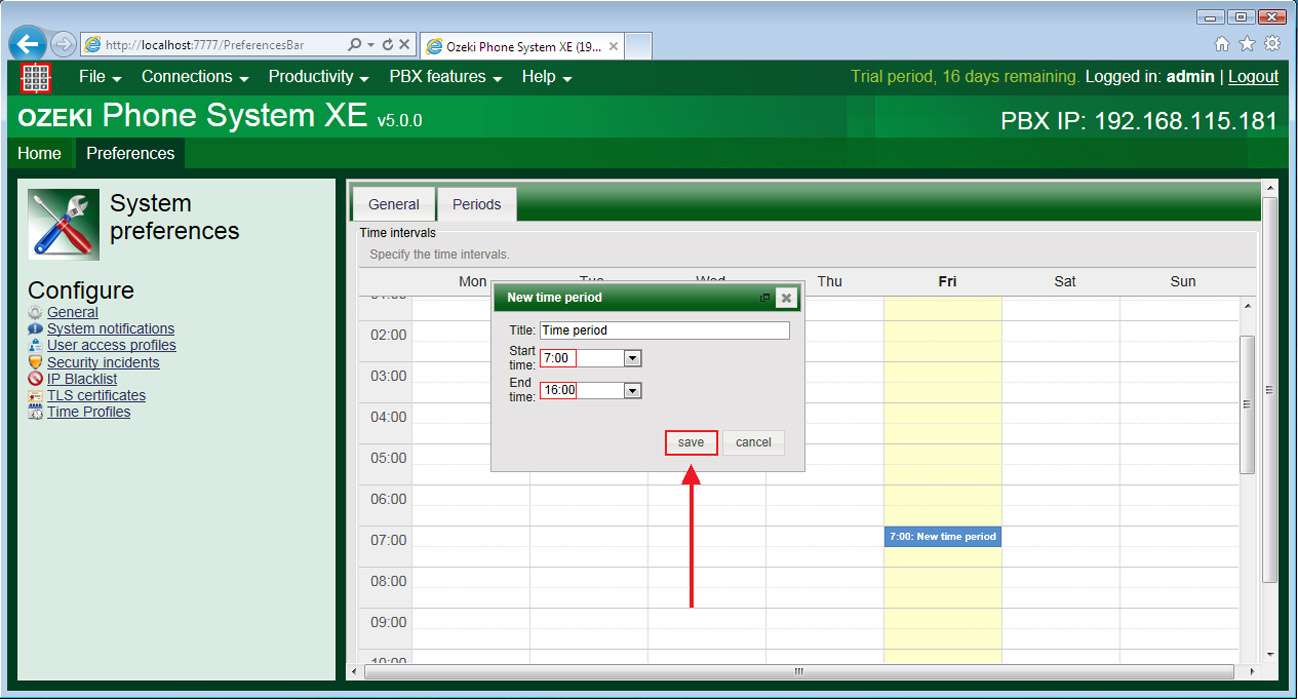
To specify the time intervals; just click on the starting hour of the choosen day and a "New time period" window will appear, where you can name the period and set its starting and ending time. This guide sets the "Start time" to 7 o'clock, and the "End time" to 16 o'clock, as Figure 7 shows. After you are done with the settings, click on the Save button.
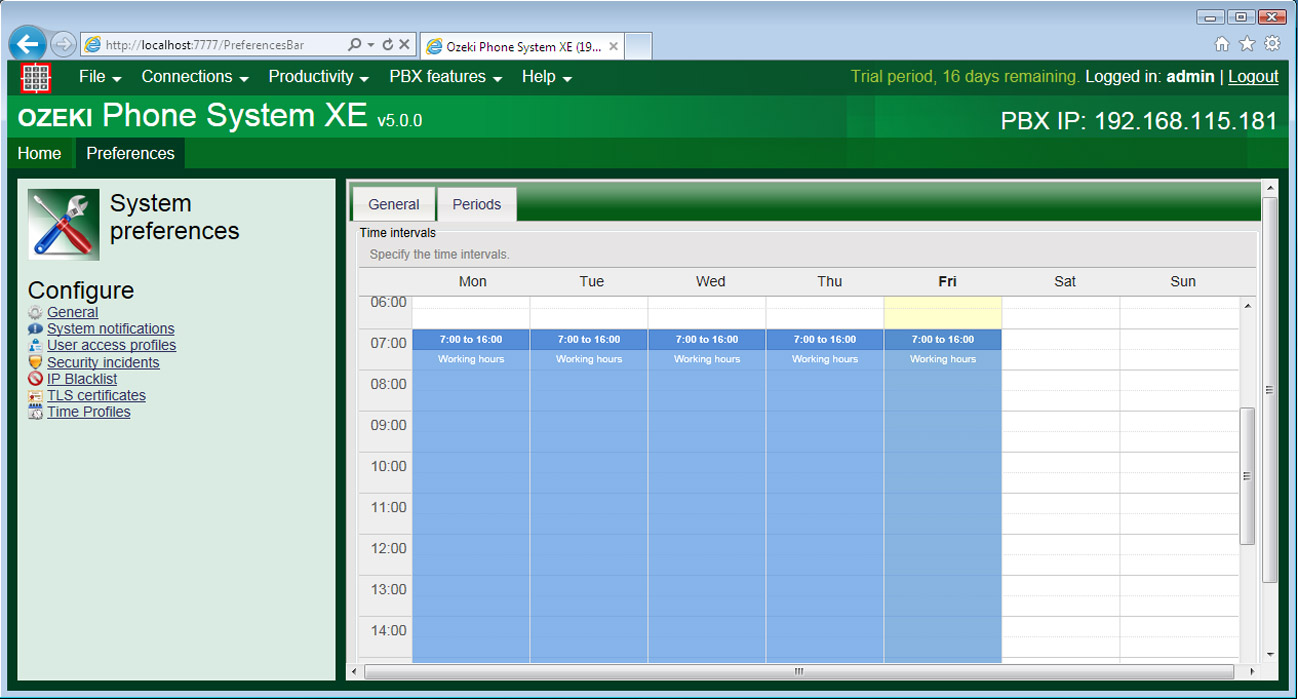
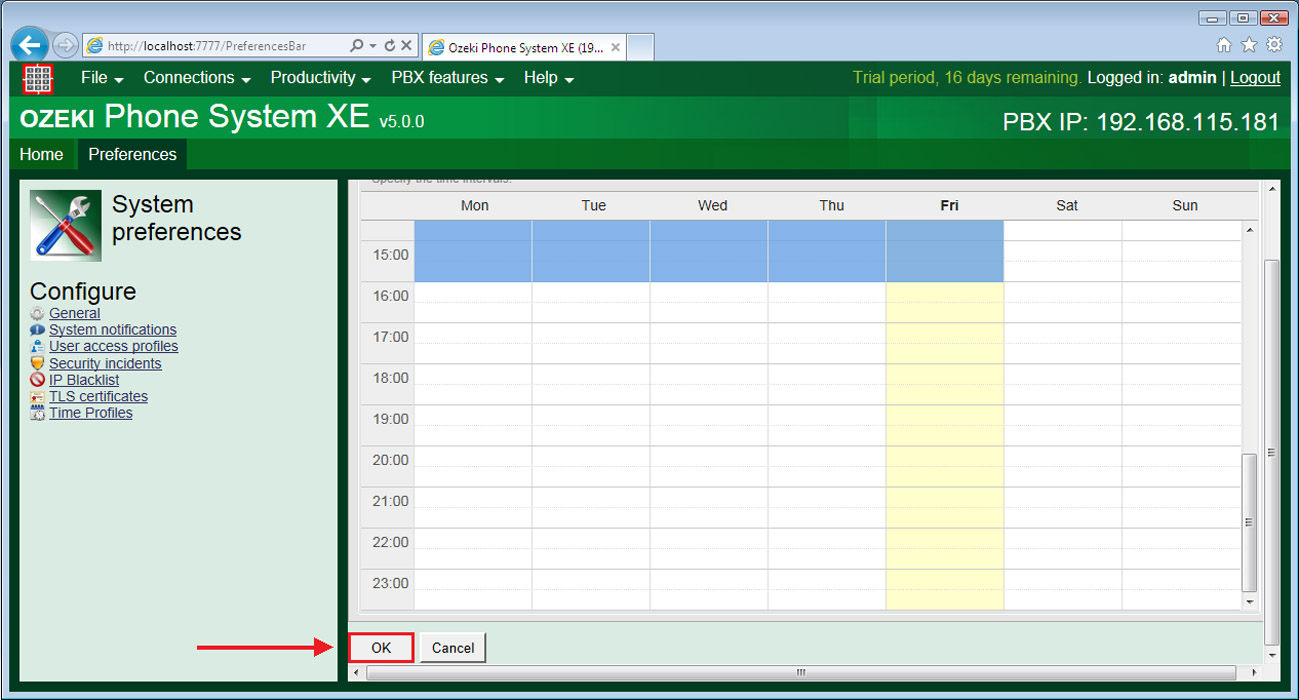
This guided shows 5 time periods and named them "Working hours", as you can see them on Figure 8 below.
After you are done with configuring the time periods, scroll down the screen and click on the OK button.
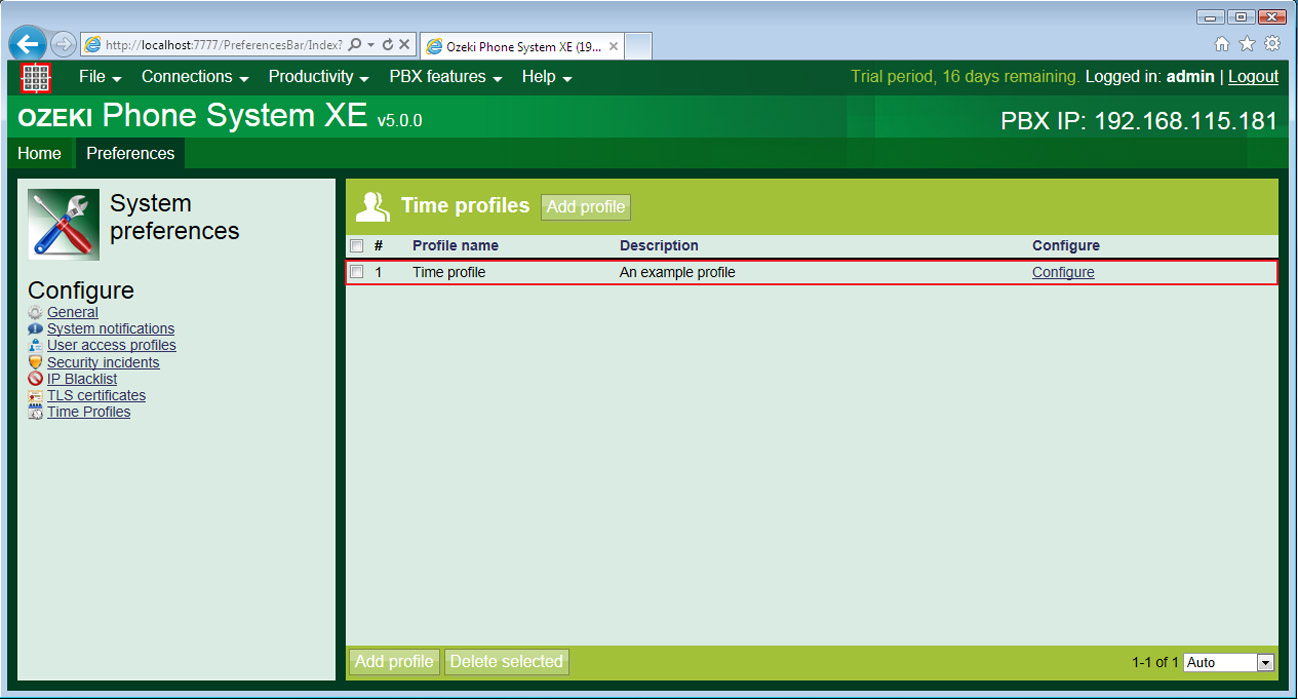
You will notice that, the time profile has been created successfully as it appears in the Time profiles window.
With this, the setup of the time profile is done.
For this example, you will need an Outside line, some SIP extensions, and two dial plans for the time profile to work precisely. So let's take a quick look how to setup these.
Outside lines
You can manage the incomming calls from outside telephone networks (GSM, analog networks). With the time profiles and to see how they work, you will need an outside line in your Ozeki Phone System.
For more information about the outside lines please visit the page of the telephone network configuration.
Extensions
You are going to need some extensions too, visit the following page for their
configuartion:
How to connect telephones to Ozeki Phone System
Dial plan
And lastly, you will have to setup some dial plans between the outside line and the extensions. You will need one dial plan that is going to be used during the time intervals, and one that is going to be used by default. The destination of these dial plans should be different. For detailed decription about the dial plan configuration, take a look at the How to setup Call routing page.
Step 3: Make a test call
After the configuration is finished, you can make a test call. Call the extension that you have set to be available during the time interval, from the outside line. If you call during the set time interval, then the extension should ring, otherwise the default extension should ring.
Conclusion
Time profiles are easy to use and they are great tools to control your incoming calls from outside lines (for example). Especially if you want to transfer the incoming calls to your live agents during the working hours, or to the voicemail otherwise.
If you have any questions or need assistance, please contact us at info@ozekiphone.com
Dig deeper!
People who read this also read...
