How to use the User Addressbook Provider in Ozeki Phone System
In this page, you can see how to use the User Addressbook Provider in Ozeki Phone System.
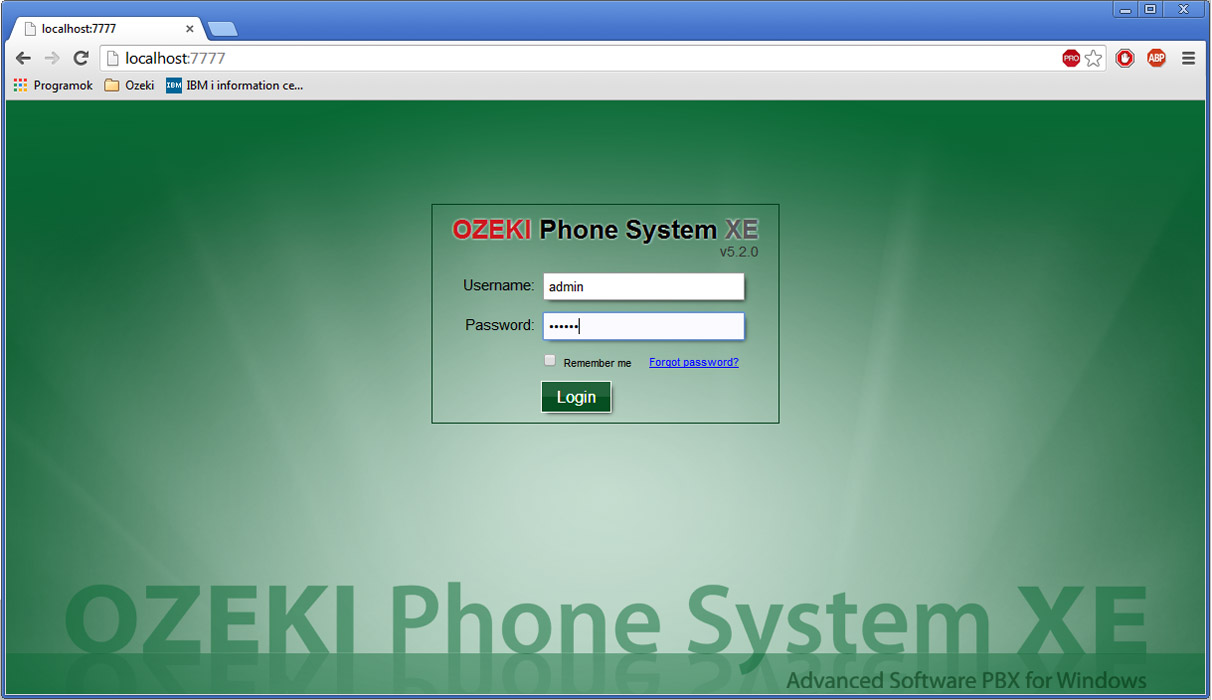
First of all login to Ozeki Phone System using your username and password (Figure 1).
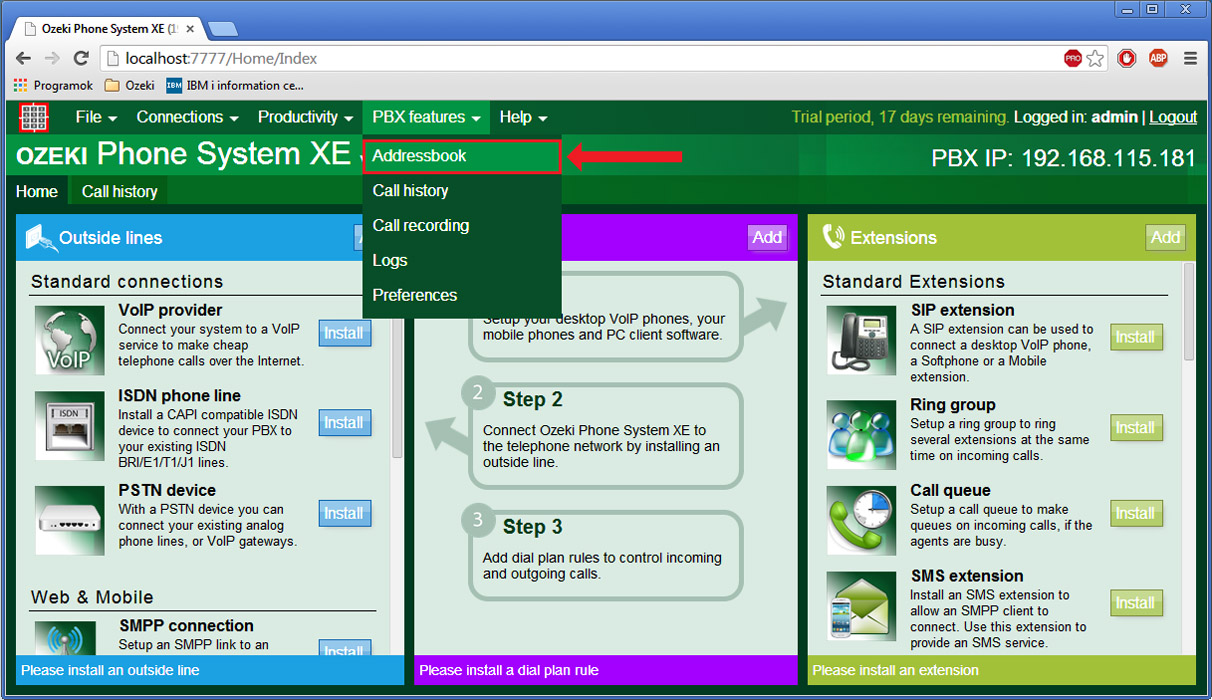
Select PBX Features and then the Addressbook menu (Figure 2).
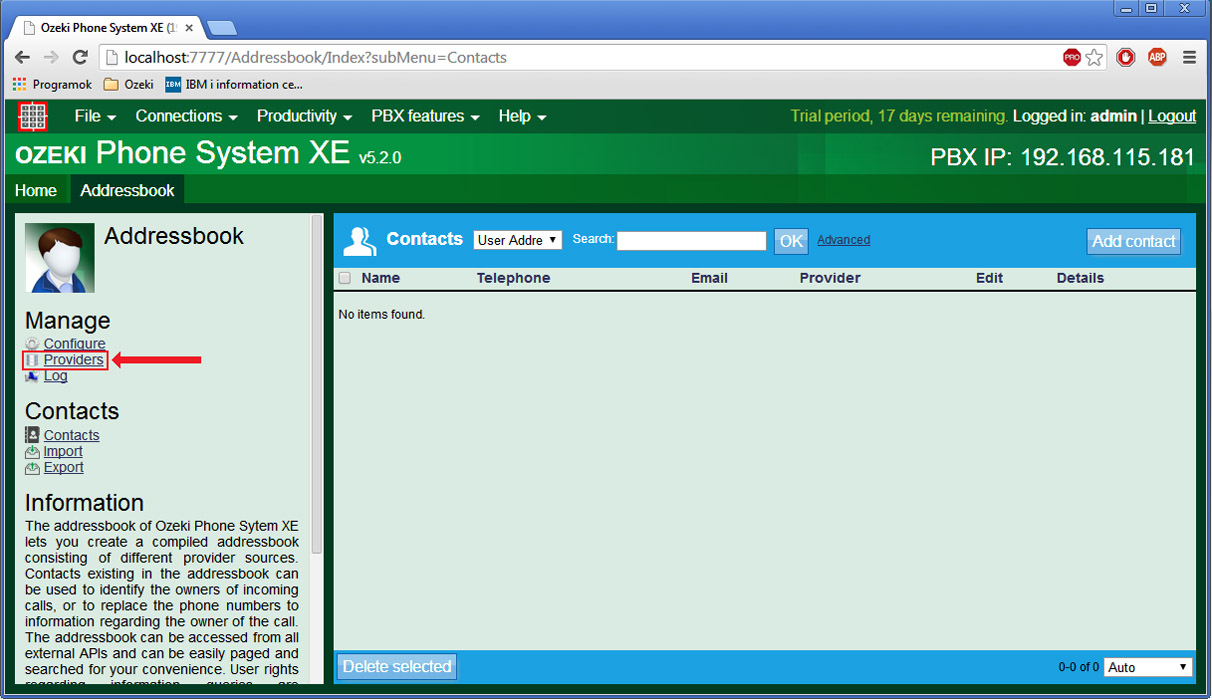
Click on the Providers button in the left menu to see the User Addressbook Provider.
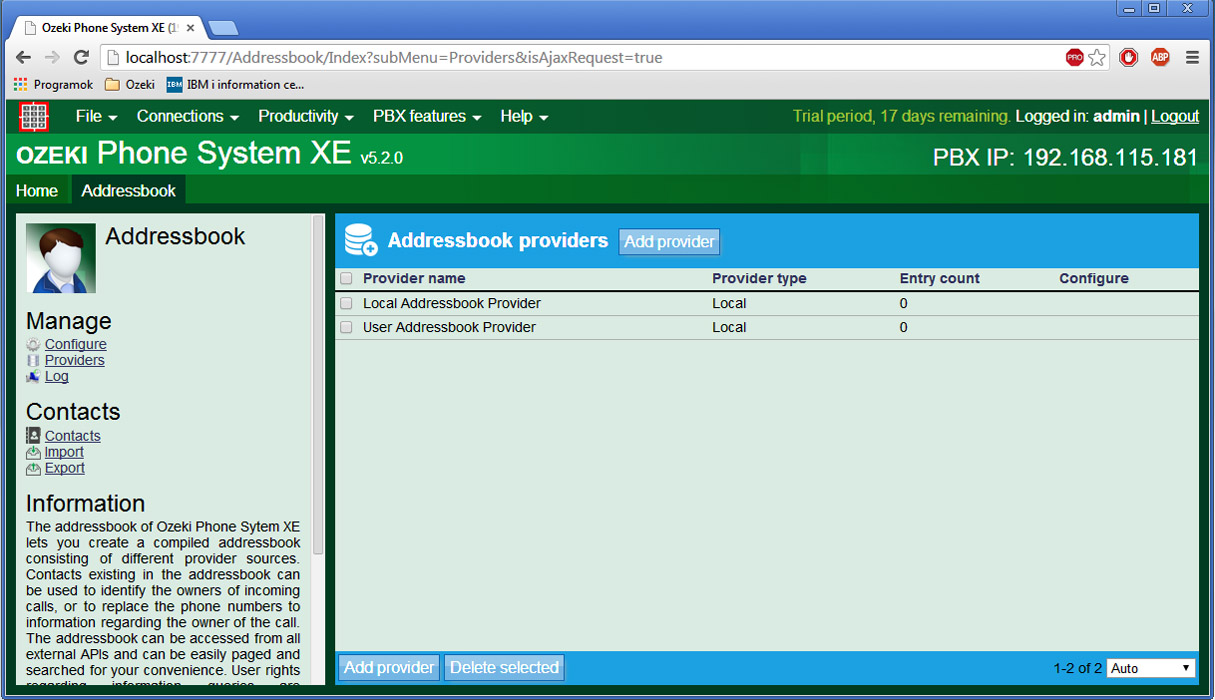
You will see the Local Addressbook and User Addressbook providers in the Addressbook Providers window. They are built in providers meaning they are added to Ozeki Phone System by default and you cant delete them (Figure 4).
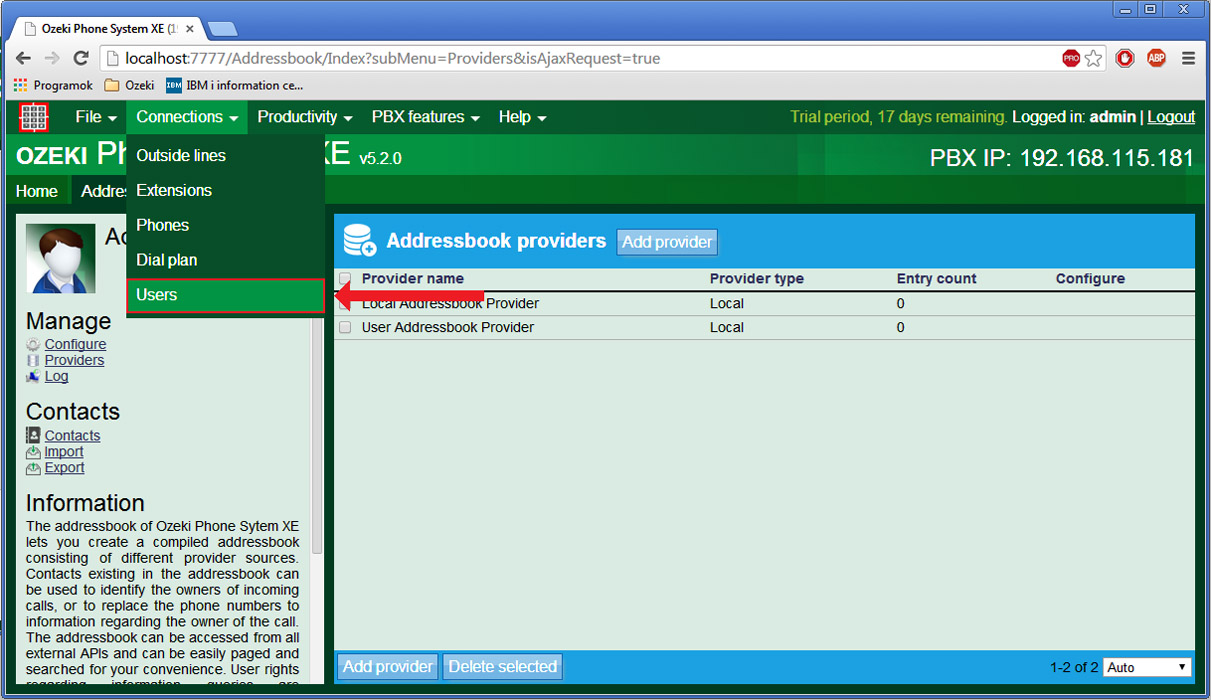
You will notice that there aren't any entries in the default providers. You can add user contacts by adding new users to Ozeki Phone System. To add new users select Connections then the Users menu (Figure 5).
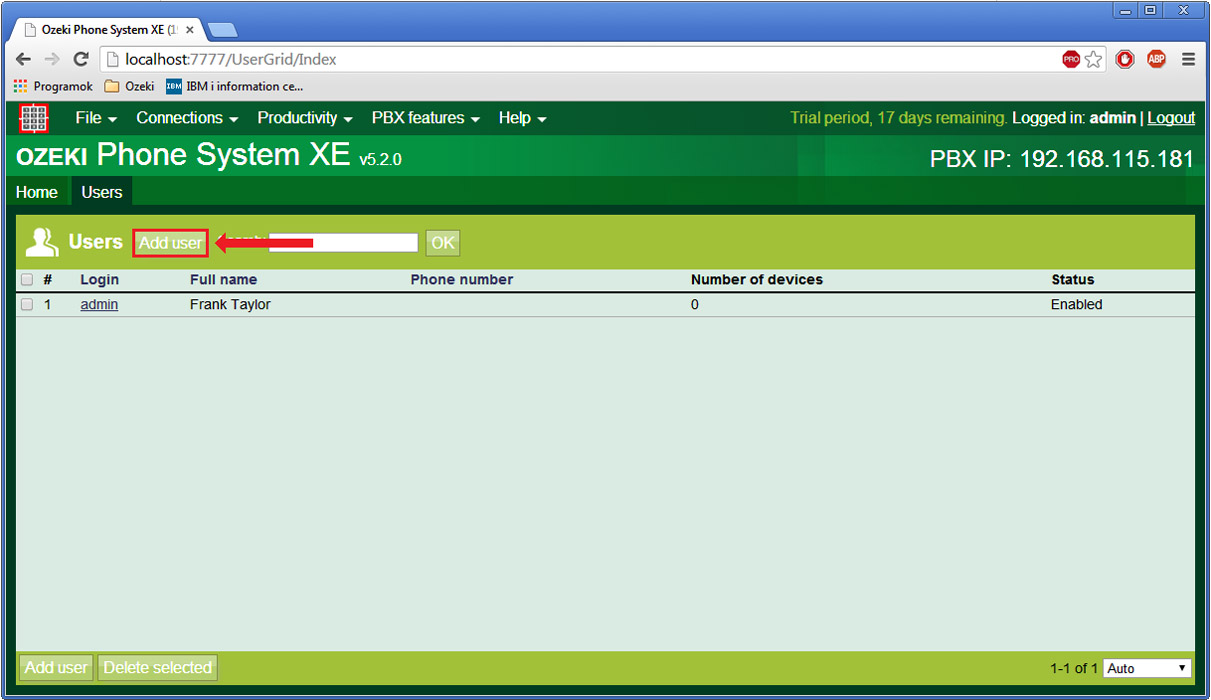
Click on the Add user button as you can see on Figure 6.
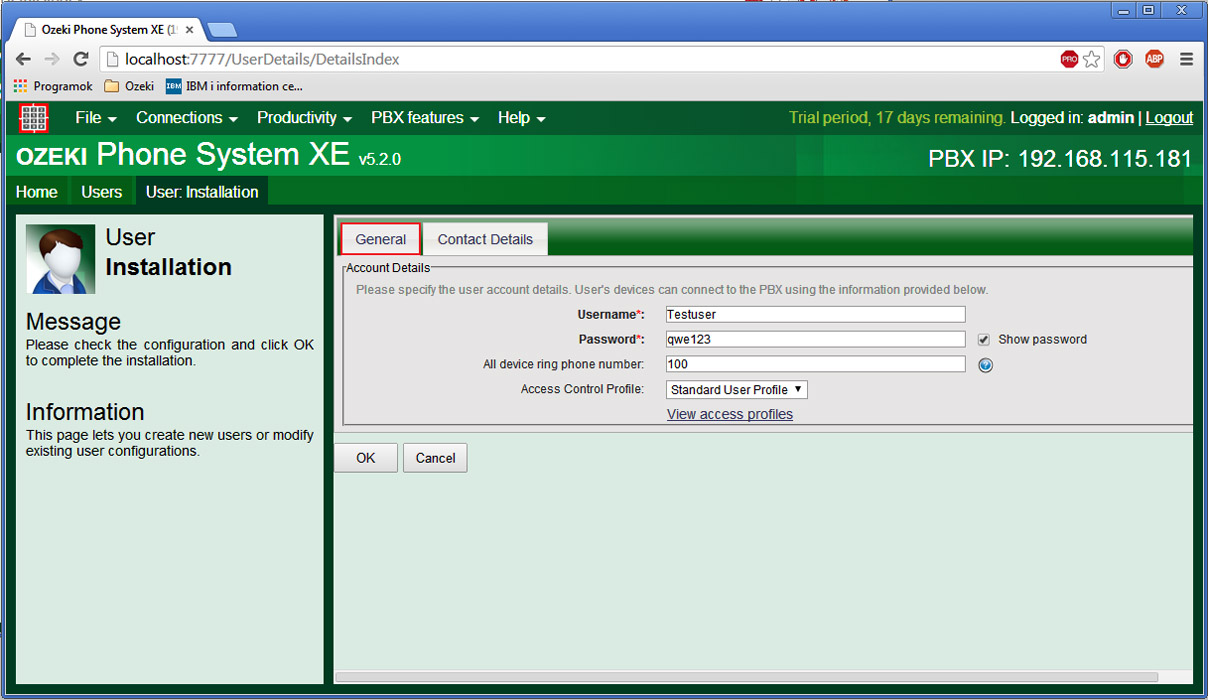
The user installation stands of two tabs, the first is the General tab. You can set the username and password of the user along with a phone number that will ring every device that belongs to the user there. You can select the access control profile at the bottom of this tab that defines what privileges the user has (Figure 7).
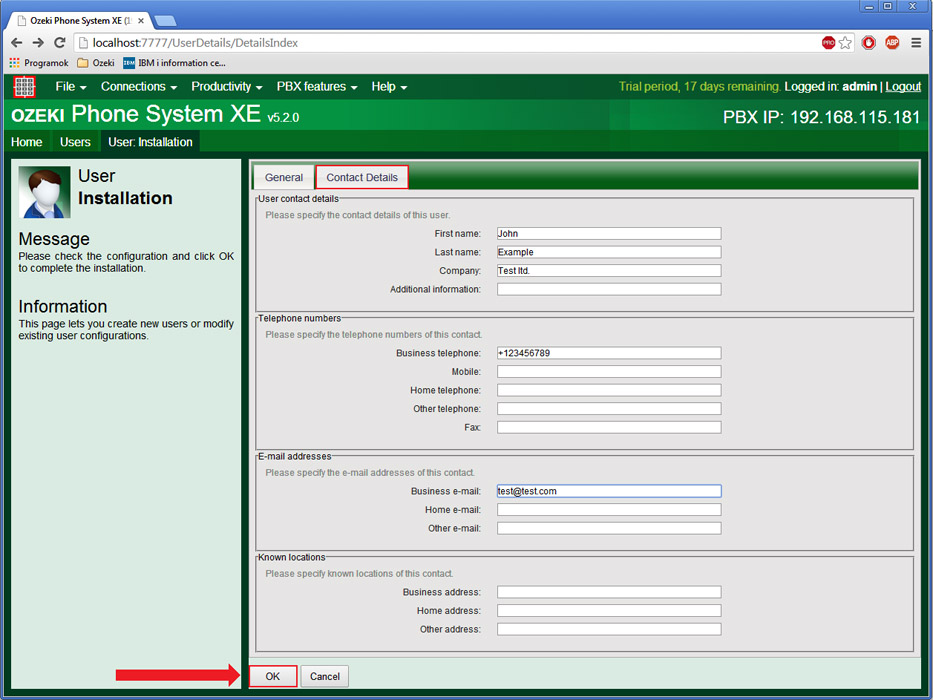
The second tab is the Contact Details where you can specify the contact details of the user. You can see the information that you have to provide for the user to be added to the contacts on the figure below. If you have set the necessary information click on the OK button (Figure 8).
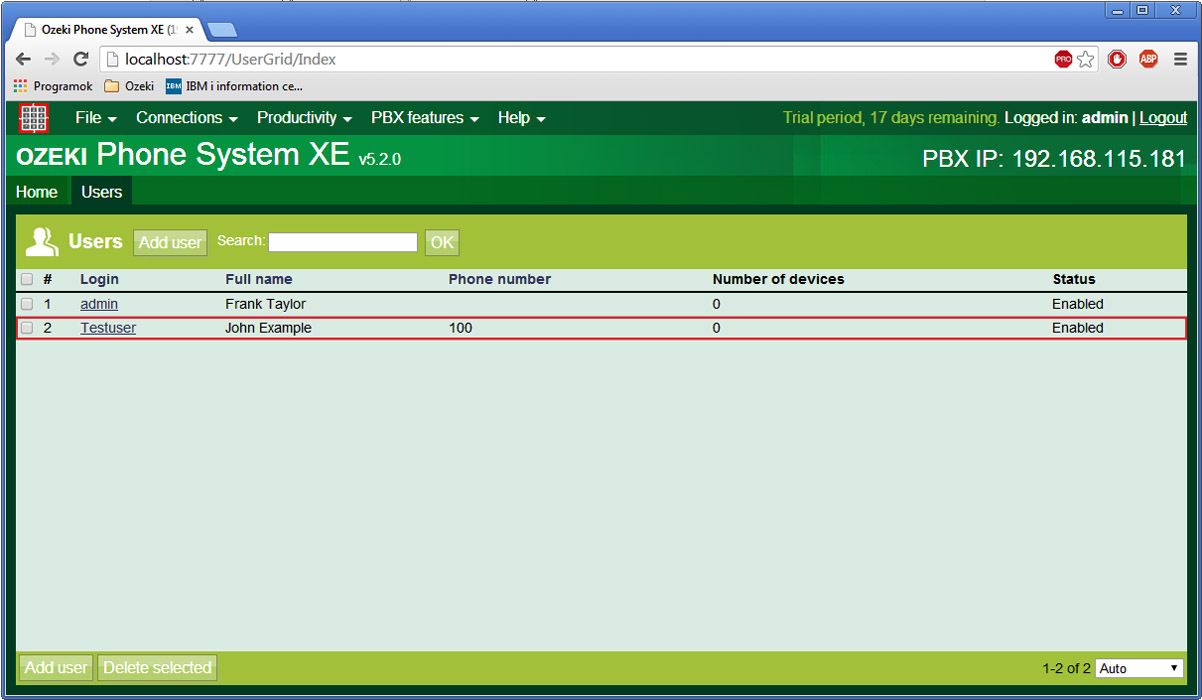
With this the user has been created successfully and you are going to see the new user in the Users menu (Figure 9).
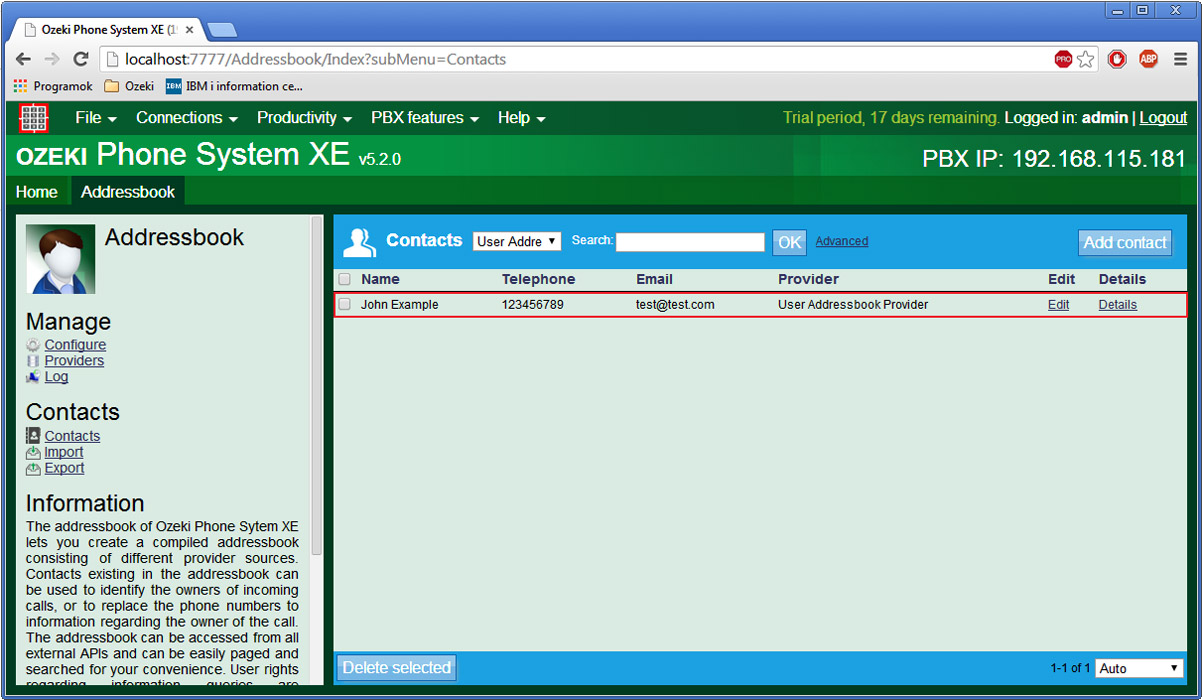
To check that the new user is added to the Contacts select the PBX Features and then the Addressbook menu. You should see the user in the User Addressbook Provider contacts (Figure 10).
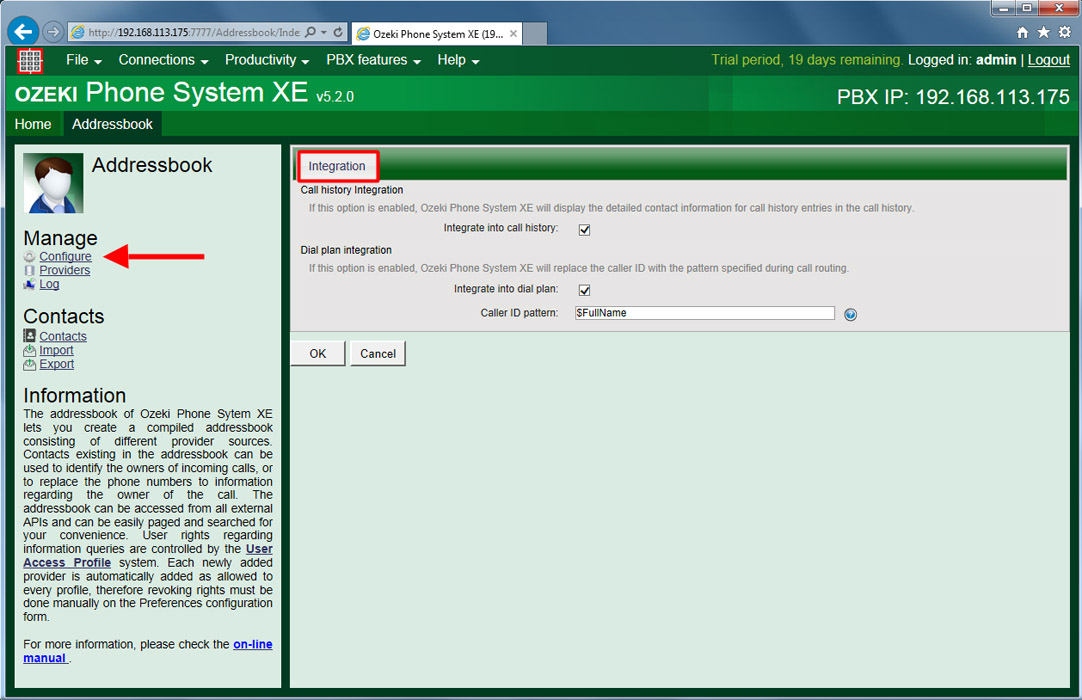
With this we are finished with the user addressbok provider so let's talk about some of the general featuers of the Addressbook itself. Click on Configure in the left menu, you configure the following things in it:
- Call history Integration: If this option is enabled, Ozeki Phone System will display the detailed contact information for call history entries in the call history.
- Dial plan integration: If this option is enabled, Ozeki Phone System will replace the caller ID with the pattern specified during call routing.
In the Caller ID pattern textbox you need to provide the parameter name to be replaced with the caller ID (Figure 16). The following parameters can be used here: $FirstName, $LastName, $Company, $Extra, $BusinessTel, $HomeTel, $OtherTel, $MobileTel, $Fax, $BusinessEmail, $HomeEmail, $OtherEmail, $BusinessAddress, $HomeAddress, $OtherAddress, $FullName, $PhoneNumber, $Email.
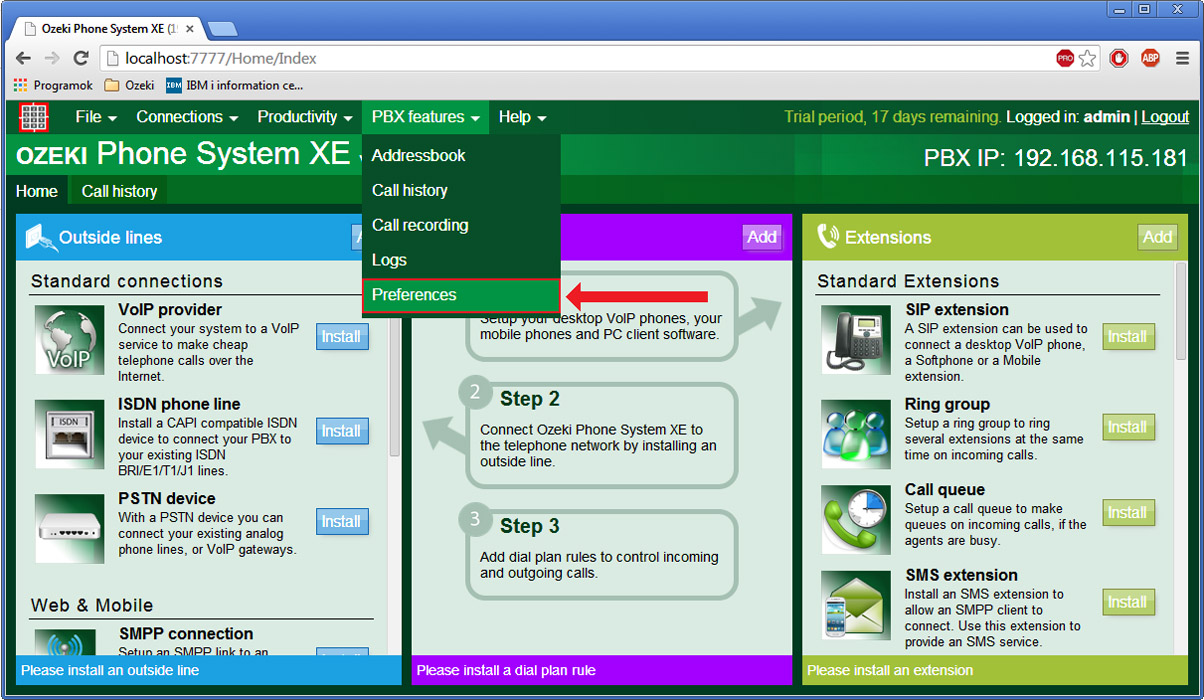
Finally let's talk about the User Access Profiles which determine the privileges of the users. To configure them select the PBX features then the Preferences menu (Figure 12).
Click on User access profiles in the left menu to configure them (Figure 13).
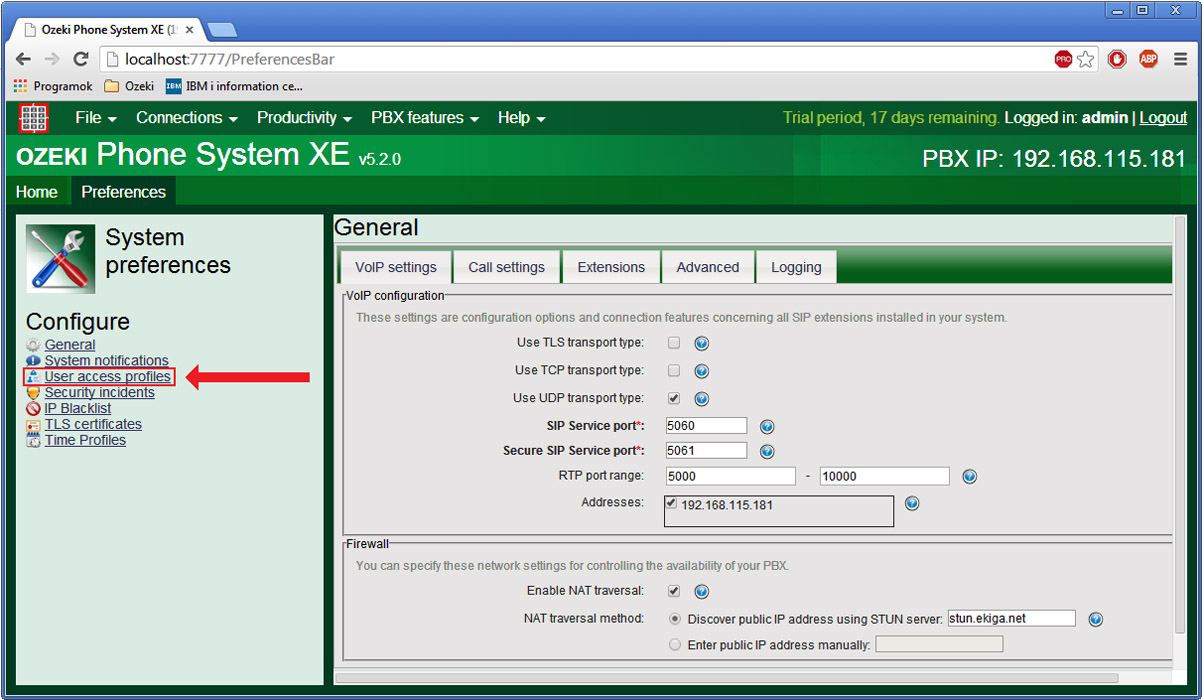
You are going to see the Admin Profile and the Standard User Profile, these two are the default user profiles. If you need you can add new user access profiles, but now click on Configure next to the Standard User Profile to see the user profile settings.
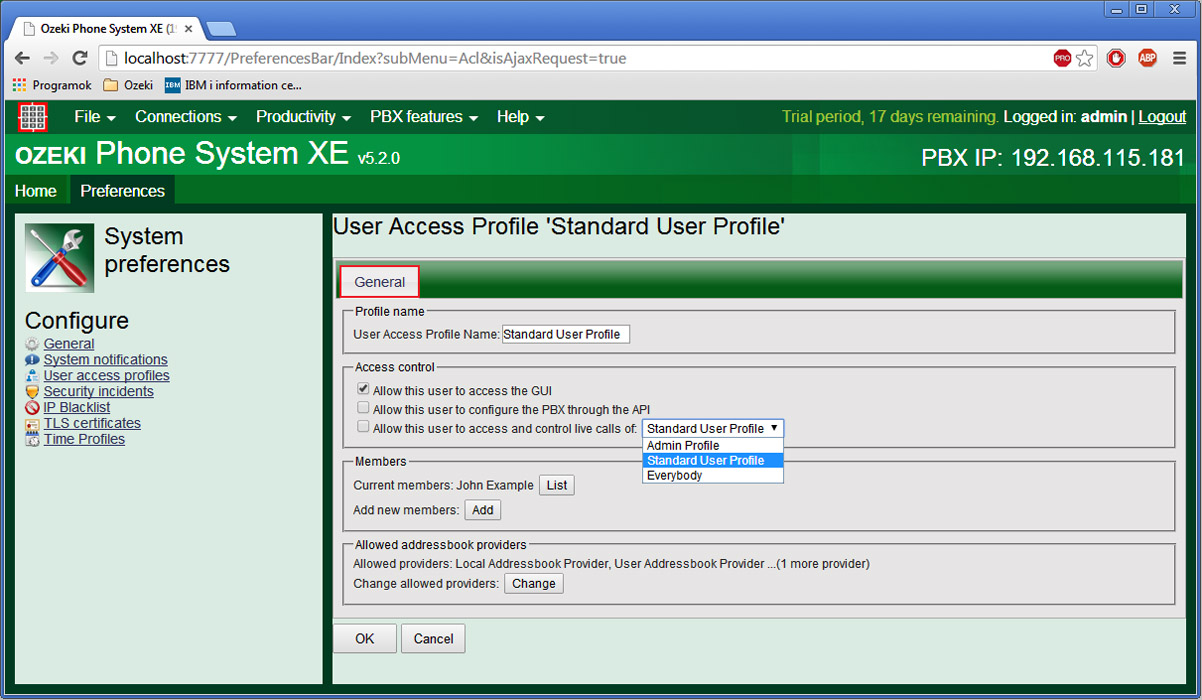
The User Access Profile configuration stands of one tab, the General. You can set the Name of the profile, that is Standard User Profile in our case. Moreover you can set the privileges of the user profile. It can access the GUI, configure the PBX through an API and access the live calls of the selected user access profiles. These are the most important settings, you can also see the members of the selected profile and the allowed addressbook providers at the bottom of the configuration page (Figure 14).
If you have any questions or need assistance, please contact us at info@ozekiphone.com
Dig deeper!
People who read this also read...
