How to use the LDAP Addressbook Provider in Ozeki Phone System
The LDAP addressbook provider gives you the option to attach an LDAP based contact information source to Ozeki Phone system. This provider can also be used to connect your Active Directory or OpenLDAP services to Ozeki Phone System.
More about LDAP http://en.wikipedia.org/wiki/Lightweight_Directory_Access_Protocol
More about Active directoy http://en.wikipedia.org/wiki/Active_Directory
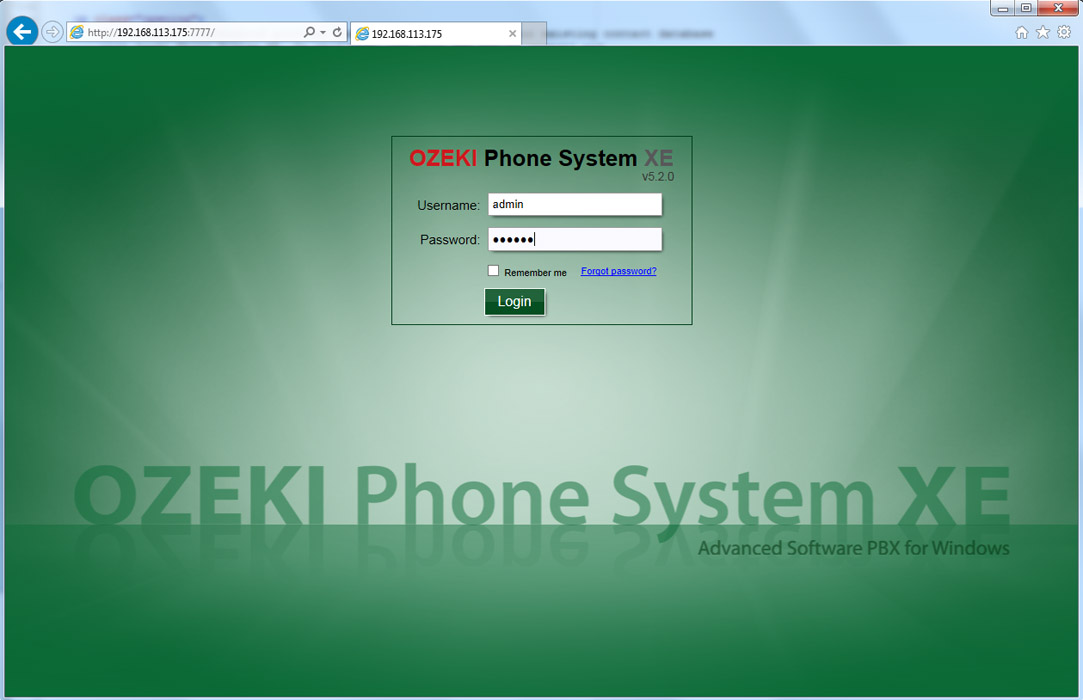
First of all login to the Ozeki Phone System using your username and password (Figure 1).
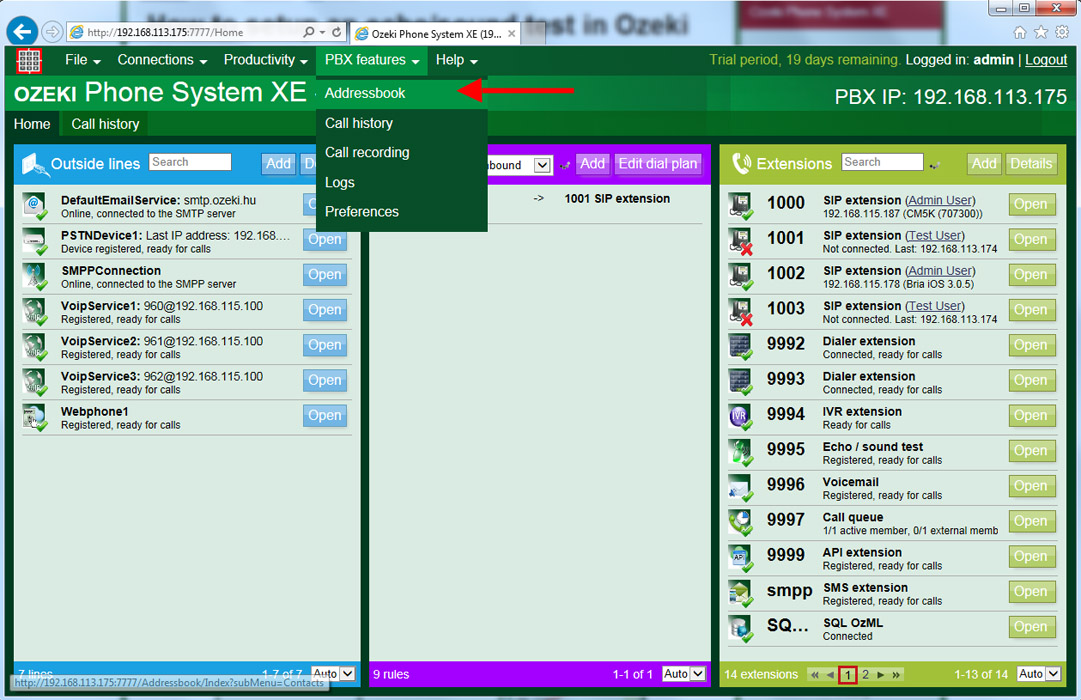
Select PBX Features and then Addressbook menu (Figure 2).
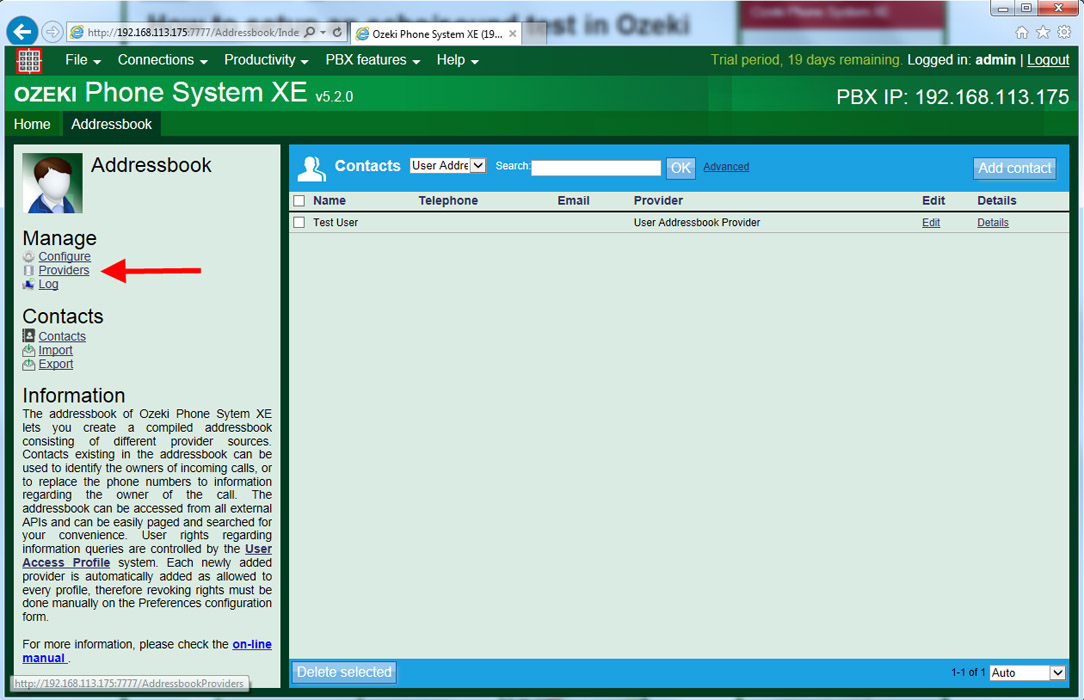
On this page, you can query the contacts of your Addressbook providers. To install a LDAP Addressbook Provider, click on Providers button in the left menu (Figure 3).
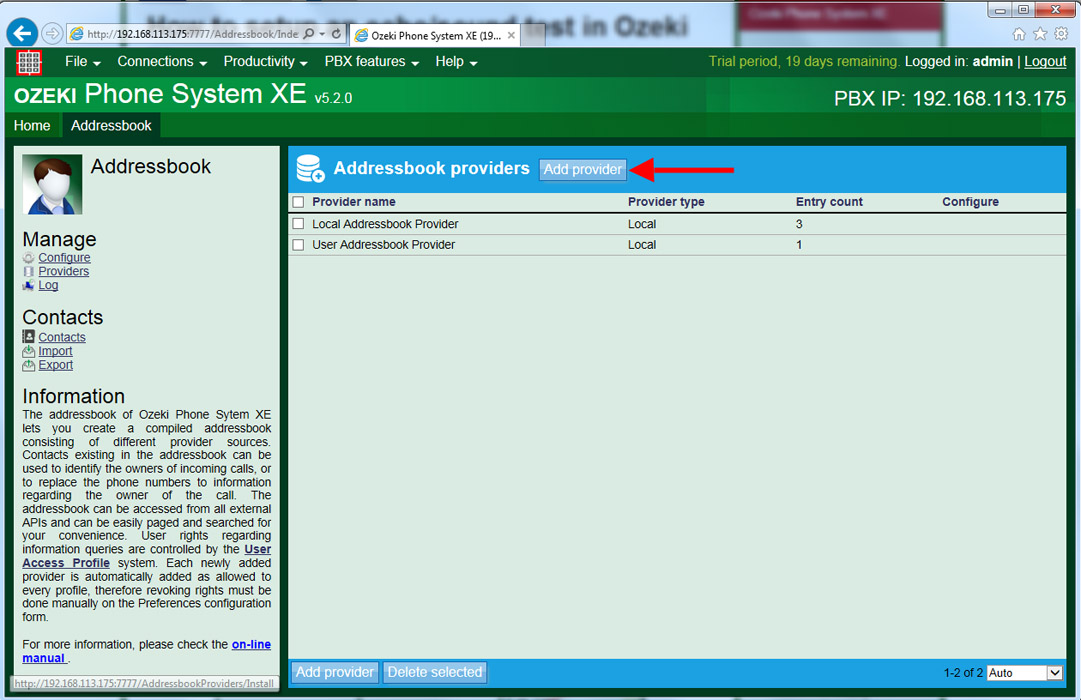
On this page, you can see all of your providers. By default, the User Addressbook Provider and Local Addressbook Provider cannot be deleted. If you wish to use your existing contacts in your LDAP service, click on Add provider button (Figure 4).
Here, click on Install button belonging to LDAP addressbook provider. By default, each newly added provider is automatically added as allowed to every profile. It can be modified manually under the configuration page of User Access Profile (Figure 5).
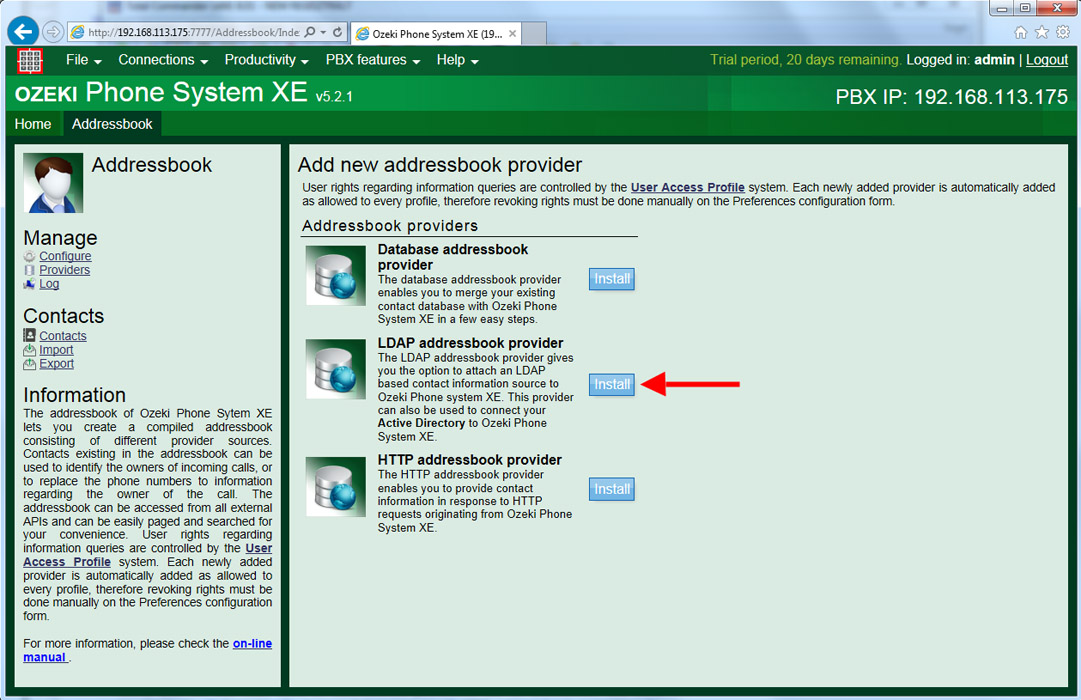
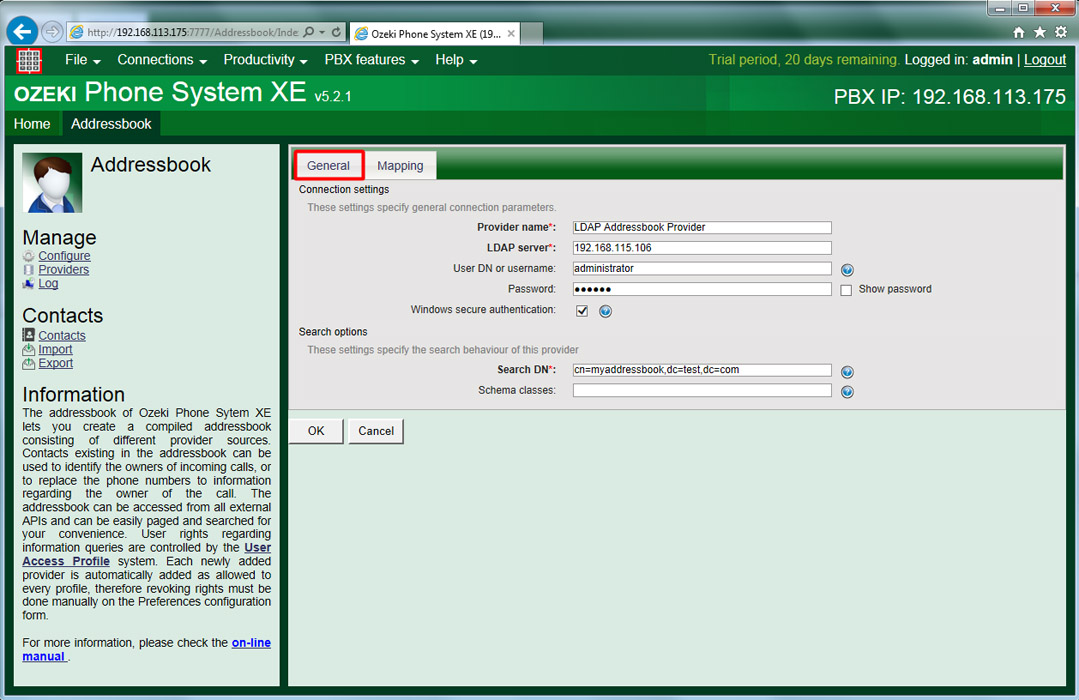
Figure 6 shows how to connect your PBX to your LDAP server. Under the General tab you need to specify the following general connection parameters:
- Provider name: A unique name for this provider.
- LDAP server: The IP address of your LDAP server.
- Use DN or username: The search query will be initiated using this user. If not specified, the search will be anonymous.
- Password: The password belonging to this user.
- Windows secure authentication: When using Active Directory services, this type of authentication is required.
In the search options section of the configuration form you can configure the followings:
- Search DN: The LDAP addressbook provider will issue the search requests in this DN. E.g. "cn=myaddressbook,dc=test,dc=com" where com is the root node, test is an organization under the root node, and myaddressbook is an organizational unit of test organization.
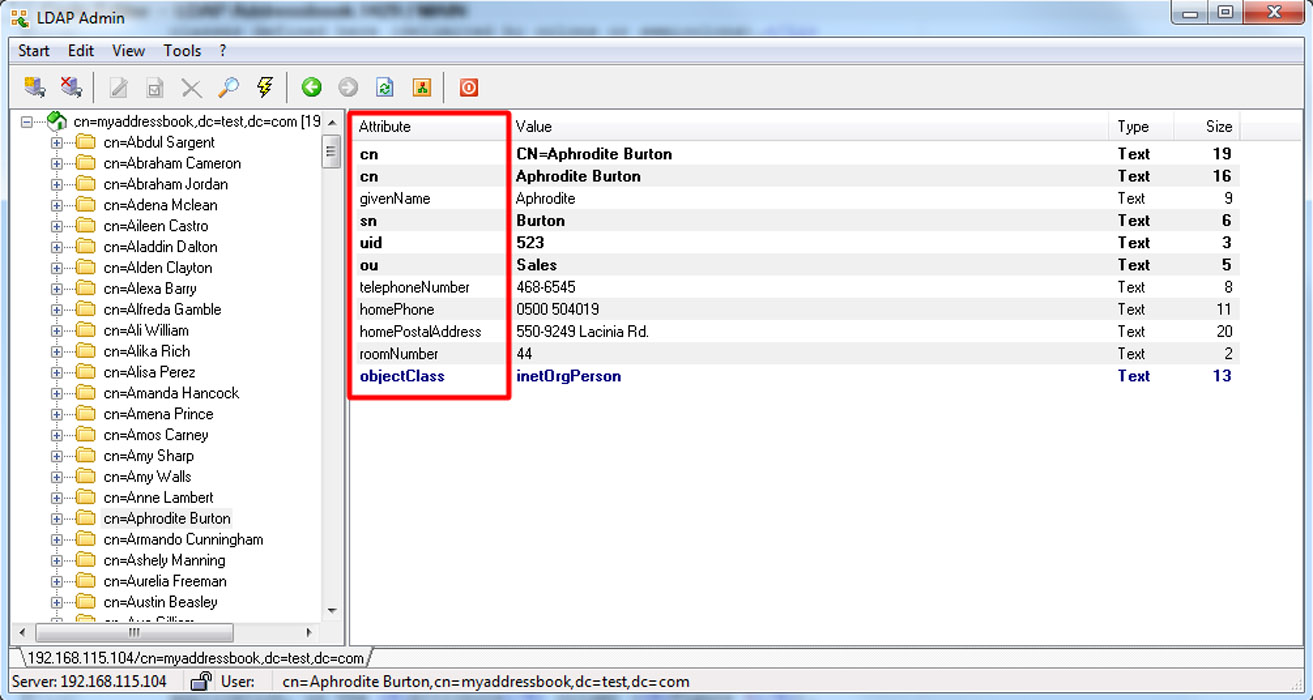
- Schema classes: The LDAP addressbook provider will look for the classes defined here (delimited by colons or semicolons). For example, in figure 8 you can see the "objectClass" attribute. If you wish to find contacts only in this class, type "inetOrgPerson" here.
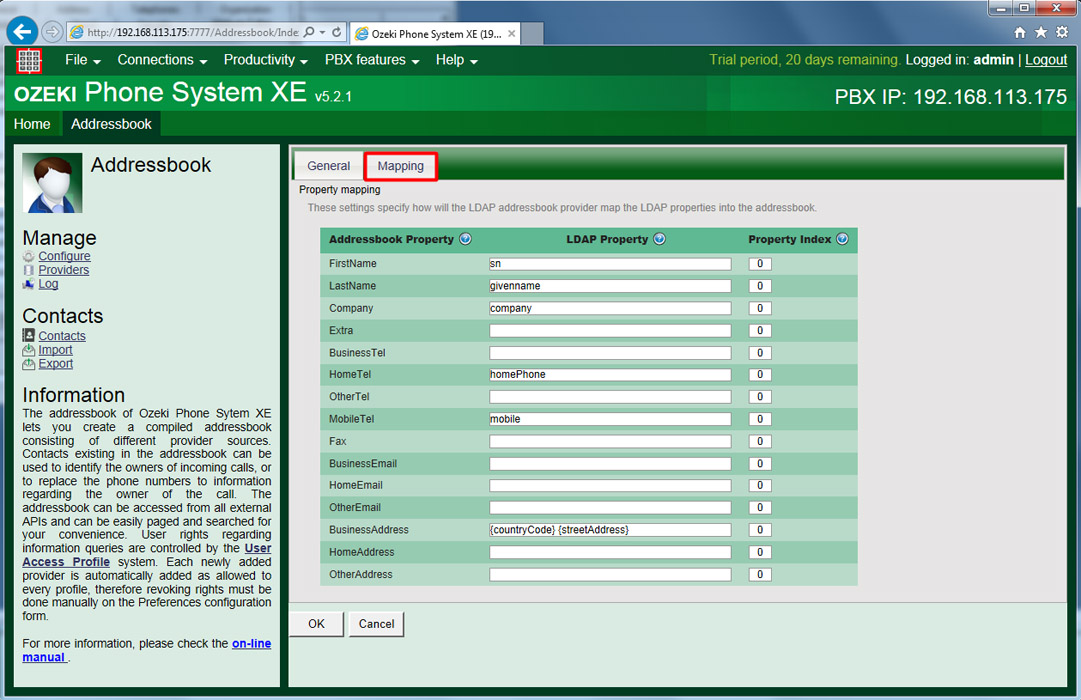
Under the Mapping tab, you need to specify how will the LDAP addressbook provider map the LDAP properties into the addressbook:
- Addressbook Property: This is the name of the property used by the addressbook in Ozeki Phone System.
- LDAP Property: This is the name of the property in your LDAP data source which corresponds with the specified addressbook property. If not specified, the addressbook will not use this property.
- Property Index: If this property contains multiple values, specify the index of the value which corresponds with the specified addressbook property. If unsure, leave this number UNCHANGED. You can map multiple properties from your LDAP object to a single Addressbook entry property. For this to work you have to specify your format string with your LDAP properties in curly brackets. (see BusinessAddress on Figure 7)
If you use OpenLDAP server, you can find the LDAP Property names in the Ldapadmin application, in the attribute column (Figure 8).
If you wish to use active directory of Windows Server, you can find the attribute names under attribute editor tab in the attribute column.
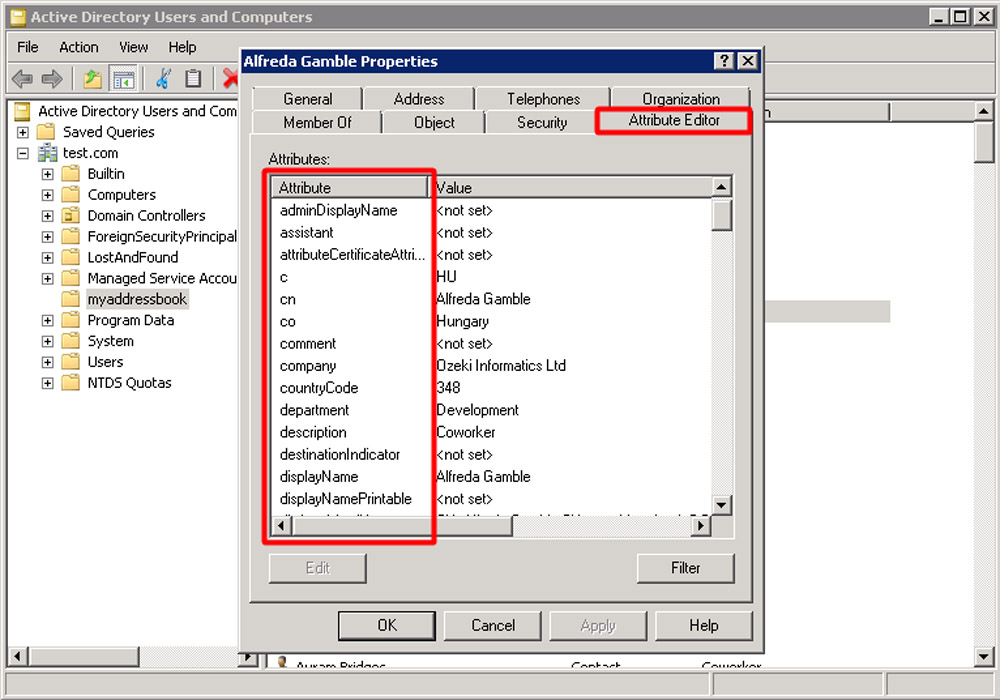
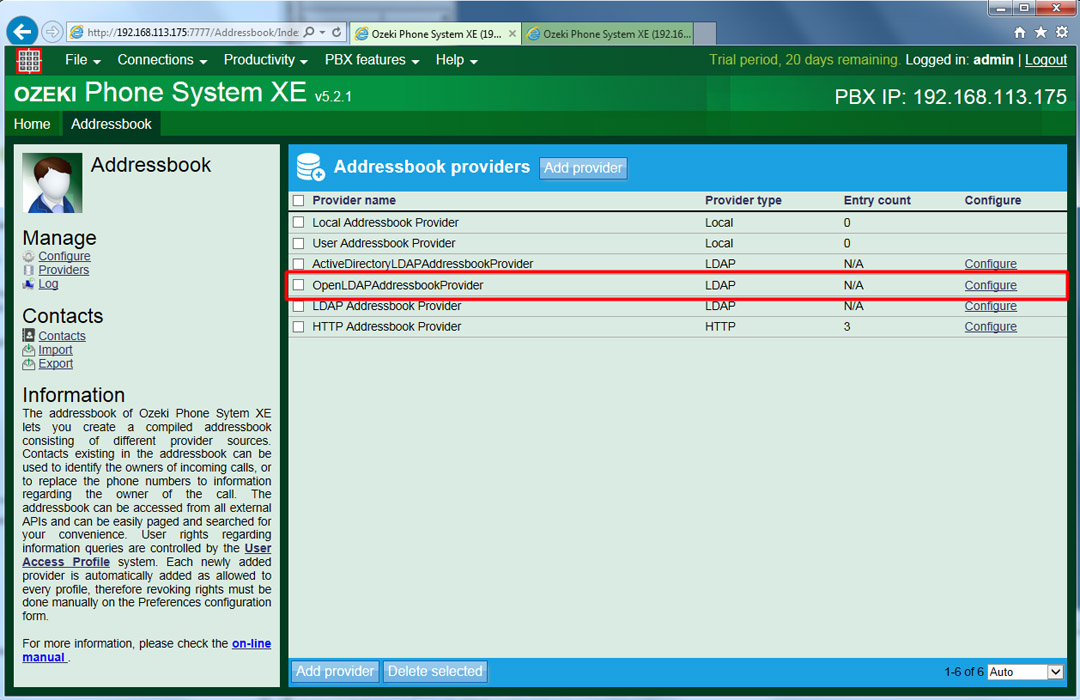
On the next page, you can see the newly installed LDAP addressbook provider in the list of the providers. Clicking on the Configure button, you can make changes in the settings of this provider (Figure 10).
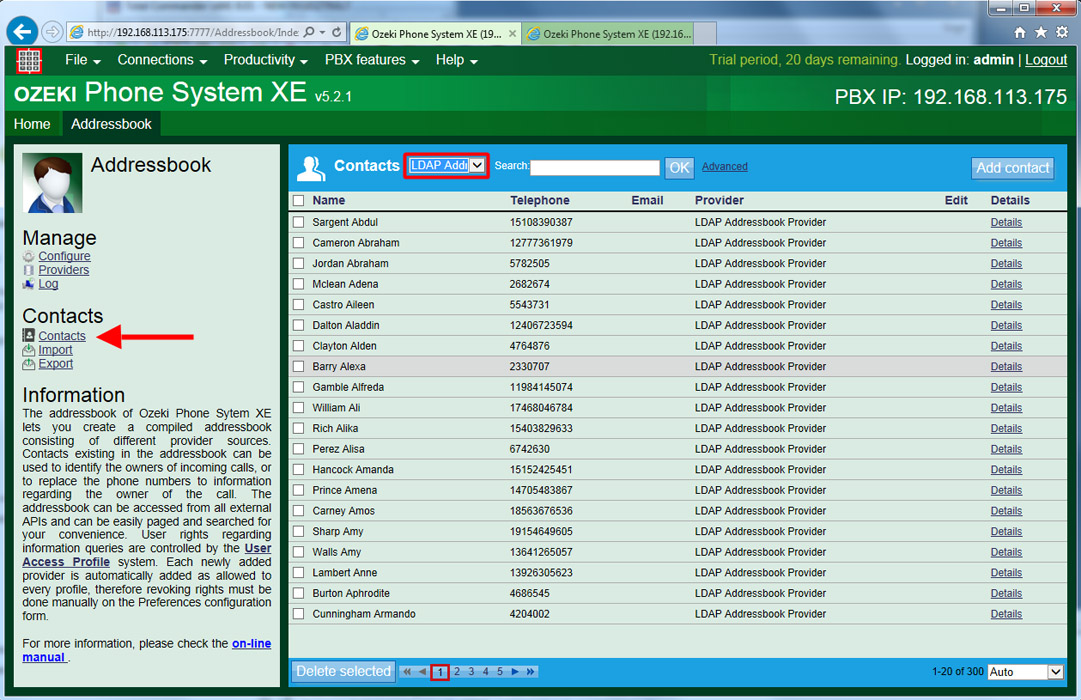
You can query the contacts of the addresbook providers under the Contacts menu. On the top of the page, you need to select the addressbook provider that you would like to see (Figure 11).
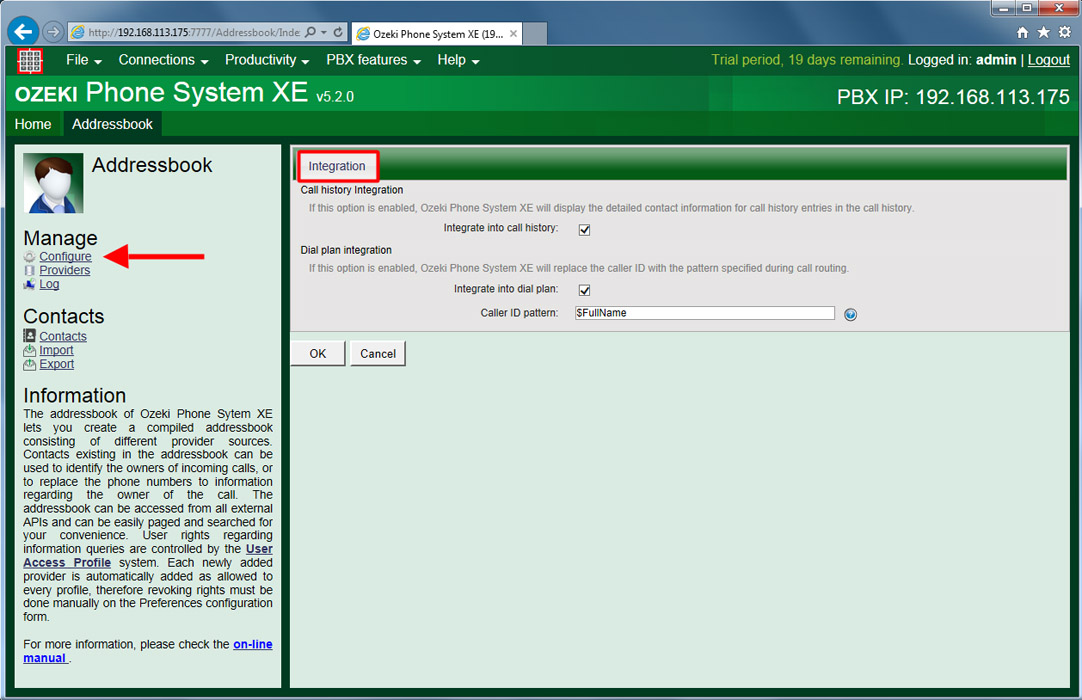
Under the Configure menu, you can set the following:
- Call history Integration: If this option is enabled, Ozeki Phone System XE will display the detailed contact information for call history entries in the call history.
- Dial plan integration: If this option is enabled, Ozeki Phone System XE will replace the caller ID with the pattern specified during call routing.
In the Caller ID pattern textbox you need to provide the parameter name to be replaced with the caller ID (Figure 12).
The following parameters can be used here: $FirstName, $LastName, $Company, $Extra, $BusinessTel, $HomeTel, $OtherTel, $MobileTel, $Fax, $BusinessEmail, $HomeEmail, $OtherEmail, $BusinessAddress, $HomeAddress, $OtherAddress, $FullName, $PhoneNumber, $Email.
If you have any questions or need assistance, please contact us at info@ozekiphone.com
Dig deeper!
People who read this also read...
