JavaScript VoIP developers 101
Part 7: How to use the JavaScript Call Assistant (Part 1)
Study the following article to get more information about the JS API HUD. This guide presents how to receive and initiate voice calls, how to send messages to specific users. You will be able to manage your employees telephone activity with a simple graphical user interface.
- Download example project: opsc-all-assistant-js.zip
- Reference manual: http://www.ozekiphone.com/examples/jsdoc/index.html
What you need:
- A text editor (for example Notepad++)
- Ozeki Phone System installed on your PC (Download now)
- A configured Web Server
- A connected softphone
Please follow these steps for develop and use your first application with our JavaScript HUD:
- Step 1: Get started
- Step 2: Create a webphone extension in Ozeki Phone System
- Step 3: Create users in Ozeki Phone System
- Step 4: Associate SIP extensions for the users
- Step 5: Using JavaScript HUD
Step 1: Get started
First of all, you need to download and install the Ozeki Phone System. You can find
more information and help in the following page.
For using JavaScript Call Assistant a webserver is essentially needed
on which your written code will be hosted. After you have downloaded and
unzipped Ozeki JavaScript Call Assistant, place the files on a webserver.
In this example, Wampserver and Apache are used. You can
download Wampserver from here. After
installing it, open the folder where your Wamp Server has been installed, then select the
www folder and copy the unzipped files to www folder. The Code example 1 shows
how is the basic index.html looks like. Also shows how can you connect
the Call Assistant to Ozeki Phone System.
|
<title>Ozeki Phone System JS API HUD example</title>
<link rel="stylesheet" type="text/css" href="style.css">
<script src="http://code.jquery.com/jquery-1.10.1.min.js"></script>
<script type="text/javascript" src="http://(IP of your PBX : Port Number)/WebphoneAPI"></script>
<script src="chat.js"></script>
<script src="hud.js"></script>
<script>
    // -------- Use your settings -------- //
    var serverAddress = "(IP of your PBX)";
    var webphoneExtensionNumber = "(Webphone Extension Number)";
    var webphoneExtensionPassword = "(Webphone Extension Password)";
    // ----------------------------------- //

    $(document).ready(function () {
        init(serverAddress, webphoneExtensionNumber, webphoneExtensionPassword);
    });
</script>
|
As you can see, the program adds reference to the running Ozeki Phone System's
WebphoneAPI script, and to the chat.js and the hud.js files, too.
You have to configure the highlighted settings (serverAddress,
webphoneExtensionNumber, webphoneExtensionPassword) with the datas of your PBX.
When the document has been loaded, the init() function will be called with the configured parameters from the hud.js.
Step 2: Create a webphone extension in Ozeki Phone System
If you would like to learn how to add and configure a webphone extension, please visit the Webphone Installation guide.
Step 3: Create users in Ozeki Phone System
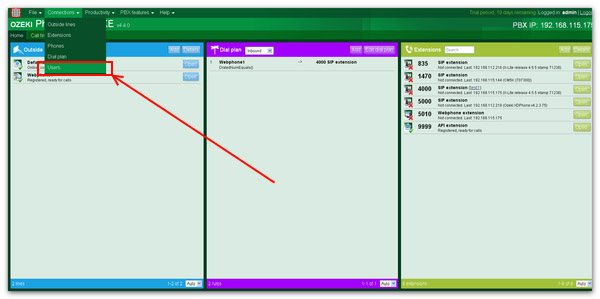
To create users, go to Connections then click on 'Users'.
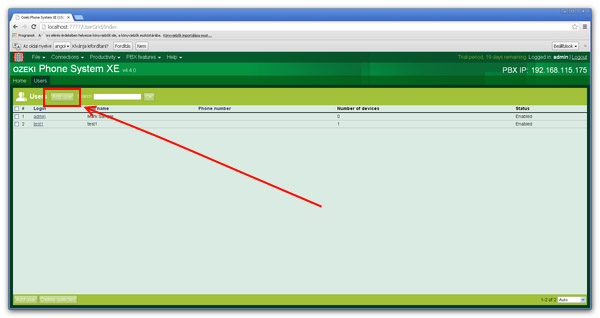
After it, click on 'Add User'.
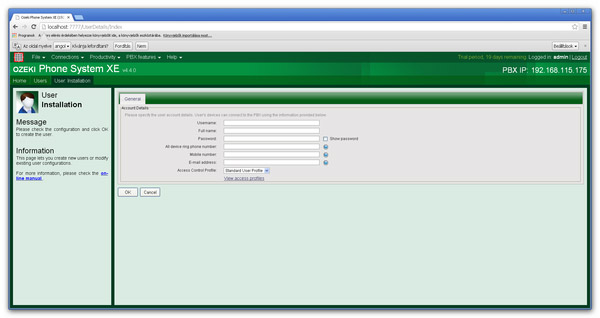
Finally fill in the form, then click 'OK'.
Step 4: Associate SIP extensions for the users
If you are done with creating users and adding new extensions, you can associate them.
In the Extensions panel choose the extension, you want to pair with a user.
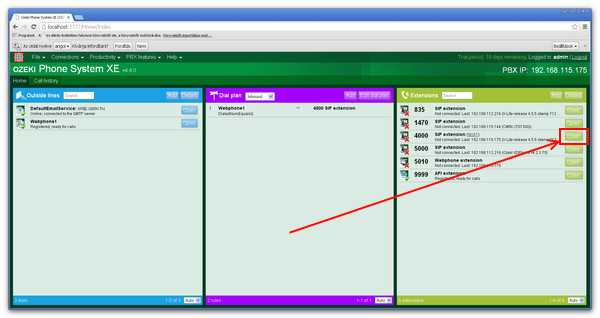
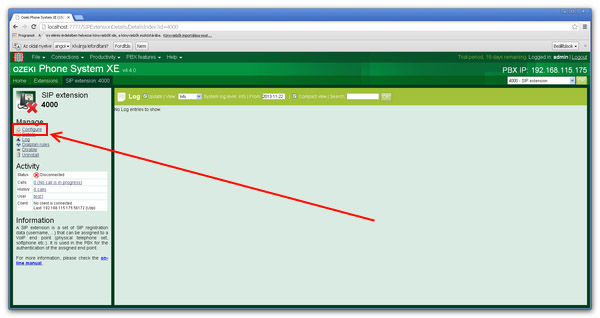
Set up the selected extension by clicking 'Configure'.
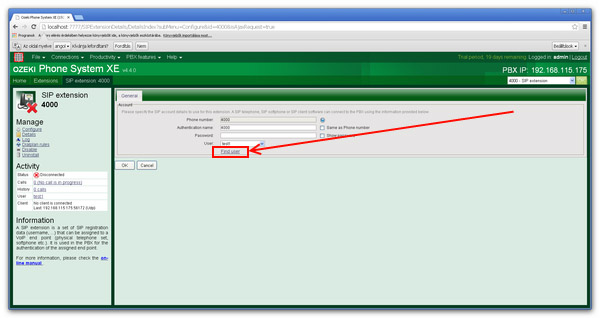
To search users you want to associate with, click on 'Find user'.
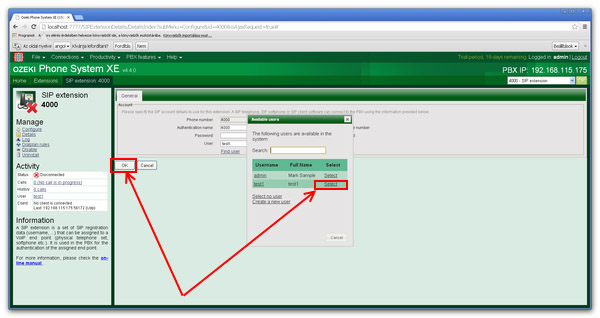
Select the user by clicking on Select next to his/her name. Then confirm it with the 'OK' button.
Step 5: Using JavaScript HUD
Once you set up everything, you can start managing the calls.
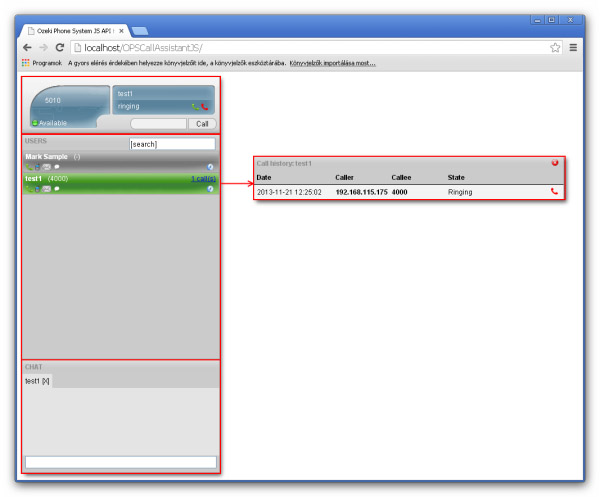
Parts of the HUDThe hud consists of 4 windows:
- current user window: shows the user status, user name and call status
- users window: shows the users and their states (speaking, online, offline)
- chat window: you can send instant messages here
- call history window: shows the recent calls in details
Make a test call
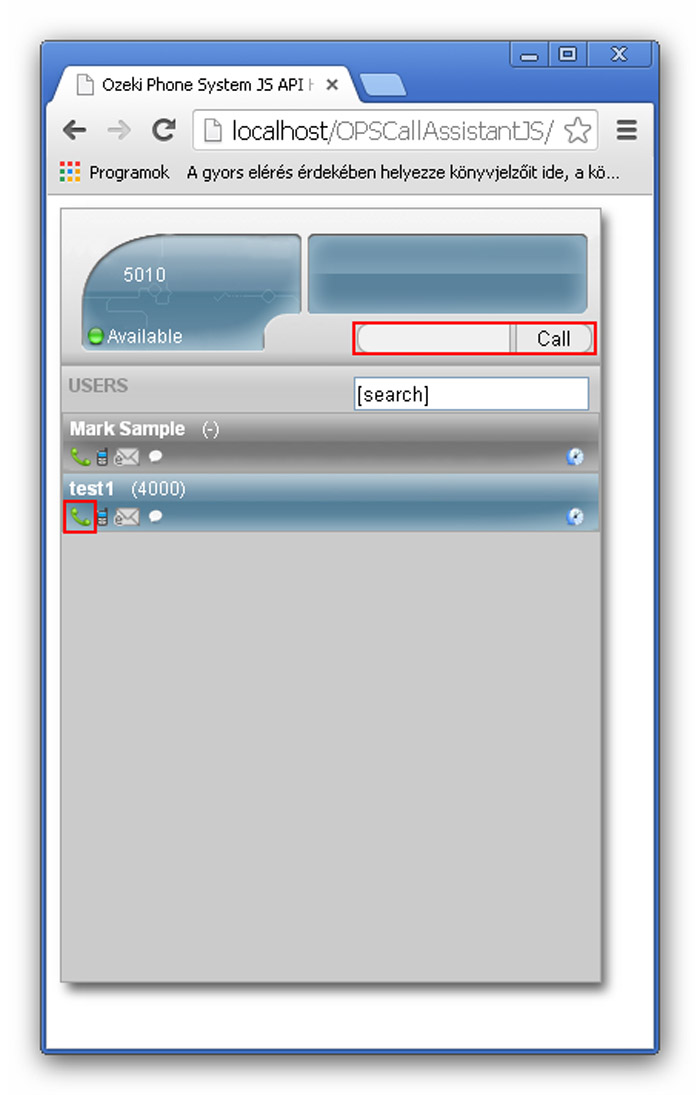
Search for the user you want to call and click on the green phone icon or type in the phone number, then click on call button. Once the call is in progress, you can hold or hang up it anytime.
Send an instant message
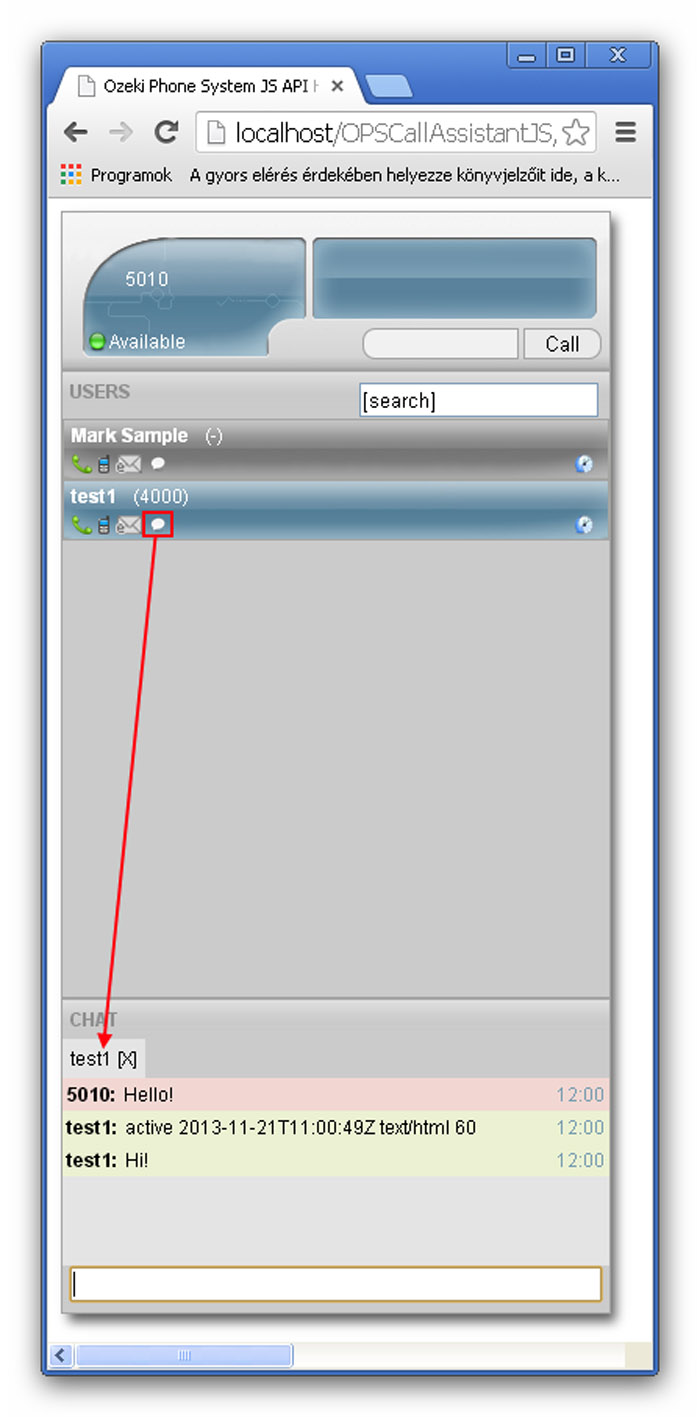
Search for the user you want to send message, then click on the white bubble under the user name. A new chat tab will open and now you can send short messages easily.
If you have any questions or need assistance, please contact us at info@ozekiphone.com
