How to setup Sierra Wireless Xtend modem for Ozeki NG SMS Gateway
Ozeki NG SMS Gateway is the ideal platfrom to send/receive SMS messages in your IT system. For this purpose, you can easily use the Sierra Wireless Xtend modem. Once the SIM card is inserted into the GSM modem, you are ready to send/receive SMS messages with the Ozeki NG SMS Gateway.
What you need
For sending SMS messages from the Ozeki NG SMS Gateway SMS software over the GSM network, you need to connect the Sierra Wireless Xtend modem to the Ozeki NG SMS Gateway. Then the SIM card needs to be inserted into the GSM modem. Figure 1 enlists the necessary components for setting up a GSM modem connection.
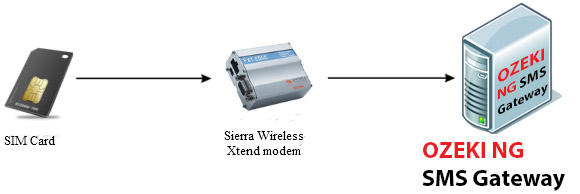
- SIM card: it provides the telephone number. SIM cards are tied to a particular service provider and can only be used with a service plan from that provider. You can buy a SIM card at any shop of the service provider. You can find these shops at any shopping mall. Just ask the shop assistant for a "SIM only" subscription.
- Sierra Wireless Xtend modem: it is a programmable modem that accepts the SIM card. You can connect it to the PC with a data cable for sending/receiving SMS messages. You can order Sierra Wireless Xtend modem directly from Ozeki with delivery time of 2-3 weeks.
- Ozeki NG SMS Gateway: It is a software for Windows operating systems that allows you to connect your IT system to the mobile network. It allows you to send SMS messages toward the GSM network with the help of Sierra Wireless Xtend modem. Download Ozeki NG SMS Gateway
How to connect Sierra Wireless Xtend modem to the PC
In order to connect the Sierra Wireless Xtend modem to the PC, you can use an USB cable and you can install a standard modem driver to allow communication between the computer and the GSM modem. Please follow the steps below to install and configure the Sierra Wireless Xtend modem with Ozeki NG SMS Gateway.
In Figure 2 you can see the Sierra Wireless Xtend modem with its accessories. The two left cables are the DC Power Adapters, the next is the USB cable that ensures connection to the computer, the next device is the Sierra Wireless Xtend modem and finally the SIM card is in the right side of the picture.
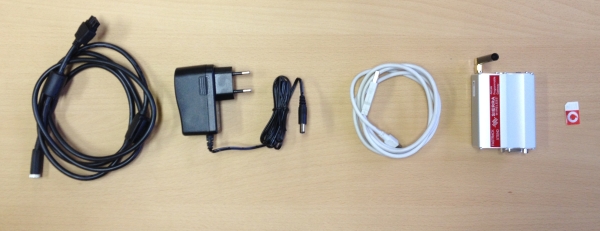
Connecting the DC Adapter and a SIM card to the modem
The Figure 3 shows the slot where the SIM card has to be plugged.
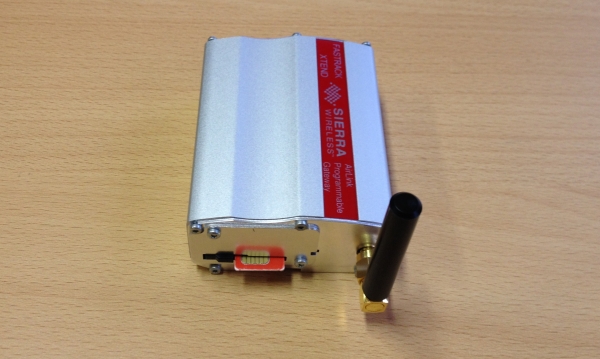
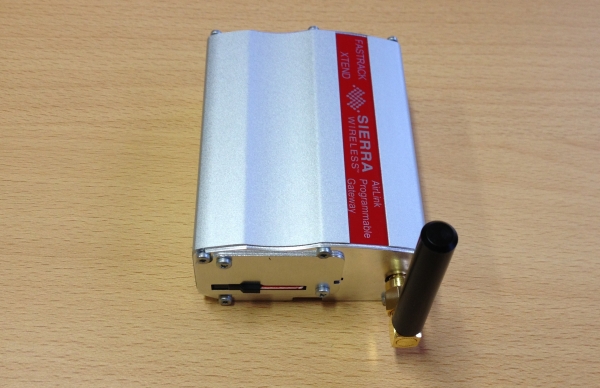
After you have inserted the SIM card into the slot you need to push it while a click is not listened (Figure 4).
The Figure 5 shows the cables that you need to connect to each other. These cables can be shown in the left side of the Figure 2.
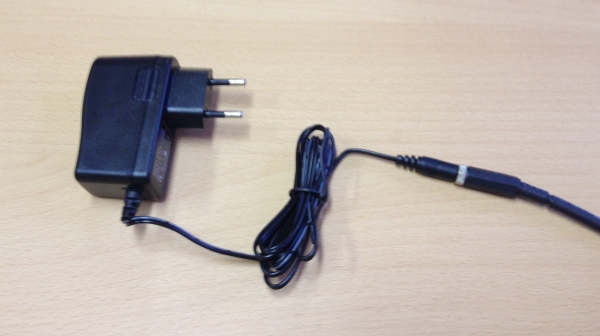
After you have put the cables to each other, you need to connect the other side of the cable to the Sierra Wireless Xtend modem (Figure 6).
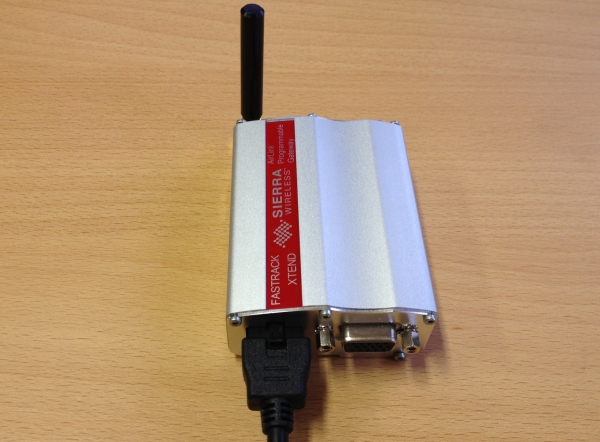
If you have connected the modem to the plug, connect it to the computer with an USB cable. The Figure 7 shows the slots to which you need to connect the cable.
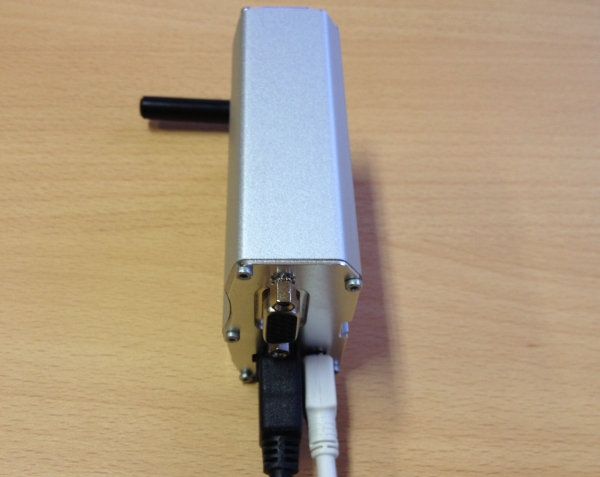
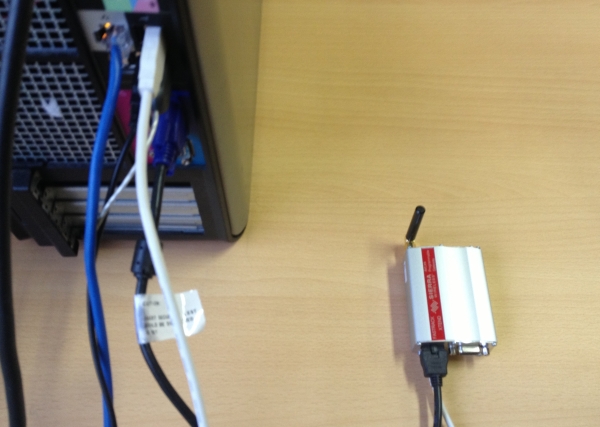
After connecting the cable to the Sierra Wireless Xtend modem, you need to connect the same cable to the USB port of the computer (Figure 8).
How to install Sierra Wireless Xtend modem driver
The next step is to download and install the proper driver of the Sierra Wireless Xtend modem. You can download it from the following link: Sierra Wireless Xtend modem driver.
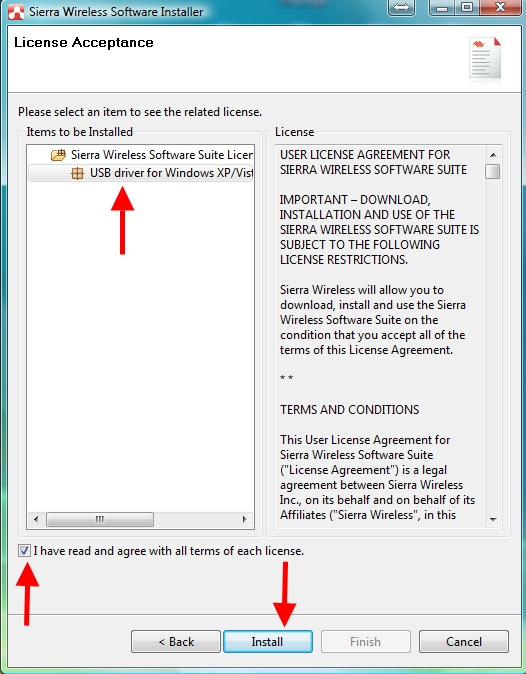
If you have downloaded it, you need to open it and follow the instruction. If the installer offers you a newer version of the driver, accept and install it. During the installation you need to select items to be installed. First you need to select it, then agree the terms and click on the Install button (Figure 9).
At the end of the installation, restart your computer.
Settings in the Ozeki NG SMS Gateway
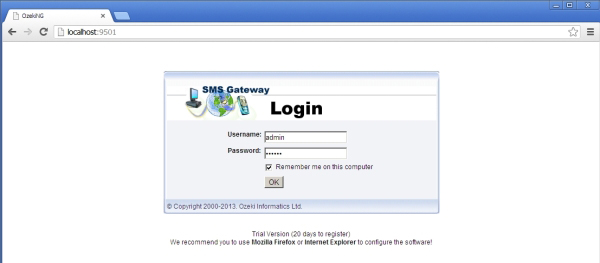
After the device driver is installed correctly, open a web browser, such as Internet Explorer and login to the graphical user interface of the Ozeki NG SMS Gateway (Figure 10).
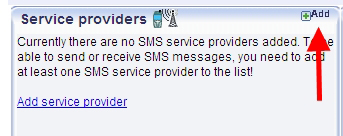
Then click on the Add button in the Service Providers section (Figure 11).
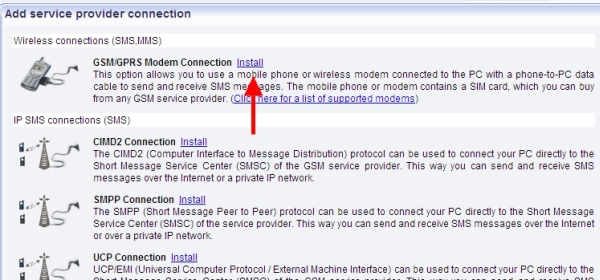
On the following page, find the GSM/GPRS Modem Connection and Install it (Figure 12). This option allows you to use a mobile phone or wireless modem connected to the PC with a phone-to-PC data cable to send and receive SMS messages. The mobile phone or modem contains a SIM card, which you can buy from any GSM service provider.
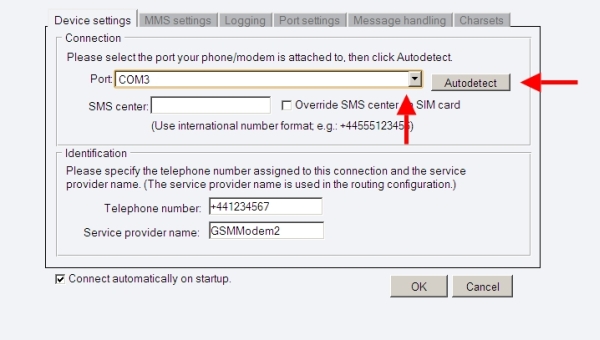
On the next page you need to select the COM3 port and click on the Autodetect button (Figure 13).
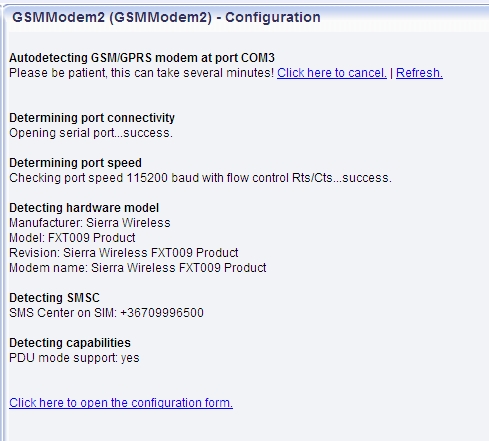
Now you need to wait until the connection will not be successful. In the Figure 14 you can see the output of the autodetection.
Keep in mind
Ozeki NG SMS Gateway effectively supports GSM modem connectivity to be able to connect your system to the GSM network. For this purpose, Sierra Wireless Xtend modem is ideal because it ensures a seamless connection. By following this guide you can setup a stable and really efficient communication system that is connected to the GSM network for sending/receiving SMS messages.
For more information or assistance, please contact us at info@ozekiphone.com
