How to setup call centre
This section is going to inform you about setting up a call center and the way you can use them for the advanced communication that your Ozeki Phone System provides. If you are looking for a modern and premium quality solution for call management, this page may be the perfect guide for you.
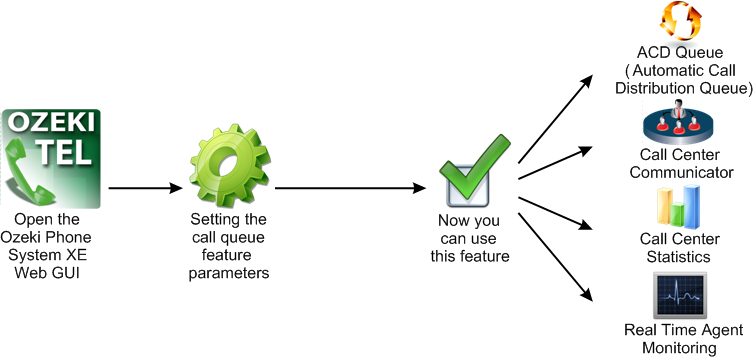
As Figure 1 summarises, you can configure your Ozeki Phone System call centre this way: first, open the Ozeki Phone System webGUI (graphical user interface). Here you can find the menu where you can set the call queue parameters with a few clicks. Now you can use this feature that contains:
- ACD Queue (Automatic Call Distribution Queue)
- Call Center Communicator
- Call Center Statistics
- Real Time Agent Monitoring

Full Feature Call Centre
Call centres must work troublefree and on high quality in order to have satisfied customers. To have a call center like this, you can configure your Ozeki Phone System to work for your and your customers' needs – the Ozeki Phone System provides all the tools you may need for the configurations. Let us see these features one by one in a few words:
- Automatic Call Distribution Queue: This feature is the name of the configured call queue in an advanced PBX (Private Branch eXchange) like the Ozeki Phone System.
-
Call Center Communicator: This feature's task is to connect customers,
partners and agents. The call center
communicator is often referred to as a "ringer" after its main purpose. A
communicator should include the following features:
- incoming and outgoing calls
- call hold
- call forwarding
- organisation of call conferences
- call routing
- call registration
- monitoring
- statistics
- Call Centre Statistics: This feature is used to show the current status of the agent or group. These statistics can provide a view of what is happening in the call centre at the moment, for a given interval or for a given day.
- Real Time Agent Monitoring: This feature provides metrics and gives supervisors the possibility to manage their call agents effectively. The authorized supervisors can monitor live agent and customer interactions with this tool.
The Setup in your Ozeki Phone System
The setup is quite an easy task with your Ozeki Phone System: you just need to enter the Ozeki Phone System webGUI, and configure it in the menu with a few clicks. In the menu you can configure all the call management features that you intend to use.
To get to know more about the advanced call management techniques, please take a look at our pages in relation:
If you have become interested, please watch our video:
How to setup Call Center (Video tutorial)
