How to connect Desktop Analog Phones to
the Ozeki Phone System
As VoIP telephony is spreading day by day, connecting old PSTN devices to the VoIP network becomes more and more significant. For this reason, the Ozeki Phone System makes it possible to connect your analog phone lines and any other PSTN devices by using an ATA device. If you need a detailed configuration guide please follow the instuctions below.
Do you need a Mobile Extension? Click here
The only way to communicate with an IP PBX is digital. So if an analog phone is connected you need to convert its signal to a VoIP signal. The most common way to do this is using an ATA (Analog Telephone Adapter) which can connect an analog telephone to a VOIP network. The ATA has an Ethernet jack, and an RJ-11 phone jack. You need to plug the phone into the RJ-11 jack and the ethernet cable into the Ethernet jack.
What you should do to create a connection
Step 1: Create a SIP account in Ozeki XEStep 2: Configure your Analog Phone
Step 3: Make a test call

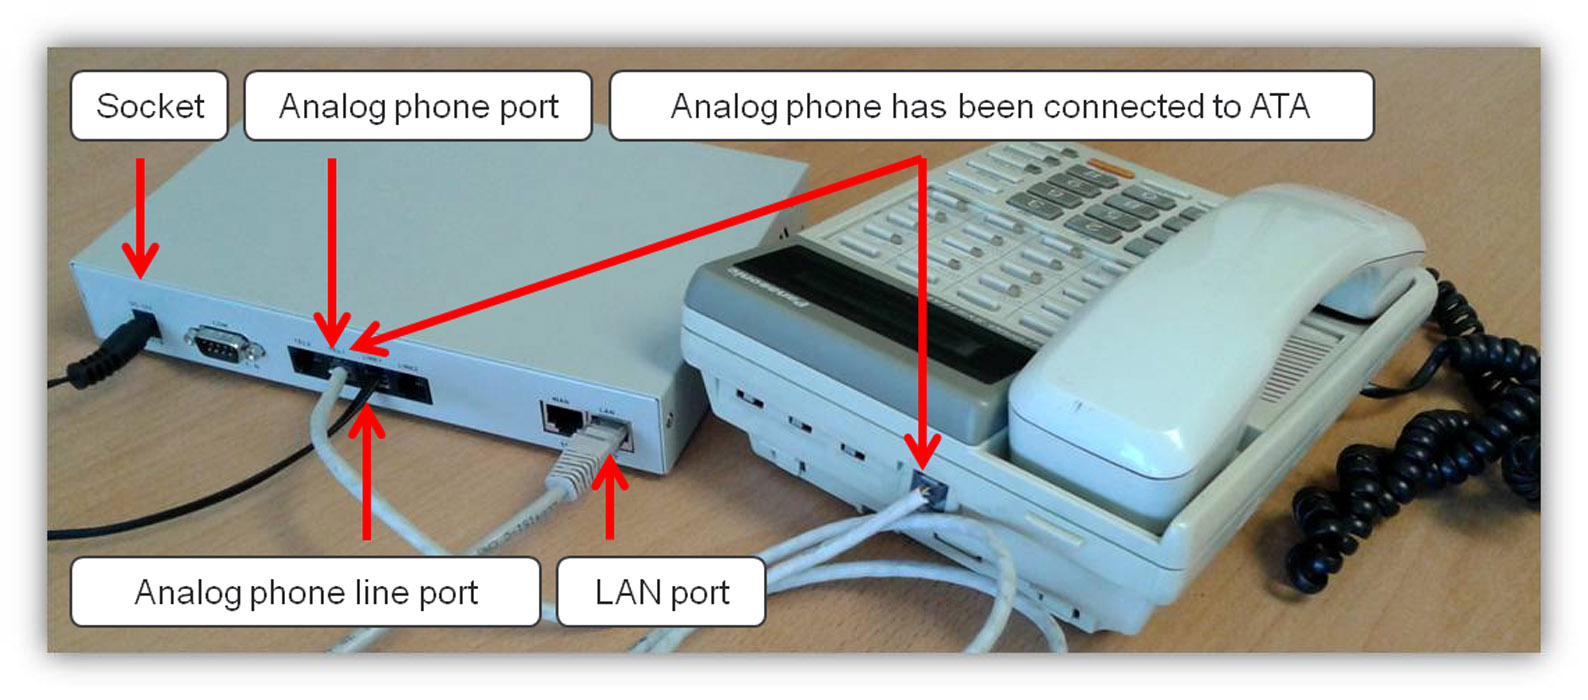
For connecting your analog phone to your PBX, you need to connect the ATA to LAN with an UTP cable and plug the power supply cable to the socket. Moreover you need to connect your analog telephone line to the appropriate ports and finally connect the telephone to the ATA by using a phone cable and plugging it into the proper ports (Figure 1).

Step 1: How to create a SIP account
In order to connect your desktop analog phone to Ozeki Phone System as a VoIP phone, first you need to create a SIP Extension. You can find detailed guide about how to create a SIP Extension here.
Step 2: How to configure your Analog Phone
In order to use your analog phone you need to complete some settings within your ATA (Analog Telephone Adapter). For this purpose, open the configuration page of the device by entering its IP address into the web browser.
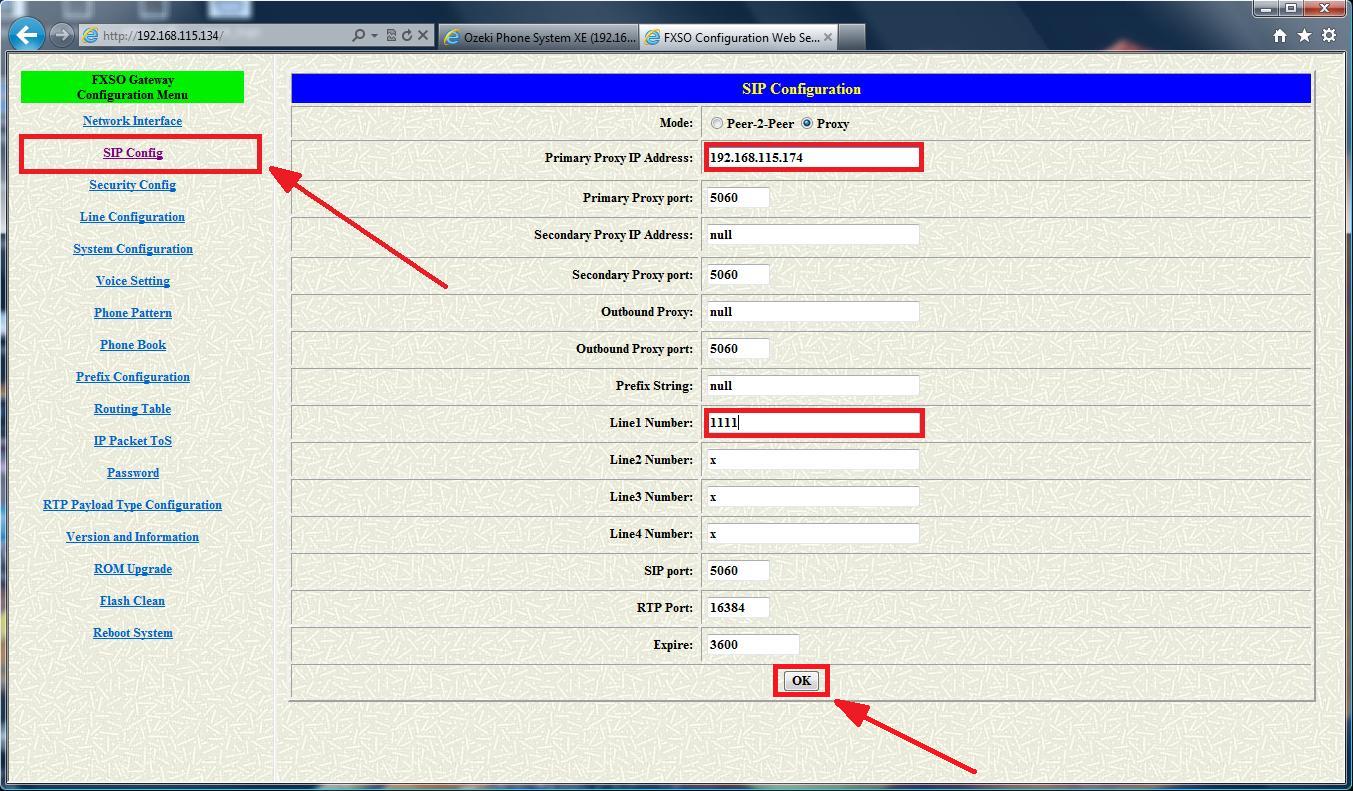
You need to specify the SIP account details (the IP address of the PBX, username, authorisation name, password) that you have provided in the Ozeki Phone System earlier.
Figure 2 demonstrates the configuration process through the example of Linkpro ITG-S422. After opening its configuration page, select the 'SIP Config' menu item then enter the IP address of your Ozeki Phone System into the Primary Proxy IP Address editbox. Click on the 'OK' button.

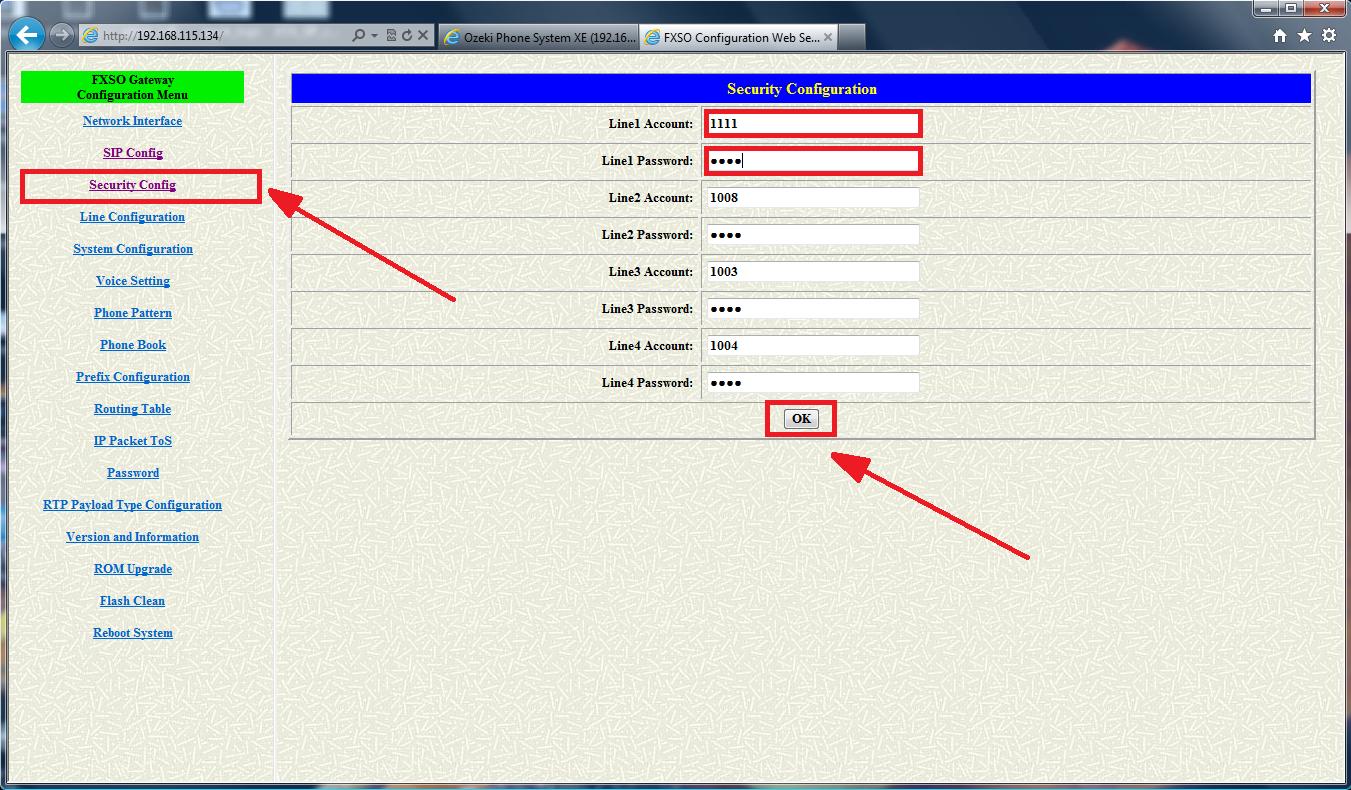
After that select the Security Config menu item, where you need to enter the authorization name of the ATA into 'Line1 Account' textbox and provide its password in the 'Line1 Password' row. Click on the 'OK' button (Figure 3).

Step 3: Make a test call
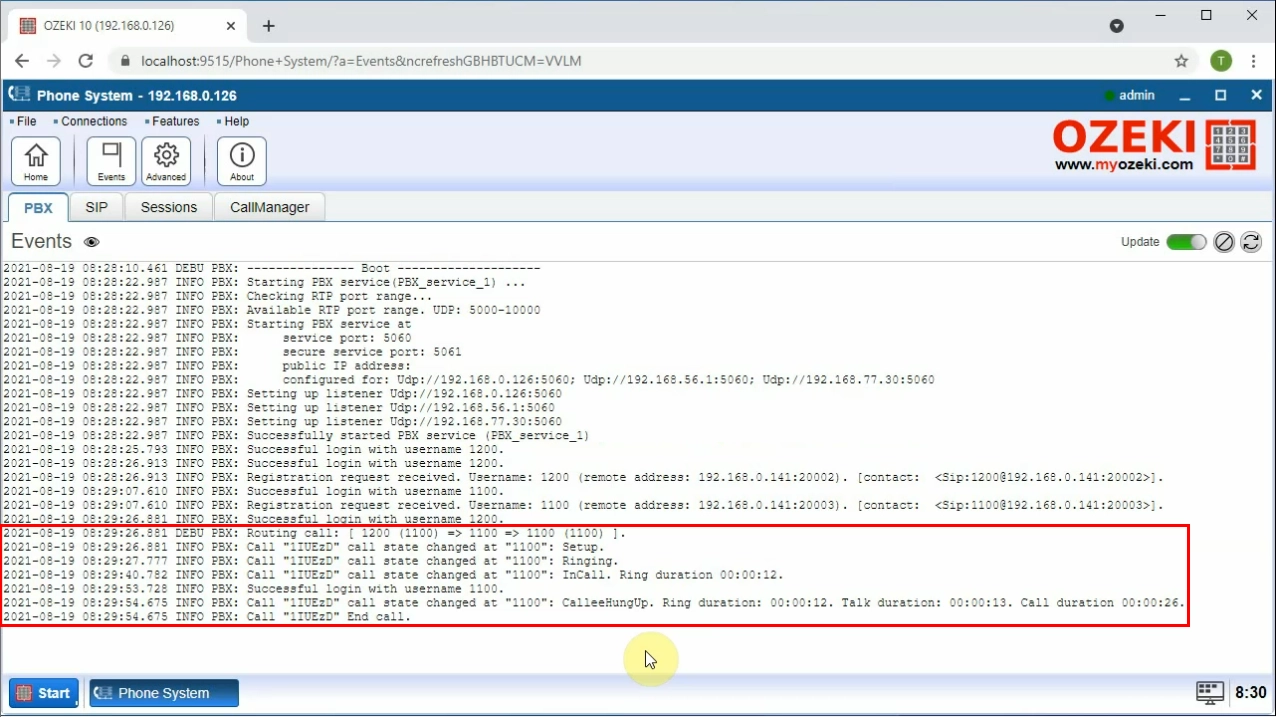
In order to make a call, dial the phone number of your new extension by using an other extension of your VoIP network. (In our example the No. 1100 extension dialled the new No. 1001 Desktop VoIP Phone extension.) Figure 4 shows that the whole call process can be tracked in the Log panel of your extension. 'Setup and Ringing' message indicates that an incoming call is in progress. 'InCall' message shows that the incoming call has been answered. After finishing the call, the 'End Call' message will appear.

Conclusion
The guide above demonstrated that conventional analog phones can be easily connected to the Ozeki Phone System. If you follow that step-by-step, you will be able to install a PSTN phone line, configure your ATA and create a new SIP extension quickly. That is it. Having done these simple steps, your phone will be ready to use.
If you have any questions or need assistance, please contact us at info@ozekiphone.com
Dig deeper!
People who read this also read...
