How to setup Ozeki Phone System with PBXnSIP
This guide explains how you can connect Ozeki Phone System to your PBXnSIP server. All you need to do is to create an extension in PBXnSIP and Ozeki Phone System can use this extension to register to the PBX.
Voice Over IP is one of today's fastest growing technology. It makes it possible to create an advanced telephone application based on the existing network. VoIP technology is based on converting the voice into packets and transmits these packets towards the destination. This page explains you how to connect Ozeki Phone System to your PBXnSIP server.
System architecture
If you follow the configuration steps of this guide, you will have a system that works as follows: First, you need to login to your PBXnSIP server using its web interface and create an extension. Ozeki Phone System will use this extension to register to the PBX. After registration you can start to reach your customers immediately. Figure 1 shows the overview of the system.

- Ozeki Phone System registers to PBXnSIP server.
- The outgoing call will be forwarded to PBXnSIP via the created extension.
- The destination phone will be ringing.
- The destination phone could be a VoIP phone, a land-line phone or a mobile phone.
Configuration steps
Before you start to configure this solution it is assumed that you have already installed PBXnSIP into your server.
Step 1.) Install PBXnSIP
Install your 3rd party PBX on your computer or virtual machine. Run installation. Select the folder you want to install the software and accept the license agreement. When you install the PBX, there are no passwords set up. You find the general system settings in the administrator mode (Settings). You can get the information about the server in System Status Overview.
Step 2.) Create a SIP account
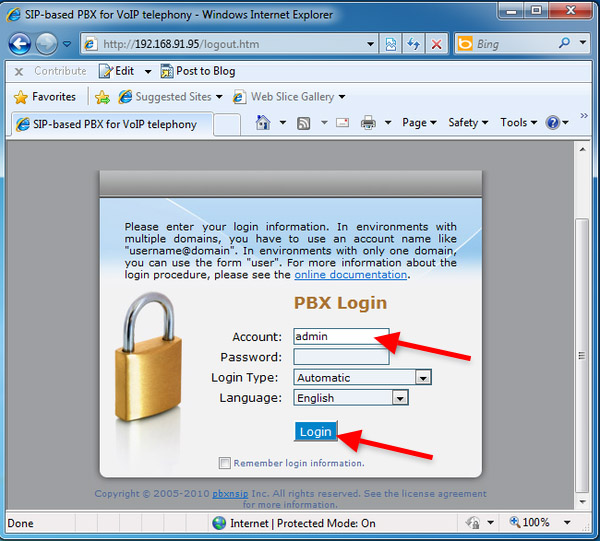
In this example I have installed PBXnSIP to a computer that has the following IP address: 192.168.91.95. Start a browser and navigate to its built-in web interface and login as administrator (Figure 2).
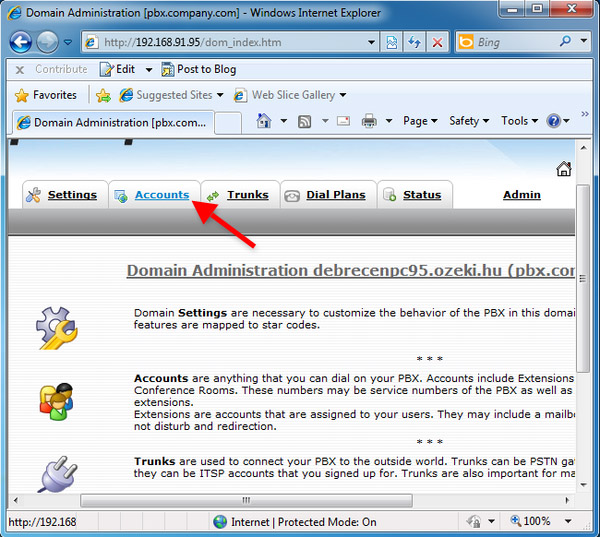
Once you logged in, click on Accounts (Figure 3)
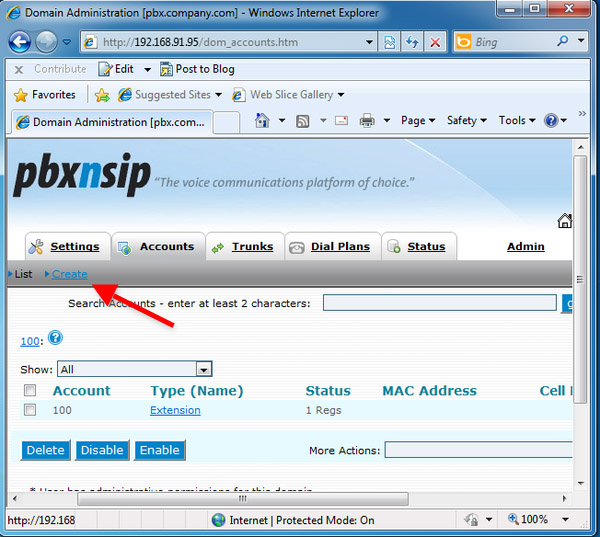
Here you can see the created Extensions. I have already registered an extension which name is 100. I will register a VoIP phone to this account. Click on Create to create a new extension (Figure 4).
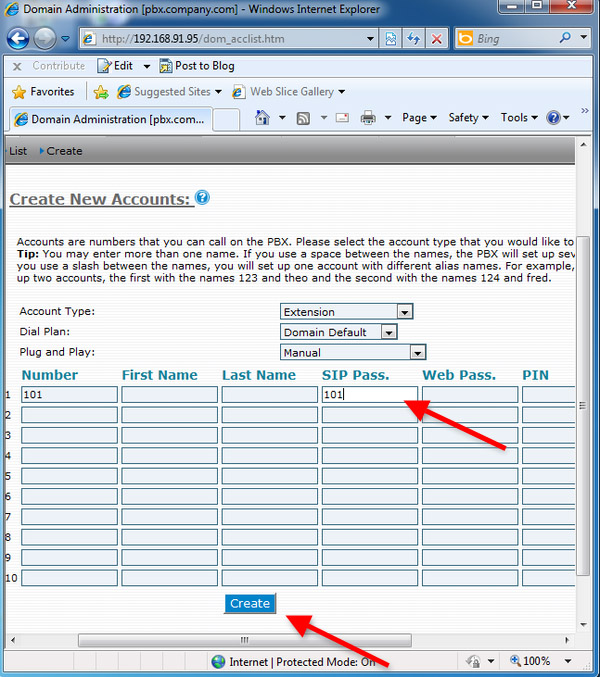
Here you can create new accounts. Provide a Number and a SIP Password and click on Create (Figure 5).
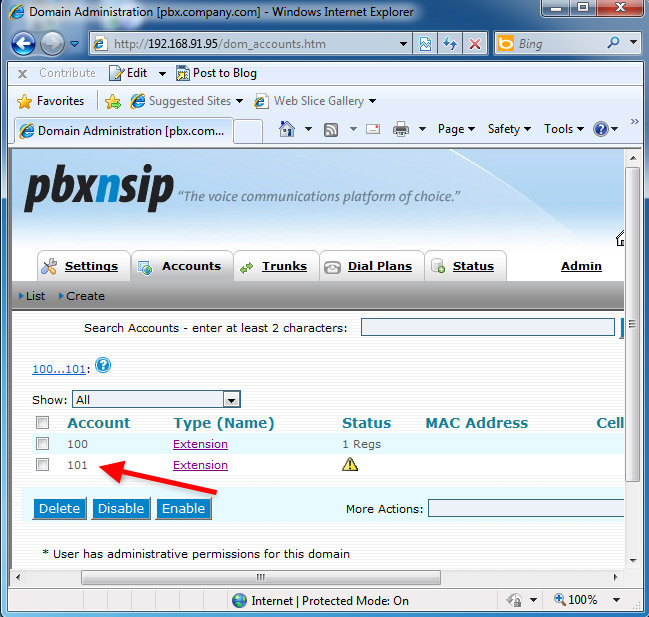
On Figure 6 you can see the created extension.
Step 3.) Configure Ozeki VoIP provider to use the created SIP account
If you have any questions or need assistance, please contact us at info@ozekiphone.com
Dig deeper!
People who read this also read...
