How to setup Ozeki Phone System with SwyxWare
Swyx provides the most advanced software-based IP telephony system on the market. Using your existing IP network, Swyx offers you all the functionality of a traditional telephony system and allowing you to take full advantage of all the benefits of business-class VoIP. In this guide you can read about how to setup Ozeki Phone System with SwyxWare.
The term, Voice over Internet Protocol (VoIP), refers to a collection of transmission technologies that make voice communications possible over the Internet. It is also known as Internet telephony and helps the conversion of voice into a digital signal that can be sent over the Internet. These signals are then compressed and translated to IP (Internet Protocol) packets for transmission.
They are converted to a regular telephone signal, if the user is calling on a normal phone. VoIP gives the provision of making calls directly from a desktop computer and uses a special VoIP phone for the purpose. The services and benefits offered by Internet telephony feature are not available with a traditional phone.
With Ozeki Phone System you can enjoy all the benefits of VoIP technlogy. You can easily setup Ozeki Phone System and use it in you own application.
On this page you can learn how to setup SwyxWare PBX and Ozeki Phone System for your application.
Overview
If you follow the configuration steps of this giude, you will have a system which works as follows:
First, you need to install your SwyxWare server. After the installation is done, you need to create a user using SwyxWare Administration that can be used by Ozeki Phone System to connect to it. After the registration you can start to make your calls via SwyxWare PBX. Figure 1 demonstrates the connection:

- Install SwyxWare in your network environment.
- Login to SwyxWare and create an extension for Ozeki Phone System.
- Ozeki Phone System will register to SwyxWare using this extension.
- You can start calling your contacts.
- SwyxWare PBX will call your contacts via Ozeki Phone System.
Configuration steps
Before you begin to follow the installation steps of this guide, it is assumed that you have already installed SwyxWare PBX into your system.
Step 1.) Install SwyxWare PBX
Connect your 3rd party PBX with Ozeki Phone System. The computer where you install PBX will be a virtual machine or a computer. Start with a simple installation to co-operate with Ozeki Phone System. Follow the installation guide at SwyxWare Development wizard. The setup will automaticly appers. You can easily configure this 3rd party PBX with Ozeki Phone System. Just check the framework accept the licence and configure SIP account below the next topic.Step 2.) Create a SIP account
First you need to open your SwyxWare Administration console at the computer where SwyxWare server is installed (Figure 2).

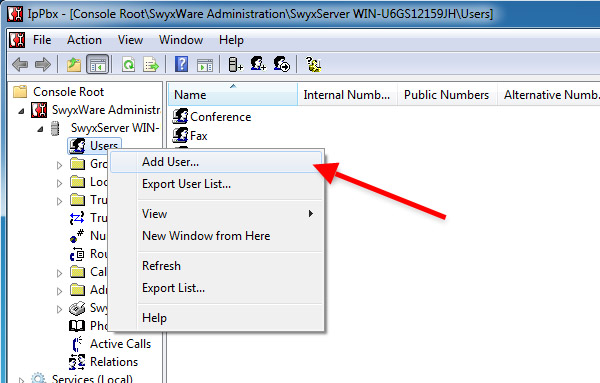
After SwyxWare Administrator is started, extract your SwyxWare server, right click at the Users entry and click on Add User (Figure 3).
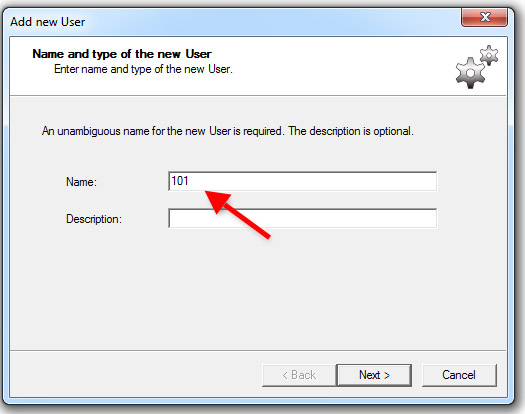
Now the Add new User wizard will show up. Enter a name for the user, e.g. 101, and click on Next (Figure 4).
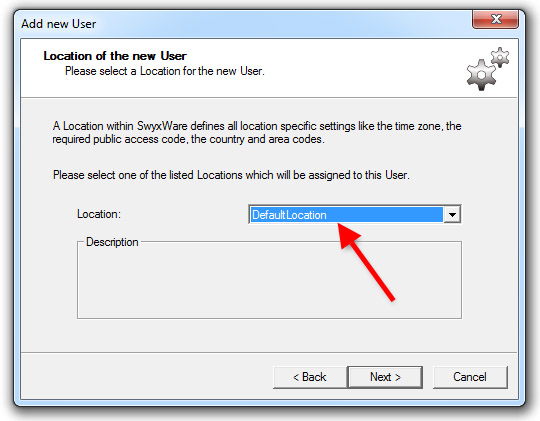
Next, set the Location to Default Location and click on Next (Figure 5).
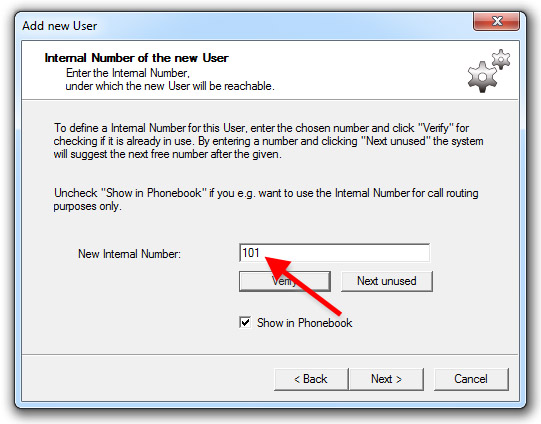
Next, set an internal number for the user (e.g. 101) and click on Next (Figure 6).
Next, set a public number for the user, if you want to call this user from the public network. I don't use public number in this example, so I set the Associated Public Number to None (Figure 7).
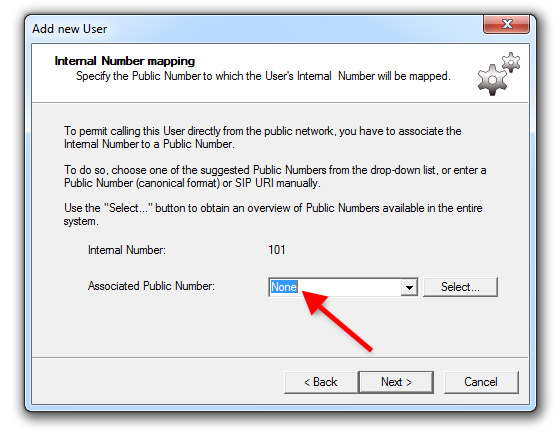
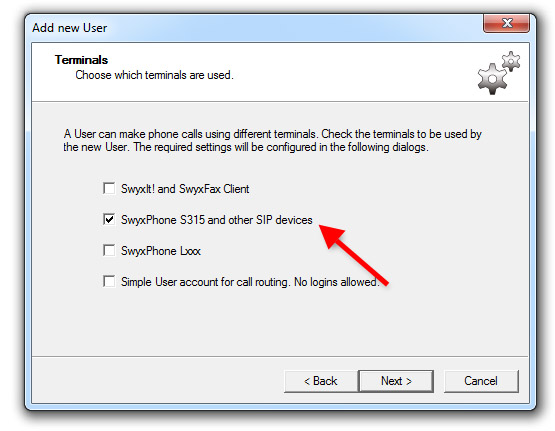
In the next step, select the SwyxPhone S315 and other SIP devices to enable SIP access for this user and click on Next (Figure 8).
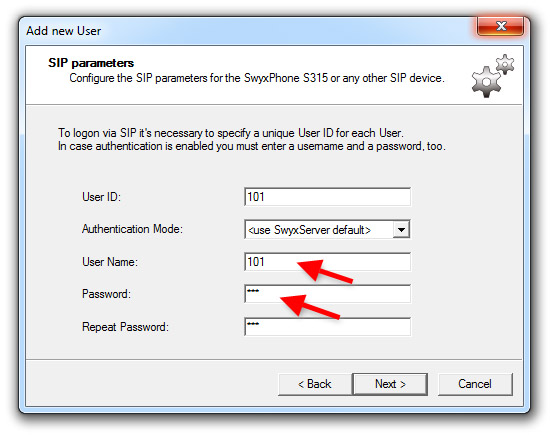
In the next step you can configure the SIP parameters for this user. Enter a Username and a Password for this user and click on Next (Figure 9).
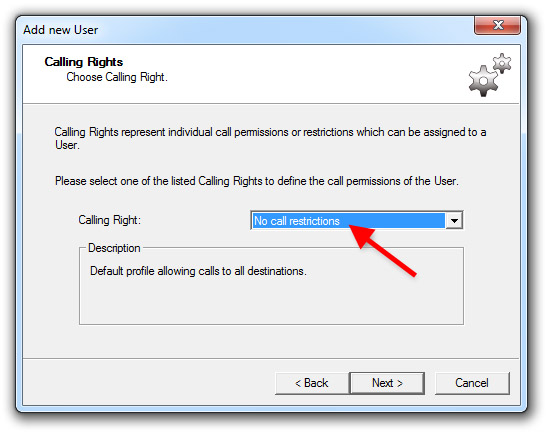
In the next step you can configure the permissions and restrictions for this user. In this example I will not use restrictions and I set the Calling Right to No call restrictions (Figure 10).
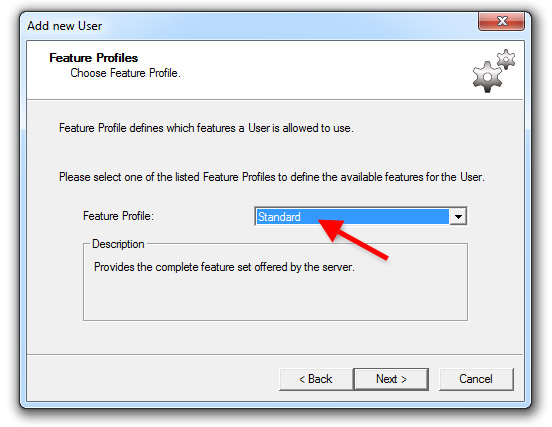
Next, you can choose features for the user. Set a feature profile and click on Next (Figure 11).
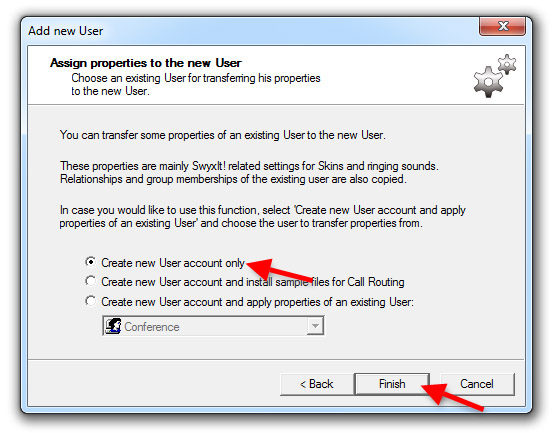
Next, choose Create new User account only and click on Finish.
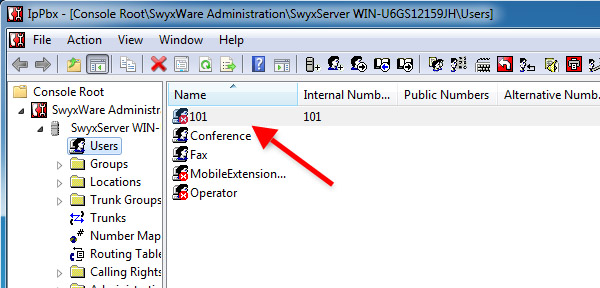
Once you completed the wizard, you can see the created user under the Users entry (Figure 13).
In this example I will use one additional user. I will use this to register Ozeki Phone System for it.
Step 3.) Configure Ozeki VoIP provider to use the created SIP account
If you have any questions or need assistance, please contact us at info@ozekiphone.com
Dig deeper!
People who read this also read...
